


Introduction: Why DIY Faucet Replacement is Worth Learning
Few home upgrades offer the instant satisfaction and practical value of replacing an old or leaking faucet. Whether you’re dealing with a persistent drip, outdated fixtures, or simply craving a kitchen or bathroom refresh, learning to replace a faucet yourself can save time, money, and the hassle of scheduling a plumber. But while it’s a popular DIY project, faucet replacement is not as straightforward as tightening a few bolts. The success of your installation hinges on using the right tools, following precise steps, and avoiding common pitfalls that can lead to leaks or damaged pipes. In this comprehensive guide, we’ll walk you through every aspect of DIY faucet replacement—from assembling your toolkit and prepping the workspace to mastering each installation step and troubleshooting unexpected issues. With detailed instructions, practical tips, and expert advice, you’ll gain the confidence to tackle this essential home repair safely and efficiently.
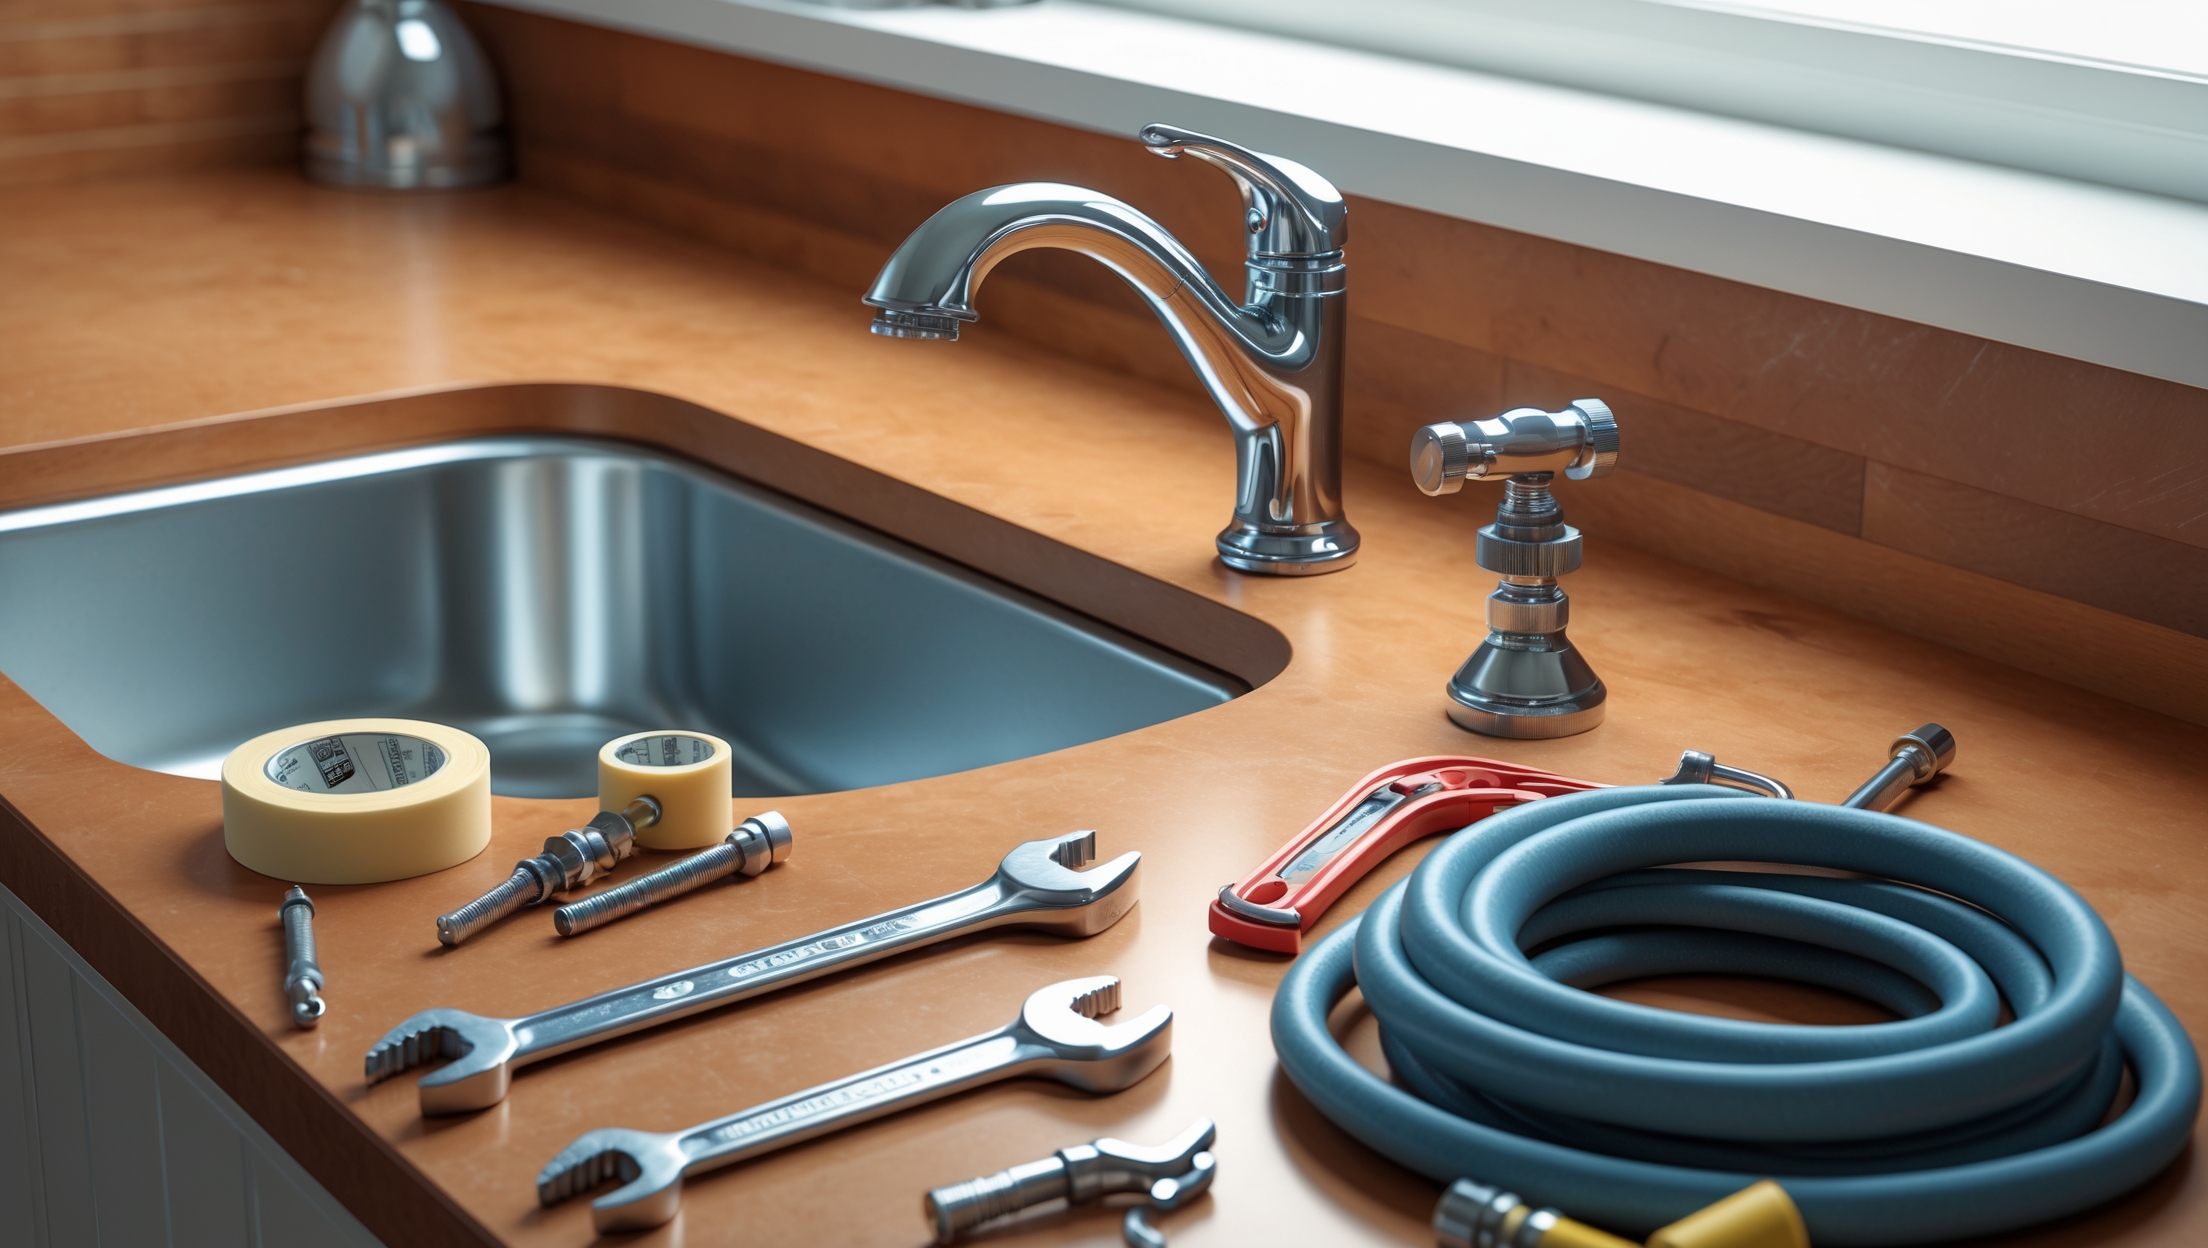
Essential Tools & Materials: What You Really Need
Tool Checklist
- Adjustable wrench – For loosening and tightening supply line connections.
- Basin wrench – Specially designed to reach and turn fasteners under sinks.
- Channel-lock pliers – Useful for gripping and stabilizing various plumbing parts.
- Plumber’s tape (Teflon tape) – Ensures watertight threaded connections.
- Putty knife – For scraping away old sealant or caulk.
- Bucket and towels – To catch water and keep the workspace dry.
- Flashlight or headlamp – Improves visibility in cramped, dimly-lit cabinets.
- New supply lines (if needed) – Flexible braided hoses are easiest for DIYers.
- Plumber’s putty or silicone sealant – For sealing the faucet base (check manufacturer’s instructions).
- Cleaning supplies – Rags, sponge, and mild cleaner for prepping the sink area.
Faucet Selection
Choose a replacement faucet that matches your sink’s mounting style (single-hole, centerset, widespread, or wall-mounted). Double-check the number and spacing of mounting holes. Consider features like pull-down sprayers, filter integration, or touchless operation—just be prepared for extra steps if your sink or countertop needs modification.
Preparation: Getting Your Workspace and Sink Ready
1. Clear the Area
Empty the cabinet under the sink. Remove cleaning supplies, bins, or any stored items. You’ll need ample room to lay on your back and maneuver tools.
2. Shut Off Water Supply
Locate the hot and cold water shutoff valves under the sink. Turn them clockwise until fully closed. If valves are corroded or stuck, do not force them—this could break the valve stems. In older homes, you may need to shut off the main water supply.
3. Relieve Water Pressure
Turn on the existing faucet to drain any remaining water from the lines. Place a bucket under the connections to catch drips.
4. Gather Tools and Safety Gear
Have all tools and materials within reach before starting. Wear gloves to protect hands from sharp edges, and safety glasses if working under a metal sink.
Step-by-Step Faucet Removal
1. Disconnect Supply Lines
Use an adjustable wrench to loosen the nuts connecting the water supply lines to the faucet. If lines are stiff or corroded, apply gentle pressure—never overtighten or twist. For stubborn connections, a spritz of penetrating oil can help.
2. Remove Mounting Hardware
Under the sink, locate the nuts or mounting brackets holding the faucet in place. A basin wrench is invaluable here, as its long handle and pivoting jaw reach tight spaces inaccessible to other tools. Loosen and remove all fasteners.
3. Free the Faucet
Once all mounting hardware is removed, gently lift the faucet up and out from above the sink. If stuck due to old caulk or mineral deposits, carefully work a putty knife around the base to break the seal. Avoid using excessive force that could damage the sink surface.
4. Clean the Surface
Scrape away any old putty, silicone, or grime. Wipe the area with a damp sponge and let it dry completely. A clean, level surface ensures a proper seal for the new faucet.
Installing the New Faucet: A Detailed Walkthrough
1. Position the Faucet
Align the faucet’s shanks with the sink holes. If your new faucet has a gasket or rubber base, set it in place according to the manufacturer’s directions. If not, apply a thin bead of plumber’s putty or silicone to the underside of the faucet base.
2. Secure the Mounting Hardware
From beneath the sink, thread the mounting nuts or brackets onto the faucet shanks. Tighten them evenly using your basin wrench, checking above to ensure the faucet stays straight. Avoid overtightening, which can crack porcelain or deform metal sinks.
3. Connect Water Supply Lines
- Attach flexible supply lines to the faucet’s hot and cold inlets. Wrap threads with plumber’s tape for a leak-free fit.
- Connect the other ends to the shutoff valves. Hand-tighten, then snug with a wrench—do not overtighten, as this can damage fittings.
- If your faucet includes a pull-out sprayer, connect the quick-connect or threaded hose to the diverter outlet as directed.
4. Reassemble and Seal (If Required)
Install faucet handles, spout, or decorative escutcheons as needed. Wipe away any excess putty or sealant.
Testing and Troubleshooting: Ensuring a Leak-Free Installation
1. Restore Water Supply
Slowly turn the shutoff valves counterclockwise to restore water. Check for leaks at all connections under the sink—use a dry paper towel to detect small drips. Tighten fittings only if necessary.
2. Flush the Faucet
Remove the aerator from the faucet spout (if present). Run both hot and cold water for several minutes to flush out debris and check flow. Replace the aerator once water runs clear.
3. Inspect for Leaks and Finalize
Check under the sink again after several minutes. Pay attention to supply line connections, mounting hardware, and the faucet base. If you spot moisture, shut off the supply and retighten connections or reapply plumber’s tape as needed.
Common Pitfalls and How to Avoid Them
- Incorrect Faucet Size: Always confirm sink hole spacing and faucet dimensions before purchase. Trying to force a mismatched faucet can damage your sink or countertop.
- Overtightening Connections: More torque isn’t always better. Overzealous tightening can strip threads, crack ceramic, or deform gaskets, leading to leaks.
- Skipping Plumber’s Tape: Threaded connections should always be wrapped with plumber’s tape to prevent leaks. Make sure to wrap in the direction of the threads.
- Ignoring Valve Condition: Old or corroded shutoff valves may leak or fail. Replace them proactively if signs of wear are present.
- Poor Surface Prep: Failing to fully remove old putty or sealant can prevent a watertight seal, leading to leaks beneath the faucet base.
- Using Worn-Out Supply Lines: Always inspect supply lines for signs of wear or corrosion. Replace them if there’s any doubt.
- Not Flushing Debris: Skipping the flushing step can cause clogs in the faucet aerator or valves, affecting water pressure and causing irregular flow.
When to Call a Professional
- Stuck or rusted nuts: If you cannot loosen mounting hardware without risking damage, a plumber’s specialized tools may be needed.
- Deteriorated or leaking shutoff valves: Replacing supply valves may require soldering or crimping pipes—best left to professionals if you’re not confident.
- Unexpected pipe damage: Discovering cracks, corrosion, or leaks in the supply pipes themselves requires expertise to repair safely.
- Custom sink modifications: Drilling new holes or resizing existing ones for modern faucets may demand professional tools and skills.
Frequently Asked Questions
How long does a typical faucet replacement take?
For most DIYers, expect 1–2 hours if all tools and materials are ready. First-time installations may take longer due to tight spaces or tricky hardware.
Can I reuse old supply lines?
While possible, it’s best practice to install new lines with each faucet replacement. Old lines can corrode or weaken, increasing the risk of leaks.
Is plumber’s putty or silicone better for sealing?
Follow your faucet manufacturer’s recommendations. Putty is easier to remove for future repairs, while silicone offers superior water resistance for some materials.
What if my faucet handle is loose after installation?
Most faucet handles can be tightened with a small Allen wrench or screwdriver. Refer to the faucet manual for specific instructions.
Conclusion: Empowering Your DIY Skills for Future Projects
Replacing a faucet is a practical, high-impact DIY project that enhances both the appearance and function of your kitchen or bathroom. By assembling the right tools, following a systematic installation process, and understanding common mistakes, you can achieve professional-quality results without the cost or wait of a plumber. This skill not only saves you money on future repairs but also builds confidence for tackling more advanced plumbing tasks. Remember, patience and preparation are your best allies—take time to select the correct faucet, double-check your fittings, and thoroughly test for leaks before considering the job complete. If you encounter unexpected obstacles, don’t hesitate to consult a professional; knowing your limits is part of being a great DIYer. With this guide, you’re equipped to handle faucet replacement and set the stage for more home improvements that make your space safer, more efficient, and uniquely yours. Happy DIYing!


If my old faucet has some stubborn caulk and mineral build-up around the base, does your guide suggest whether plumber’s putty or silicone is better for resealing when I install the new one? I want to avoid future leaks.
For resealing your new faucet, the guide recommends using silicone sealant rather than plumber’s putty. Silicone creates a waterproof, flexible seal that resists mold and mineral build-up, making it ideal for bathroom and kitchen faucets. Just be sure to thoroughly clean away the old caulk and mineral deposits before applying the silicone to ensure a long-lasting, leak-free installation.
How long should I expect the whole faucet replacement process to take for someone doing it for the first time? I’m trying to figure out if I need to set aside a full afternoon or if it’s quicker than that.
For a first-time DIYer, replacing a faucet usually takes between two to four hours, depending on your comfort level and whether you encounter any issues like stuck nuts or corroded parts. Setting aside a full afternoon is a good idea, as it gives you extra time for unexpected snags and clean-up without feeling rushed.
Do you have any tips for clearing out old caulk or sealant when prepping the sink area? I want to avoid scratching my countertop, but I also want to make sure the new faucet seals properly.
To remove old caulk without scratching your countertop, use a plastic putty knife or a caulk removal tool rather than metal blades. Gently work it under the caulk to lift it. If residue remains, apply a caulk remover gel and let it sit as directed before wiping away. After removal, clean the area with rubbing alcohol to ensure it’s residue-free before installing the new faucet.