


Introduction: Why a Dedicated Home Workshop Makes All the Difference
Whether you’re a weekend tinkerer or a serious DIY enthusiast, having a dedicated home workshop is a game-changer. No more searching for misplaced tools or improvising with the kitchen table as your workspace. A well-planned workshop simplifies every aspect of repairs, maintenance, and upgrades, saving you time, energy, and frustration. It’s not just about storage; it’s about creating a safe, efficient environment where projects come together smoothly. This step-by-step guide will walk you through designing, equipping, and organizing your home workshop, ensuring you avoid common pitfalls and maximize the potential of your space—no matter the size. We’ll cover essential tools and equipment, optimal layouts for various spaces, smart storage solutions, safety must-haves, budgeting tips, and ongoing maintenance to keep your workshop in top condition. Transform your DIY experience by building a workshop that works for you!
Choosing the Right Location for Your Workshop
Assessing Your Available Space
The perfect workshop doesn’t require a massive garage or basement. Evaluate your home and consider these options:
- Garage: Offers space and ventilation but may need to share with vehicles or storage.
- Basement: Great for noise isolation; watch for moisture and ensure good lighting.
- Shed or Outbuilding: Excellent for dedicated space, but requires power and climate control.
- Spare Room or Utility Room: Ideal for small-scale projects; check for adequate ventilation.
Key Location Considerations
- Accessibility: Easy to reach with materials and tools.
- Ventilation: Especially important for painting, sanding, or using chemicals.
- Power Supply: Sufficient outlets for tools and lighting.
- Noise Containment: Important if close to living spaces or neighbors.
- Lighting: Natural light is a bonus but supplement with bright, shadow-free fixtures.
Planning Your Workshop Layout
Workflow and Zones
Efficient layout is crucial for productivity and safety. Consider organizing your workshop into clear zones:
- Work Area: Central workspace with a solid, level workbench.
- Tool Storage: Pegboards, cabinets, and drawers within arm’s reach.
- Materials Storage: Shelving for wood, hardware, and consumables.
- Finishing/Assembly Zone: Clean, open area for final assembly or painting.
- Safety and Cleaning: Fire extinguisher, first aid kit, and easy access to cleaning supplies.
Layout Tips by Workshop Size
- Small Spaces: Fold-down workbenches, wall-mounted storage, and mobile tool carts maximize space.
- Medium/Large Spaces: Dedicated stations for cutting, sanding, and assembly prevent bottlenecks.
- Multi-use Spaces: Use rolling cabinets and modular furniture for flexibility.
Essential Tools & Equipment: The Core Kit
Hand Tools Every Workshop Needs
- Claw hammer
- Screwdriver set (flathead, Phillips, Torx)
- Tape measure and combination square
- Utility knife
- Pliers (needle-nose, slip-joint, locking)
- Adjustable wrench
- Level
Power Tools for Versatility
- Cordless drill/driver with drill bit set
- Jigsaw or circular saw
- Orbital sander
- Shop vacuum
- Optional: Miter saw, rotary tool, impact driver for advanced projects
Workshop Furniture and Fixtures
- Sturdy workbench (DIY or store-bought)
- Workbench vise or clamps
- Pegboard or slatwall for tool hanging
- Storage cabinets and shelves
- Comfortable stool or anti-fatigue mat
Storage Solutions: Keeping Your Workshop Organized
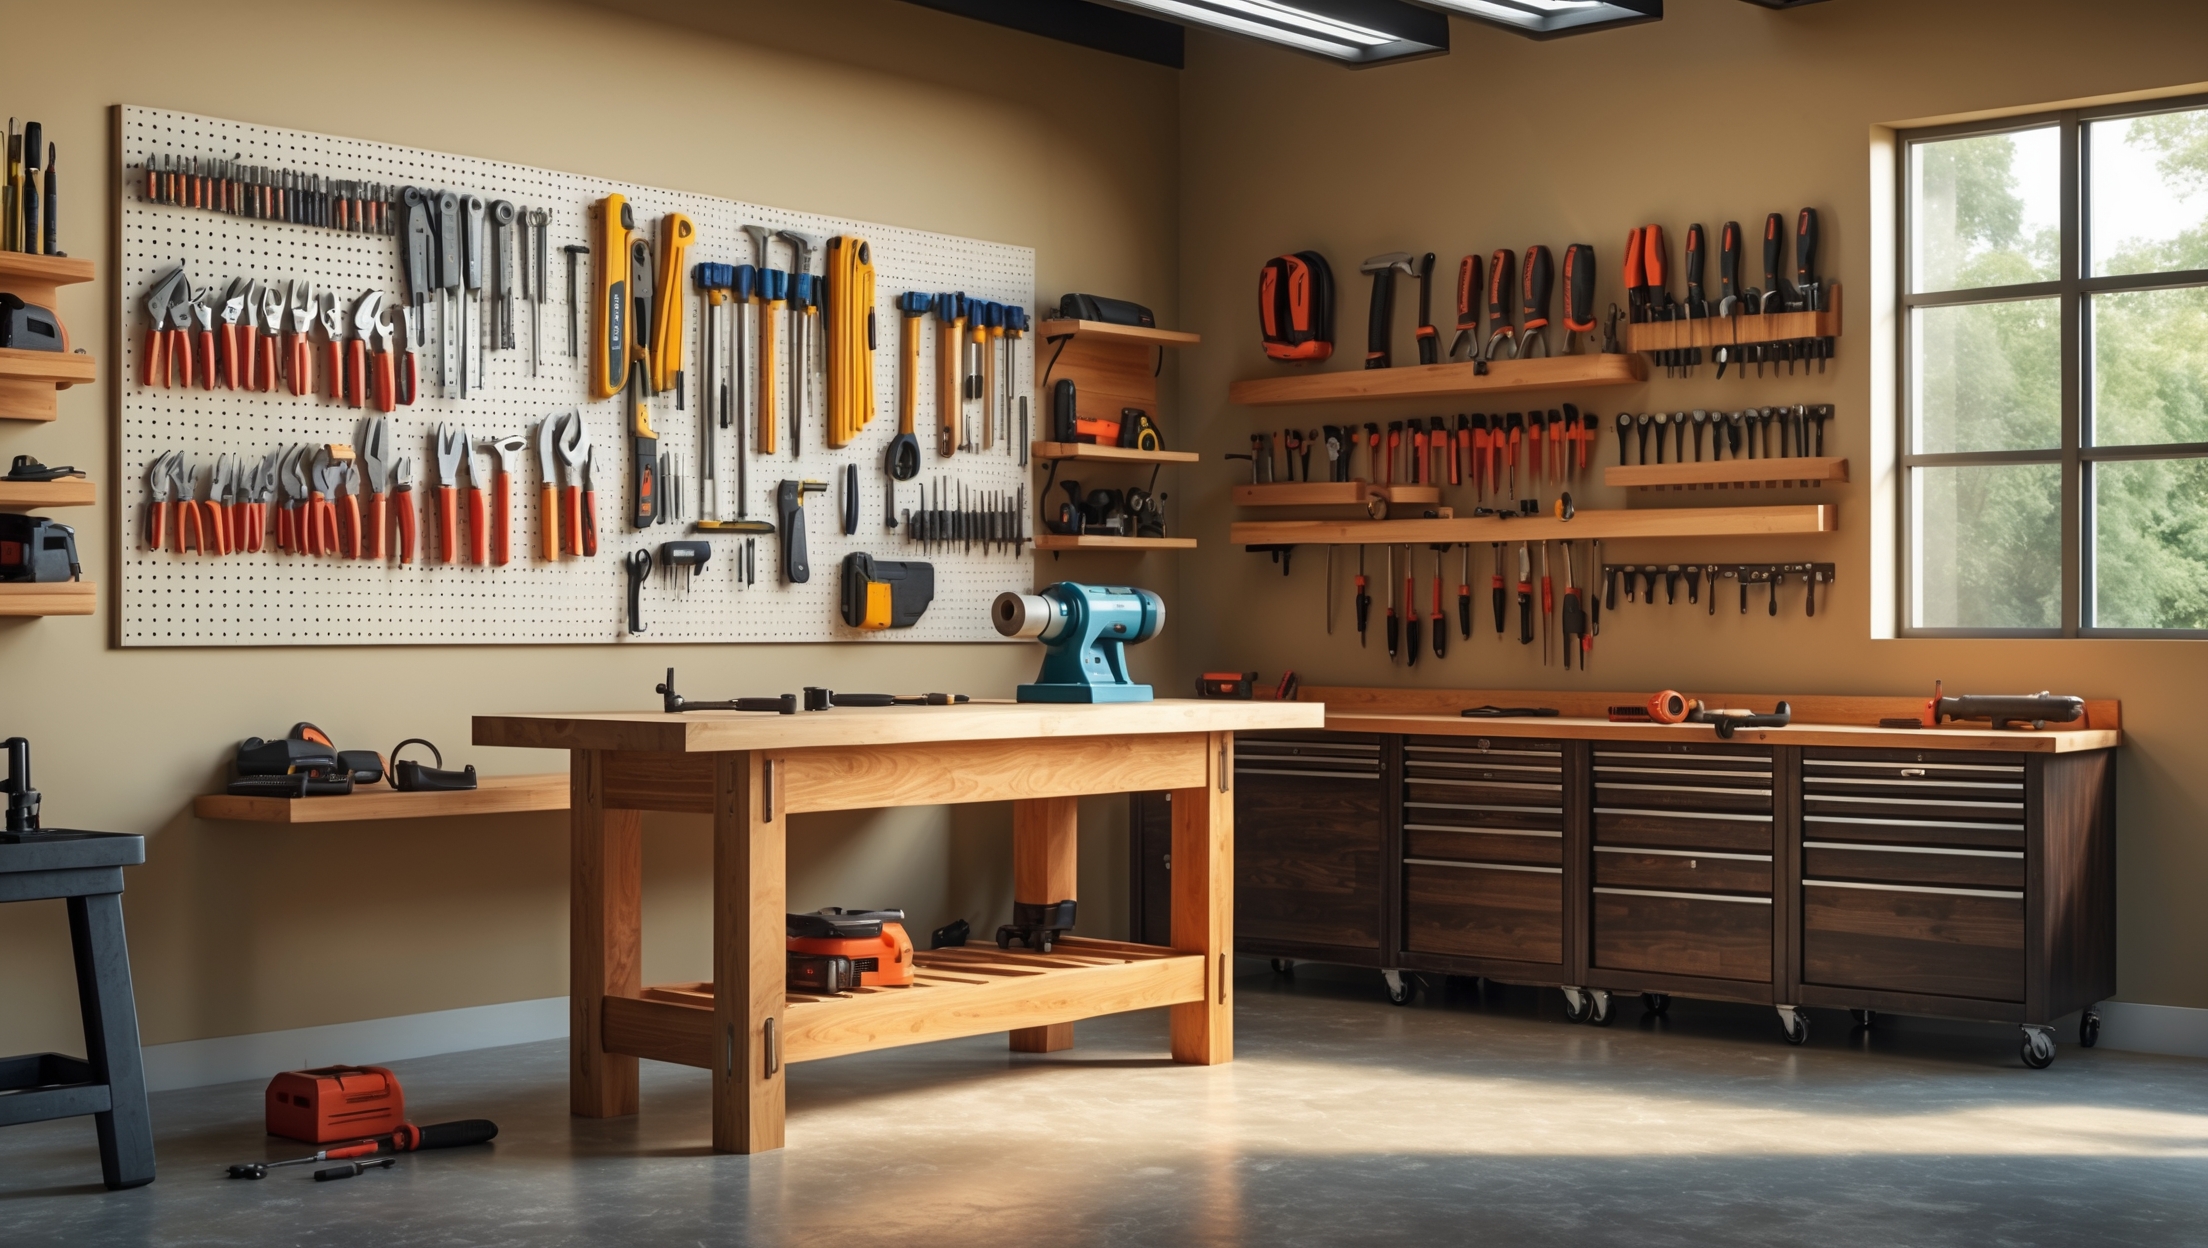
Pegboards & Wall Storage
Pegboards allow you to display and organize tools for easy access. Customize with hooks, baskets, and holders for frequently used items.
Drawers, Cabinets, & Bins
- Drawer organizers keep hardware sorted.
- Clear plastic bins for fast identification of parts.
- Label shelves and drawers for efficiency.
Vertical & Overhead Storage
Install wall-mounted shelves for paint, glue, and bulk supplies. In garages or sheds, use overhead racks for storing seasonal items or lumber.
Mobile Storage
Rolling tool chests and carts offer flexibility—move tools to where you need them, then stow away to save space.
Safety Essentials for Every Workshop
Personal Protective Equipment (PPE)
- Safety glasses or goggles
- Hearing protection (earmuffs or plugs)
- Dust mask or respirator
- Work gloves
- Steel-toe boots (for heavy-duty work)
Fire & Electrical Safety
- ABC fire extinguisher within reach
- First aid kit stocked and accessible
- GFCI outlets for wet or damp locations
- Surge-protected power strips
Ventilation & Fume Extraction
Install exhaust fans or open windows when working with paints, solvents, or sawdust. For heavy use, consider a portable air purifier or dust collection system.
Organization Prevents Accidents
- Keep walkways clear—no cords or loose tools on the floor.
- Store sharp tools securely.
- Regularly inspect tools and cords for damage.
Budgeting for Your Workshop: Smart Spending Strategies
Setting Your Budget
Workshops can be built on any budget. Prioritize essentials, then add specialty tools as you grow. Start with a list of must-haves and nice-to-haves.
Where to Save
- Buy used or refurbished tools for big savings.
- DIY workbench and shelving save money.
- Look for tool bundles or starter kits.
Where to Invest
- Quality hand tools—these last a lifetime.
- Reliable power tools with good warranties.
- Proper lighting and electrical safety upgrades.
Hidden Costs to Consider
- Extension cords and surge protectors.
- Consumables: screws, sandpaper, blades, adhesives.
- Climate control (heating/cooling) if needed.
Maintaining Your Workshop: Best Practices
Regular Cleaning Routines
- Sweep up dust and debris after each project.
- Wipe down benches and tools to prevent rust.
- Empty shop vacs and dust collectors frequently.
Tool Maintenance
- Sharpen blades and bits as needed.
- Lubricate moving parts on tools and machines.
- Check batteries on cordless tools and replace as necessary.
Safety Checks
- Test fire extinguishers and first aid kits semi-annually.
- Inspect electrical outlets and cords for wear.
- Review and update safety protocols periodically.
Advanced Upgrades: Taking Your Workshop to the Next Level
Dust Collection Systems
Install a central dust collection system or use portable units for power tools. This improves air quality and extends tool life.
Enhanced Lighting
- LED strip or panel lights provide bright, even illumination.
- Task lighting over the workbench for precision jobs.
Upgrade Storage Solutions
- Add modular drawer systems for expanding tool collections.
- Install heavy-duty racks for lumber and large materials.
Climate Control
- Portable heaters or air conditioners for year-round comfort.
- Dehumidifiers in basements to prevent rust and mold.
Conclusion: Your Workshop, Your DIY Headquarters
Setting up a home workshop is one of the most rewarding upgrades you can make for DIY repairs, maintenance, and home improvement projects. It’s your personal headquarters—a place to think, create, and solve problems with confidence. By thoughtfully selecting your location, planning an efficient layout, and investing in the right tools and safety equipment, you set yourself up for success on every project. Remember, a great workshop isn’t about having the fanciest gear or the biggest space; it’s about designing a workspace that fits your needs and makes every job easier. Start with the essentials, organize for efficiency, and upgrade as your skills and ambitions grow. With regular maintenance and a commitment to safety, your workshop will remain a productive, inspiring space for years to come. So clear out that corner, gather your tools, and get ready to transform your DIY potential—one project at a time.


You mention that a workshop doesn’t need a massive garage and that a utility room can work for small projects. What are some examples of DIY projects that can be safely and comfortably handled in such a small space?
A small utility room is great for tasks like repairing small appliances, basic electronics work, assembling furniture, painting picture frames, or crafting items like shelves and organizers. You can also handle light woodworking, bike repairs, or sewing projects, as long as you keep tools and materials organized to maximize your space and ensure safety.
I have a small spare room that gets pretty hot and stuffy in the summer. When you mention ventilation as a key consideration, do you have any DIY-friendly tips or must-have products to help with airflow, especially if I might use paints or glues?
For a small, stuffy room, a window exhaust fan is a DIY-friendly way to boost airflow—just fit it into an open window to draw fumes out. If you don’t have a window, consider a portable air purifier designed for VOCs or a duct fan with venting to the outside. Always work with the door open when using paints or glues, and consider a box fan to improve air exchange.
For those of us with a spare room or utility room as our only option, do you have any tips on keeping noise to a minimum so it doesn’t disrupt the rest of the house?
Using a spare or utility room for your workshop is a smart use of space. To reduce noise, consider adding weather stripping to doors and using thick rugs or foam mats on the floor. You can also hang heavy curtains or acoustic panels on walls to absorb sound. Keeping power tools on vibration-dampening pads helps, and try to schedule noisy tasks when they’re least likely to disturb others.
Could you elaborate on organizing tools efficiently in a shared garage space, especially when it’s used for vehicles as well? I’m concerned about accessibility without sacrificing parking or cluttering the area.
To keep tools organized in a shared garage, consider using wall-mounted pegboards or magnetic strips for items you use often, as they save floor space. Install shelving or cabinets above where vehicles park to store less frequently used tools. Mobile tool carts are another great option—they provide flexibility and can be rolled out of the way when not in use. Always group similar tools together and label storage areas to maintain order without encroaching on parking space.
I’m leaning toward setting up my workshop in the basement, but I’m worried about moisture and lighting like you mentioned. What are some practical ways to address those issues so I can still have a comfortable and safe work area down there?
To handle moisture in your basement workshop, consider using a dehumidifier and sealing any cracks in walls or floors. Install vapor barriers if needed. For lighting, combine bright LED overhead lights with portable task lights for detail work. Also, make sure you have good ventilation to keep the space comfortable and air quality high. These adjustments should make your basement workshop both safe and pleasant.
You touched on budgeting tips for setting up a home workshop. Do you have recommendations for which essential tools or storage solutions are worth investing in upfront, versus what can be acquired over time as needs grow?
For setting up your workshop, it’s wise to invest upfront in quality basics you’ll use often, like a sturdy workbench, a reliable drill, a set of screwdrivers, and safe, organized storage such as wall-mounted pegboards or cabinets. Items like specialty tools or extra power equipment can be added gradually as your projects demand. This way, you cover everyday needs without overspending at the start.
The article mentions making sure basements have good lighting and moisture control for workshops. Can you recommend practical ways to improve lighting and deal with humidity issues if someone is starting with a typical unfinished basement?
To improve basement lighting, consider installing bright LED shop lights or fluorescent fixtures, which are energy efficient and provide consistent coverage. For moisture control, use a dehumidifier and make sure any cracks in walls or floors are sealed with waterproofing products. Adding a vapor barrier along floors and walls can also help keep humidity down, making your workshop a safer and more comfortable space.
If I’m just starting out and on a tight budget, which essential tools and safety equipment would you recommend I prioritize getting first for basic DIY repairs and upgrades?
To start your workshop on a budget, focus on versatile hand tools like a hammer, screwdrivers (flathead and Phillips), a tape measure, pliers, an adjustable wrench, and a utility knife. For safety, prioritize safety glasses and work gloves. These basics will cover most simple repairs and upgrades, and you can add more specialized tools as your projects grow.
When setting up a workshop in a basement, how do you manage moisture and humidity issues to protect tools and materials over time? Are there specific dehumidifiers or ventilation solutions you’d recommend for a DIY setup?
Managing moisture in a basement workshop is important to prevent rust and damage to your tools. Use a quality dehumidifier sized for your space—models from brands like Frigidaire or Honeywell are popular for DIYers. Also, consider adding a hygrometer to monitor humidity levels. For ventilation, install an exhaust fan or use window fans if possible. Store materials off the floor on shelves and use airtight bins for sensitive items to add extra protection.
When budgeting for essential tools and equipment, how should I prioritize my purchases if I’m starting out and can’t buy everything at once? Are there must-haves versus nice-to-haves that you recommend?
Start by listing the types of projects you plan to tackle most often, since your needs may vary. Focus on must-have basics like a good hammer, screwdrivers, measuring tape, pliers, and an adjustable wrench first. These are versatile and essential for most DIY tasks. Power tools, specialty items, and extras like clamps or workbenches can be added later as your projects become more advanced or as your budget allows.
I have limited space and am considering using a spare room as my workshop. What should I prioritize to ensure good ventilation and noise control without making major renovations?
To improve ventilation in a spare room, use a portable fan near an open window or door to circulate fresh air, and consider a small air purifier to reduce dust. For noise control, place thick rugs or mats on the floor and hang heavy curtains or moving blankets over doors and windows to dampen sound. These steps help without requiring major renovations.
When setting up the workshop in a basement, how do you deal with moisture issues? Do I need a dehumidifier, or are there simpler steps to make sure my tools and materials don’t get damaged?
Basements often have higher humidity, which can lead to rust on tools and damage to materials. While a dehumidifier is a great solution, you can also start by improving ventilation, sealing any cracks in walls or floors, and storing tools in airtight containers or cabinets. Silica gel packs or moisture absorbers placed near tools can help as well. Regularly check for damp spots and address leaks promptly to keep your workshop dry.
The article mentions smart storage solutions for maximizing smaller spaces. Can you suggest some practical examples or common mistakes to avoid when organizing tools and materials in a utility room or spare room?
Some practical smart storage examples include using pegboards for hanging tools, installing shelves above workbenches, using clear bins for small parts, and adding magnetic strips for metal tools. Avoid common mistakes like overcrowding shelves, not labeling containers, and putting frequently used items out of easy reach. Make sure to keep walkways clear and regularly declutter to maintain an organized space.
Could you give some advice on how to fit essential tools and smart storage into a small spare room without making the space feel cramped? I am hoping to use a utility room, but it is a pretty tight area.
Maximize your utility room by using vertical space—install wall-mounted pegboards or shelves to hang essential tools. Consider stackable storage bins or rolling carts that fit under tables or in corners. Fold-down workbenches can provide workspace without taking up permanent room. Keep only your most-used tools within arm’s reach and store less-frequently used items in higher or less-accessible spots to keep the area open.
I noticed the article suggests both garages and basements as potential workshop locations. Are there any specific safety risks I should be aware of when setting up in a basement, especially regarding ventilation and moisture?
Setting up a workshop in a basement does require extra attention to safety. Basements often have limited ventilation, so it’s important to ensure proper airflow if you’ll be using paints, solvents, or power tools. Consider adding exhaust fans or opening windows when possible. Moisture is another concern—use a dehumidifier to keep humidity low and store tools off the floor to prevent rust. Check for any water leaks and address them before setting up your workspace.
You mentioned that sheds or outbuildings are great for dedicated workshops but might need climate control. Do you have recommendations for affordable ways to heat and cool a detached workshop without breaking the bank?
For affordable climate control in a detached workshop, consider using a portable electric heater for winter and a window or portable air conditioner for summer. Good insulation is key to keeping costs down, so add weatherstripping or foam panels if possible. Ceiling or box fans can help with air circulation, and opening windows or vents on mild days can also make a difference.
When it comes to organizing tools and materials in a small spare room, how do you recommend maximizing storage without making the space feel cramped or unsafe?
To maximize storage in a small spare room, consider using vertical space with wall-mounted shelves or pegboards for tools. Magnetic strips can hold metal tools, and clear bins or labeled drawers help keep materials sorted and visible. Opt for foldable workbenches or stackable containers to free up floor space. Always keep walkways clear to ensure safe movement around the room.
The article touches on budgeting for a home workshop—do you have tips for prioritizing which tools and equipment to buy first if I’m on a tight budget and starting from scratch?
When starting a home workshop on a tight budget, begin by listing the types of repairs or upgrades you want to do most often. Invest first in versatile, high-quality hand tools like a hammer, screwdrivers, measuring tape, and pliers. Next, consider a cordless drill and a basic saw, as they cover many common tasks. Hold off on specialized tools until you find you need them for specific projects. Buying good essentials up front can save you money and frustration later.
For those of us looking to convert a basement into a workshop, what would you recommend for dealing with moisture issues and making sure the space is safely ventilated?
For a basement workshop, it’s important to address moisture by using a dehumidifier, sealing any cracks in the walls or floor, and considering a vapor barrier if needed. For ventilation, installing an exhaust fan or vent system will help remove fumes and improve air quality. Also, make sure to keep any chemicals or paints in sealed containers to minimize odors and moisture buildup.
When setting up a workshop in a basement, what are the best strategies for dealing with moisture and ensuring good ventilation, especially if natural airflow is limited?
To manage moisture in a basement workshop, start by using a dehumidifier to keep humidity levels down and prevent mold. Seal any cracks in walls or floors to stop water seepage. For ventilation, consider installing an exhaust fan to move stale air out and bring fresh air in, even if you can’t open windows. Using moisture-resistant materials for flooring and storage can also help protect your tools and workspace.
Could you share more tips on incorporating sufficient power supply in a shed or outbuilding that doesn’t already have wiring? I’m concerned about running heavy-duty power tools safely in an outdoor space.
For a shed without existing wiring, consider hiring a licensed electrician to install a dedicated circuit from your main panel. They’ll ensure the wiring meets local codes and is rated for your tool load. Use outdoor-rated conduit and outlets, and install a subpanel if you expect frequent or heavy use. Make sure to add ground fault circuit interrupters (GFCIs) for safety. Avoid using long extension cords, as they can overheat and aren’t a good substitute for permanent wiring.
When it comes to setting up power and outlets in a shed or outbuilding, are there any affordable solutions if I’m not able to hire an electrician right away?
If hiring an electrician isn’t possible right away, you could use heavy-duty extension cords rated for outdoor use to bring power from your home to the shed temporarily. Portable power stations or generators are also options for basic tools. Be sure not to overload circuits and always keep safety in mind. For permanent wiring, though, professional installation is safest and may be required by local codes.
For someone with limited space, like using part of a utility room, what are your top recommendations for safe tool storage and maintaining good airflow?
For limited spaces like a utility room, I recommend wall-mounted pegboards or shelving to keep tools organized and off the floor. Use lockable cabinets for any sharp or hazardous items. To maintain airflow, avoid blocking vents and consider a small oscillating fan or a window exhaust fan if possible. Make sure there is space between stored items and walls to allow air to circulate, helping to reduce dust and moisture buildup.
I’m trying to figure out which space in my house would make the most sense for a small workshop, but I worry about noise since my kids’ bedrooms are nearby. Do you have any tips for keeping sound from carrying when working indoors?
To help keep workshop noise from reaching your kids’ bedrooms, consider adding rugs or rubber mats to absorb sound, sealing gaps under doors, and using weatherstripping around the workshop door. If possible, set up your workspace in a basement or garage, as these areas usually have more natural sound barriers. Also, try doing noisier tasks during hours when your kids aren’t sleeping to minimize disturbances.
Is it possible to set up a functional DIY workspace in a small utility room on a tight budget? What are the minimum essentials I should prioritize for tools and safety if I’m just getting started?
Absolutely, a small utility room can work well for a DIY workspace, even on a tight budget. Start by prioritizing a sturdy work surface (like a foldable workbench), good lighting, and basic tools such as a hammer, screwdrivers, pliers, measuring tape, and a cordless drill. For safety, invest in safety goggles, gloves, and a first aid kit. Keep your space organized with wall hooks or small shelves to maximize room.
When it comes to setting up a workshop in a basement, what are some practical ways to deal with moisture and humidity issues? I’ve heard these can really mess with both tools and wood projects.
Moisture and humidity in basements can definitely be a challenge for a workshop. Consider using a dehumidifier to keep humidity levels under control, and make sure your space is well-ventilated. It also helps to use moisture barriers on the floors and walls if possible. Store tools and materials off the ground on shelves or racks, and keep wood sealed in airtight containers or bags to prevent warping.
The article mentions budgeting tips for setting up a workshop. Could you share more details on which essential tools or safety gear are worth investing in right away versus items I can add later?
When starting out, it’s smart to invest in high-quality basics like a sturdy workbench, tape measure, screwdrivers, a hammer, and a cordless drill. For safety, prioritize safety glasses, ear protection, and gloves right away. More specialized tools, like power saws or specialty clamps, can be added as your projects get more advanced. This approach keeps your initial costs manageable while covering what you’ll use most often.
I’m considering setting up my workshop in my basement, but I’m worried about moisture. What are some effective ways to manage humidity and prevent tool rust in a basement workshop?
Managing humidity in a basement workshop is important to protect your tools. Use a dehumidifier to keep moisture levels down, and consider installing a hygrometer to monitor humidity. Store tools in airtight containers or use silica gel packs in tool drawers. You can also apply a light coat of oil to metal surfaces to prevent rust. Good ventilation and sealing any basement leaks will also help keep humidity under control.
How should I prioritize essential tools and equipment for my home workshop when I’m on a tight budget but want to make sure I’m prepared for most common repairs?
When setting up a home workshop on a tight budget, start by focusing on versatile, multi-use tools like a hammer, screwdrivers (both flathead and Phillips), pliers, a tape measure, and an adjustable wrench. Next, add a cordless drill and a basic saw. These cover most common repairs. Gradually expand as needed based on the projects you tackle most often, so you’re not spending money on tools you might rarely use.
You mention smart storage solutions, but how do you suggest organizing tools and supplies if space is really limited, like in a utility room or small shed? Are wall-mounted systems better than portable toolboxes, or does it depend on the types of projects?
In tight spaces like utility rooms or small sheds, wall-mounted systems are very effective for keeping tools visible and accessible—pegboards or magnetic strips work well for commonly used items. For less frequently used supplies or smaller hand tools, stackable portable toolboxes and bins can maximize floor or shelf space. The choice depends on how often you use each tool and the types of projects you tackle: frequent DIYers often benefit from a mix of both solutions.
I’m trying to decide between using a spare room or part of my garage for my DIY projects. Based on your experience, which space tends to be easier to organize and keep dust-free, especially when doing woodworking or repairs?
For woodworking and repairs that create dust, the garage is usually easier to manage. Garages often provide better ventilation and make it simpler to contain and clean up dust. Spare rooms can be harder to protect from dust spreading to the rest of your home, and organizing tools or materials is often simpler in a garage where you can install shelves or pegboards.
When setting up a workshop in a basement, you mention moisture and lighting as challenges. Could you recommend specific strategies or products for effectively dealing with basement moisture while still maintaining safe electrical setups and tool storage?
To control basement moisture, consider using a dehumidifier specifically designed for basements and install a vapor barrier along walls and floors. Seal any cracks with waterproofing compounds. For electrical safety, use outlet covers rated for damp locations and consider GFCI outlets. To protect your tools, store them in airtight or rust-resistant toolboxes and add silica gel packs inside drawers or cabinets to keep humidity down.
When considering moisture issues in a basement workshop, do you have any advice on affordable ways to control humidity, or should I look into a different space if my basement tends to get damp during the summer?
If your basement gets damp in the summer, you can still make it work as a workshop with some simple humidity control measures. Using a dehumidifier is an affordable and effective option—just be sure to choose one sized for your space. Also, improve ventilation by running a fan or opening windows when possible. Place moisture absorbers like silica gel or damp-rid in problem areas. If these steps aren’t enough to keep things dry, it might be worth considering another location, especially for storing sensitive tools or materials.
When budgeting to set up a basic home workshop, what tools or equipment would you recommend prioritizing first so I can get started without overspending?
To get started on a budget, focus on the most versatile and frequently used hand tools first. Prioritize a good quality hammer, screwdrivers (both flathead and Phillips), measuring tape, adjustable wrench, and pliers. For power tools, a cordless drill is a great early investment. Add a sturdy workbench and some basic safety gear like goggles and gloves. This setup will cover most basic repairs without stretching your budget.
For someone just getting started on a tight budget, which essential safety or power upgrades should be prioritized first when equipping a new home workshop?
When you’re setting up a home workshop on a budget, it’s best to prioritize safety upgrades first. Start with proper lighting and a good fire extinguisher. Make sure you have safety gear like goggles, gloves, and hearing protection. For power upgrades, consider installing a few grounded outlets and a surge protector to safely handle your tools. These basics will help you work safely and efficiently from the beginning.
When it comes to sharing the garage between a car and a workshop, do you have any tips on organizing tools and materials so that the space stays functional for both purposes without constant rearranging?
One approach is to use vertical storage like wall-mounted pegboards or shelves for your tools and materials, keeping the floor clear for your car. Mobile workbenches or rolling tool chests can be easily moved when you need to make space. Group similar items in labeled bins or drawers, and designate specific zones for car parking and workshop activities. This way, everything stays accessible and organized without frequent rearranging.
You mentioned budgeting tips for outfitting a home workshop. What are some smart ways to prioritize spending for essential tools versus storage solutions if I am working with a limited budget?
When budgeting, it’s wise to spend first on the essential tools you need most for your DIY projects—consider what you’ll use frequently and buy those items with good quality. For storage, get creative with affordable options like repurposed shelves or wall hooks. You can always upgrade your storage as your needs and budget grow, but having the right tools from the start is key for getting your workshop up and running.
Could you elaborate on how to balance noise containment with ventilation? I want to avoid disturbing my family but also need proper airflow for sanding and painting in a small utility room.
Balancing noise containment and ventilation in a small utility room can be done by using acoustic door seals or weatherstripping to dampen noise leakage while installing a window fan or a portable exhaust fan to create airflow. You can also add sound-absorbing panels or heavy curtains to reduce sound levels. When sanding or painting, run the fan so air flows out, and keep doors mostly closed to limit noise. Remember to wear a mask for added safety.
For someone trying to balance their workspace between a shared garage and vehicle storage, do you have any tips on keeping everything organized and accessible without making daily car use inconvenient?
Try using mobile tool carts or rolling storage cabinets so you can easily move your tools and supplies out of the way when you need to park the car. Wall-mounted shelves, pegboards, and fold-down workbenches also help maximize vertical space and keep the floor clear. Label storage bins for quick access, and plan a simple routine to reset your workspace after each project so it stays tidy and ready for both uses.
Could you provide more detail on planning the power supply for a shed or outbuilding? Are there minimum outlet numbers or types you suggest for safely running standard DIY tools?
When planning power for a shed or outbuilding, dedicate at least one 20-amp circuit for tools, and another for lighting if possible. Install more outlets than you think you’ll need—ideally one every 6 feet along the walls and at least two per wall. Use GFCI outlets for safety, especially in potentially damp conditions. Standard 120V outlets are fine for most DIY tools, but if you plan to use heavy equipment, consider adding a 240V outlet. Always consult a qualified electrician for proper installation and code compliance.
You mention budgeting tips for setting up a workshop—are there any specific suggestions for prioritizing essential tools versus storage options when starting out on a tighter budget?
When starting out with a limited budget, it’s smart to prioritize essential tools that you’ll use frequently for your projects, such as a drill, measuring tape, screwdrivers, and a saw. For storage, simple solutions like sturdy shelves or bins can work until you expand your tool collection. Focus first on the tools you need most for your planned DIY tasks, then gradually upgrade your storage as your workshop grows.
You talk about budgeting for essential tools and equipment, but do you have advice for which items are smart to buy first if I’m just starting out and don’t have a lot to spend?
If you’re just getting started and want to stick to a budget, begin with versatile, high-use tools. A good claw hammer, a tape measure, a set of screwdrivers, adjustable pliers, and a basic cordless drill are smart first purchases. These cover most basic repairs and upgrades. As you take on more projects, gradually add specialized or larger tools as needed.
When considering a basement for a home workshop, what are the best ways to deal with moisture and humidity? Are there specific flooring or wall treatments you recommend for keeping tools and materials in good condition down there?
To manage moisture in a basement workshop, use a dehumidifier and ensure good ventilation to keep humidity low. For flooring, sealed concrete, epoxy coatings, or vinyl tiles work well as they’re moisture-resistant. On the walls, consider using mold-resistant drywall or applying waterproof paint. Storing tools off the floor on shelves or pegboards also helps protect them from dampness.
I noticed the article talks about garages and sheds as possible workshop spaces. If I end up sharing my garage with a car, are there specific layout strategies or storage solutions you recommend to make the most of the limited space?
Sharing your garage with a car definitely calls for smart organization. Consider using wall-mounted shelves, pegboards, and overhead racks to keep tools off the floor and maximize vertical space. Foldable workbenches or rolling tool carts are great as they can be moved or stored away when not in use. Keeping your workspace flexible and uncluttered will make it much easier to switch between parking and DIY projects.
I noticed you mentioned moisture is a concern when setting up a workshop in the basement. What are some effective ways to control humidity and prevent water damage in that type of space?
To control humidity in a basement workshop, consider using a dehumidifier to keep moisture levels down. Sealing any cracks in the foundation and ensuring proper insulation can help prevent water seepage. It’s also helpful to install a vapor barrier on floors and walls. Make sure gutters and downspouts outside direct water away from your home’s foundation. Keeping the space well-ventilated will further reduce the risk of mold and water damage.
You mentioned moisture can be an issue in basement workshops. What are some practical ways to manage humidity and prevent tool rust if I go with a basement space?
Managing humidity is key in a basement workshop. Use a good-quality dehumidifier to keep moisture levels low, and consider insulating walls and floors to reduce condensation. Store tools in airtight containers or cabinets with silica gel packs, and wipe them down with a light coat of oil after use to prevent rust. Also, ensure there’s proper ventilation by using fans or installing vents if possible.
I’m on a tight budget and have to share the garage with our car and storage bins. Any tips on organizing tools and supplies so I can quickly switch between workshop and regular garage use without leaving a mess?
Using portable storage solutions can really help in your situation. Consider a rolling tool chest or stackable bins that you can move aside when you need the garage for your car. Pegboards or wall-mounted racks keep tools organized and off the floor. Try grouping supplies in labeled bins so it’s easy to both set up and pack away after each project, making the transition smooth and keeping everything tidy.
You mention budgeting tips for setting up a home workshop—could you share some examples of areas where it makes sense to save versus splurge, especially for someone just starting out?
When starting your home workshop, it’s smart to save on items like basic hand tools (screwdrivers, pliers, hammers) and storage solutions, since quality entry-level options work well. Splurge on essentials like a reliable power drill and safety gear, which get heavy use and make a big difference in performance and comfort. Over time, you can upgrade tools as your skills and needs grow.
You mentioned climate control for a shed or outbuilding—are there affordable ways to insulate and power these spaces so they’re comfortable to use year-round without a huge budget?
Absolutely, there are budget-friendly ways to make your shed or outbuilding comfortable year-round. For insulation, consider using foam board or fiberglass batts, which are both affordable and effective for walls and ceilings. Weatherstripping doors and windows helps keep drafts out. For power, a simple extension cord from your main house can be a short-term fix, but for safety and convenience, installing a dedicated circuit is best. Portable heaters or fans can help control temperature without the high cost of permanent HVAC systems.
Could you provide more detail on how to effectively share a garage workshop with parked vehicles or stored household items, without sacrificing workflow or accessibility to tools during projects?
To share a garage workshop with parked vehicles or stored items, prioritize organization and mobility. Use wall-mounted racks, pegboards, and overhead shelves to maximize vertical space for tools and supplies. Keep essential tools on a rolling cart so you can move them around as needed. Designate a clear workspace—folding workbenches are great for saving space when not in use. Mark zones with tape on the floor to separate car parking from your project area, ensuring both accessibility and safety.
How should I prioritize essential tools and storage if I’m setting up a workshop on a tight budget? Are there must-have items to start with, or is it better to try to get everything gradually as needed?
When working with a tight budget, it’s best to start with must-have tools that you’ll use most often, like a hammer, screwdrivers, measuring tape, pliers, and a cordless drill. Choose simple, sturdy storage solutions—like shelves or pegboards—for organization. You don’t need to buy everything at once; gradually add specialized tools as your projects require them. This approach keeps costs low and prevents clutter.
I live in an older house where the basement is pretty damp year-round. You mention moisture as a concern for basement workshops—do you have any recommendations for DIY moisture control or specific flooring materials that hold up best in those conditions?
For a damp basement, start by using a dehumidifier to control moisture levels and consider sealing any cracks in the foundation. When it comes to flooring, avoid wood or carpet. Opt for moisture-resistant options like epoxy coatings, interlocking PVC tiles, or sealed concrete. Adding a vapor barrier under flooring materials can help prevent moisture from seeping up, making your workshop more comfortable and protecting your tools.
I’m thinking about setting up a workshop in my basement since it’s quiet and out of the way, but I’m worried about the moisture you mentioned. What are some practical steps I can take to control humidity and protect my tools in a basement workspace?
To control humidity in your basement workshop, consider using a dehumidifier to keep moisture levels in check. Store your tools in airtight containers or cabinets, and use silica gel packs to absorb any residual moisture. It’s also helpful to install a vapor barrier on basement walls if possible, and regularly check for leaks or condensation. Keeping your workspace well-ventilated will further protect your tools from rust and damage.
I noticed you mentioned the importance of ventilation, especially when working with paints or chemicals. What are some affordable ways to improve ventilation in a basement workshop where adding windows isn’t really an option?
Improving ventilation in a basement without windows is possible with a few affordable solutions. You can use portable exhaust fans or box fans placed near doors or ventilation ducts to help push fumes out. Installing a vent hood or ducting system that leads to the outside is another effective option. Also, consider using air purifiers with activated carbon filters to help reduce chemical odors in the air.
The article mentions budgeting tips for equipping a workshop. Could you suggest which essential tools I should invest in right away and which ones can wait if I’m trying to start on a tight budget?
If you’re starting out on a tight budget, focus first on versatile essentials: a good hammer, screwdrivers (both flathead and Phillips), measuring tape, pliers, an adjustable wrench, a utility knife, and a cordless drill. These tools cover most basic repairs and projects. Power saws, specialty tools, and larger equipment can usually wait until you know exactly what you’ll need for specific projects or when your budget allows.
I have a small shed in my backyard and I’m wondering what’s the best way to run power out to it safely for tools and lighting? Do I need to hire an electrician or is this a DIY-friendly project?
Running power to a backyard shed is best done safely and up to code. While some experienced DIYers tackle this, it usually involves burying outdoor-rated cable, installing a subpanel, and ensuring proper grounding—all of which must comply with local electrical codes. For most people, hiring a licensed electrician is the safest option. This ensures your tools and lighting will work reliably and your shed will be protected from electrical hazards.
I’m debating between converting part of my garage versus using a backyard shed for my workshop. Besides climate control and power supply, are there any pros or cons you’ve noticed with one option over the other for projects involving paint or woodworking?
For painting or woodworking, ventilation is a key factor. Garages often share air with your house, so fumes and dust can be a concern, while a shed lets you isolate those effects away from your living space. Sheds sometimes offer more flexibility for installing dedicated ventilation or dust collection systems, but may have less space or be harder to access in bad weather. Also, consider security—garages are usually more secure, but a properly locked shed can work well too.
When setting up a workshop in a basement, what are your top recommendations for addressing potential moisture issues? Would a standard dehumidifier usually be enough, or are there additional steps required to protect tools and materials long-term?
A standard dehumidifier is a great start for controlling moisture in a basement workshop. For long-term protection, also consider sealing any cracks in walls or floors, using a vapor barrier on floors, and keeping tools stored off the ground. Regularly monitor humidity levels—ideally keeping them below 50%—and ensure good ventilation. These combined steps will help safeguard your tools and materials from rust and mold.
When budgeting for essential tools and equipment, what’s the best way to prioritize what to buy first for a new home workshop? Are there any items that can wait until later upgrades?
Start by listing the projects you plan to tackle first in your home workshop. Focus your initial budget on versatile, high-quality tools like a tape measure, hammer, screwdrivers, and an electric drill, since these are used in many tasks. Specialized tools, power saws, or advanced equipment can usually wait until you know you need them for specific projects or future upgrades.
You mention that proper lighting is essential, especially if natural light is limited. Are there particular types of fixtures or bulb temperatures you recommend for maintaining good visibility and reducing eye strain during detailed work?
For a home workshop, LED fixtures are a great choice because they’re energy-efficient and provide bright, even lighting. Aim for bulbs with a color temperature between 4000K and 5000K—this range mimics daylight and helps reduce eye strain during detailed tasks. Overhead fixtures combined with adjustable task lights at your workstations will give you the best coverage and flexibility.
I’m trying to set up a workshop in my basement, but I’m worried about moisture affecting my tools and materials. Do you have any recommendations for moisture control or storage solutions in a basement setting?
Moisture can definitely be a concern in basements. To protect your tools and materials, consider using a dehumidifier to reduce humidity levels. Store tools in airtight containers or cabinets with silica gel packs to absorb moisture. Shelving units that keep items off the floor will also help prevent water damage in case of minor flooding. Regularly check for leaks or damp spots and address them promptly to keep your workshop dry.
You mention budgeting tips for equipping a home workshop—could you give some advice on what essential tools and equipment to prioritize first if someone is working with a limited budget?
If you’re on a limited budget, focus first on versatile hand tools like a hammer, screwdrivers (both flathead and Phillips), measuring tape, pliers, and an adjustable wrench. A cordless drill is also a smart early investment. For workspace, a sturdy workbench or table is helpful, and basic safety gear like goggles and gloves. As you gain experience and identify your most common projects, you can gradually add specialty tools.
If I only have a small spare room available, how can I optimize it for both storage and safe ventilation, especially when working with paints or glues?
For a small spare room, consider vertical storage like wall-mounted shelves or pegboards to maximize space. Use sealable containers for paints and glues to reduce fumes. For ventilation, try placing a portable fan near an open window to direct fumes outside, and if possible, install a window exhaust fan. Always work with the door open, and never use solvents without proper airflow to keep your workspace safe.
Could you provide more details on what tools and equipment absolutely need their own dedicated power outlet? I want to plan the electrical setup so I don’t have issues down the line.
Absolutely, it’s smart to plan ahead for your workshop’s electrical needs. Tools like table saws, air compressors, miter saws, drill presses, and large shop vacuums generally require their own dedicated outlets due to their high power draw. Stationary tools that run on 220V or require frequent, uninterrupted use should also have dedicated circuits. This prevents overloads and ensures safe, reliable operation. For portable tools or battery chargers, standard outlets grouped on a shared circuit usually work fine.
When considering a basement for a home workshop, how do you effectively deal with potential moisture issues and make sure the lighting is sufficient for detailed work?
To manage moisture in a basement workshop, start by using a dehumidifier and sealing any cracks in walls or floors to prevent water intrusion. Waterproof paint on walls can also help. For lighting, combine bright overhead LED fixtures with adjustable task lights at your workbench to reduce shadows and ensure visibility for detailed projects.
If I only have a utility room to work with, what are some practical storage and ventilation strategies for handling projects that involve fumes or dust, given the limited space and the need to keep things organized?
In a small utility room, wall-mounted shelves and pegboards can maximize your storage without taking up floor space. For ventilation, consider using a portable exhaust fan or placing a box fan in a window to direct fumes outside. Always keep windows open when working with fumes or dust, and store chemicals in airtight containers on higher shelves to keep them safe and out of reach. Regularly sweep and vacuum to minimize dust buildup.
The article mentions the importance of sufficient outlets and lighting. How do you determine how many outlets you’ll need, and is it safe to use power strips or should I really hire an electrician to add new circuits?
To figure out how many outlets you need, list the tools and equipment you plan to use and consider where in the workshop you’ll use them. Each major tool or workstation should have its own outlet nearby for convenience and safety. Power strips are fine for low-power tools or temporary setups, but for heavy-duty or multiple devices running at once, it’s much safer to hire an electrician. They can properly install extra outlets and circuits to handle the electrical load.
For small spaces like a spare room, how do you recommend handling ventilation, especially if I plan to do projects involving paint or chemicals? Are there compact ventilation systems you suggest?
For a small space like a spare room, portable window exhaust fans can help pull fumes outside. If there’s no window, consider a compact air purifier with a HEPA and activated carbon filter, but remember these don’t fully replace proper ventilation for strong fumes. Always work with doors open when possible, and use low-odor, water-based products to minimize airborne chemicals.
When choosing between a basement and a garage for a home workshop, what would you recommend for someone who’s worried about both noise and moisture? I want to keep projects quiet but also don’t want my tools to rust.
If you’re concerned about both noise and moisture, a garage may be better for noise since it’s usually more separated from living spaces, but it often has higher moisture risk, which can lead to rust. A basement offers quieter operation but often has humidity issues. For either option, use soundproofing materials and invest in a dehumidifier or moisture barriers to protect your tools. Prioritize whichever location lets you control humidity best while managing noise with insulation and door seals.
When choosing between a garage and a shed for a workshop, which one do you think is easier to adapt for good lighting and power supply? I want to make sure my space is safe and comfortable for long projects.
A garage is usually easier to adapt for good lighting and a reliable power supply. Most garages are already wired for electricity and have more outlets, making it simpler to add bright overhead lights and additional task lighting. Sheds often require new wiring, which can be more involved and costly. Garages also tend to have better insulation, helping maintain comfort during long projects.
When budgeting for a new workshop, do you recommend investing more upfront in high-quality essential tools, or should I focus first on storage solutions and upgrade my tools gradually over time?
It’s usually best to prioritize high-quality essential tools first, as they directly affect the quality and safety of your work. Basic, well-made tools will last longer and perform better. Storage solutions are important too, but you can start simple and upgrade them as your collection grows. This balanced approach helps ensure your workshop is both functional and organized from the start.
Could you provide an estimate of a reasonable starter budget for setting up a basic but functional home workshop, including the essential tools, lighting, and storage mentioned in the article?
A reasonable starter budget for a basic but functional home workshop is typically between $300 and $700. This should cover essential tools like a drill, saw, hammer, screwdrivers, and measuring tape, as well as basic lighting fixtures and shelving or cabinets for storage. Prices can vary based on tool quality and if you choose new or used items, but this range allows you to get reliable, entry-level gear and set up an organized, well-lit space.
You mentioned smart storage solutions in the article. What are some space-saving storage ideas for someone who only has a small spare room to work with and doesn’t want it to feel cramped?
For a small spare room, consider wall-mounted shelves or pegboards to keep tools and materials off the floor. Magnetic strips can hold metal tools on the wall, and stackable storage bins fit neatly under a workbench or in a closet. Foldable workbenches and rolling carts are also handy—they offer workspace when needed and tuck away easily to keep the room feeling open.
If budget is a big factor, which tools and storage solutions should I prioritize first to get my workshop up and running efficiently, and what can wait until later upgrades?
If you’re working with a tight budget, start by investing in a sturdy workbench, a basic set of hand tools like a hammer, screwdrivers, pliers, and a measuring tape, as well as a cordless drill. For storage, prioritize simple shelves or a pegboard for organizing your most-used tools. You can wait on specialty tools and modular storage systems until you know exactly what future projects will require.
When deciding between setting up a workshop in a shed versus a basement, how do you weigh the pros and cons in terms of comfort year-round and tool storage security? Are there specific challenges with climate control or humidity in either choice?
When comparing a shed and a basement for your workshop, comfort and tool security are important factors. Basements tend to have more stable temperatures year-round and better protection from theft, but can have humidity issues that may require a dehumidifier. Sheds often need more insulation and climate control for comfort, and tools might be less secure unless you reinforce doors and locks. Both options can work well, but basements are usually easier to keep comfortable and secure.
When it comes to ventilation, especially for painting or working with chemicals, do you have recommendations for setting up effective ventilation in a spare room or utility room without exterior windows?
For a spare or utility room without exterior windows, consider installing a mechanical ventilation system like an exhaust fan that vents to the outside through a wall or ceiling duct. Portable air purifiers with HEPA and activated carbon filters can also help reduce fumes, but they don’t replace the need for actual ventilation. Always work with doors open when possible and avoid prolonged exposure to fumes.
I noticed you mentioned moisture as a concern when using a basement for a workshop. What are some effective and affordable ways to control humidity and prevent rust or tool damage in a basement setting?
You’re right—controlling moisture in a basement workshop is important to protect tools from rust. Affordable solutions include using a dehumidifier to lower humidity, running a fan for better air circulation, and storing tools in airtight containers or with silica gel packs. Consider sealing any foundation cracks and using vapor barriers on floors or walls to prevent moisture from coming in. Regularly checking humidity levels with a simple hygrometer can also help you keep things under control.
You mention optimal layouts for various spaces, but how do you recommend organizing tools and work zones if my workshop needs to share space with vehicles in a garage? Are there specific storage solutions that work well in that situation?
In a shared garage, consider wall-mounted pegboards to keep tools visible and easy to reach without taking up floor space. Use rolling tool chests or carts so you can move your work zone when parking your vehicle. Foldable workbenches are also useful since they can be stored against the wall when not in use. Overhead racks or ceiling-hung shelves help store less-used items without interfering with cars.
If my garage is also the only place I can park my car, how do people usually manage the space so a workshop setup doesn’t interfere with everyday parking and storage needs?
Many people with dual-use garages use mobile workbenches and wall-mounted storage to keep the floor clear for parking. Foldable tables, pegboards, and shelving units can help you organize tools vertically, making it easy to access them when working and tuck everything away afterward. Rolling tool carts are also a great solution, allowing you to move gear out of the way quickly when you need to park your car.
The article mentions budgeting tips, but do you have any recommendations for stretching a small budget when it comes to organizing and storing tools effectively in a new workshop setup?
Absolutely! For organizing tools on a small budget, consider repurposing items like old jars for screws and nails, using pegboards for wall storage, and building simple shelves from leftover wood or crates. Magnetic strips are affordable for metal tools, and plastic bins from dollar stores work well for grouping items. Label everything to keep your setup organized without spending much.
When you talk about planning the workshop layout, do you have any tips for organizing zones in a really small space like a spare room, so that it’s still efficient and safe to use power tools?
For a small workshop in a spare room, grouping your tools and materials by task can help—for example, keep all cutting tools together, and set up a small workbench as your main workspace. Use vertical storage like wall-mounted racks or pegboards to save floor space. Make sure you have clear pathways and keep power tools away from clutter to prevent accidents. Good lighting and easy access to outlets are also important for both efficiency and safety.
If I’m on a tight budget, which essential tools and safety items should I prioritize first when setting up a basic workshop for general home repairs and upgrades? I don’t want to overspend but still want to cover the basics.
To set up a basic workshop on a budget, start with a claw hammer, screwdrivers (both flathead and Phillips), an adjustable wrench, a tape measure, utility knife, and pliers. For safety, prioritize safety glasses, work gloves, and a dust mask. These essentials will let you handle most basic repairs and upgrades without overspending. You can add more specialized tools gradually as needed.
I’m considering setting up my workshop in the basement, but I’m a bit worried about moisture and lighting like you mentioned. Do you have specific tips for dealing with dampness or making sure the space is bright enough for detailed work?
For basement workshops, moisture control is key. Use a dehumidifier and consider sealing any cracks in walls or floors with waterproof sealants. Store materials off the ground on shelves or pallets. For lighting, combine bright overhead LEDs with focused task lights at your workbench. Light-colored walls can also help reflect more light around the space and keep it feeling open and bright.
Could you share some tips for organizing tools and materials in a small spare room or utility room, especially when space and ventilation are limited compared to a garage or basement?
For a small spare or utility room, wall-mounted pegboards and shelves can save a lot of floor space and keep tools within easy reach. Use clear bins or labeled containers for small parts and materials. Stackable storage boxes work well to maximize vertical space. If ventilation is limited, avoid heavy chemical use and consider a portable air purifier or a small fan near a window. Keep frequently used items most accessible, and store less-used tools higher up or further back.
I noticed you suggested that a shed or outbuilding is an excellent option if you can add power and climate control. For someone on a tight budget, what are some practical, affordable ways to bring electricity and heat or cooling to a small backyard shed?
For affordable electricity, many people use heavy-duty outdoor extension cords from the house, but make sure they’re rated for outdoor use and the load you’ll need. For heat, a small space heater is cheap and effective—just use it only while working. For cooling, a basic box fan or portable air conditioner can help. Always prioritize safety by not overloading circuits and never leaving heaters unattended.
Could you offer some budgeting tips for prioritizing essential tools versus nice-to-have equipment when just starting to set up a small home workshop?
Start by listing the most common projects you plan to tackle, then identify which tools are absolutely necessary to complete those tasks safely and efficiently—these are your essentials. Invest in quality versions of these basics first, like a good drill, measuring tape, and safety gear. For nice-to-have equipment, keep a wish list and watch for sales or buy secondhand as you gain experience and understand your needs better.
Could you provide more detail on budgeting for essential tools and equipment? For someone just starting out, what would you consider the minimum investment needed to set up an efficient and safe home workshop?
For beginners, start by listing the basic tools you’ll use most often—think a quality cordless drill, a set of screwdrivers, pliers, a hammer, measuring tape, and safety gear like goggles and gloves. You can expect to spend about $200–$400 for reliable entry-level tools and basic safety equipment. Prioritize quality for items you’ll use frequently, and gradually add specialized tools as your projects expand.
I noticed you mentioned considering ventilation when working with paints or chemicals in different workshop spaces. Can you suggest specific ventilation solutions for a basement setup where installing a full window might not be possible?
For a basement workshop without a full window, you could use a portable exhaust fan with a duct that vents outside through a small window or wall vent. Installing a through-the-wall vent with a backdraft damper is also effective. Additionally, using an air purifier with a HEPA and activated carbon filter helps reduce fumes and particles. Always keep doors open when working and try to work with less toxic materials when possible.
You mentioned using a garage or shed for a workshop, but I’m short on both space and outlets. In your experience, what’s the easiest way to add more power supply without hiring an electrician right away?
If adding outlets permanently isn’t an option right now, a heavy-duty extension cord with a built-in surge protector can give you more access to power safely. Choose one rated for workshop tools and avoid overloading it. Also, consider using power strips that have individual switches for better control. Just be sure not to daisy-chain multiple extension cords, as that can be a fire hazard.
You mention that ventilation is important, especially if using chemicals or doing sanding in the workshop. For a basement setup, what are some practical ways to ensure proper ventilation without making major structural changes?
For a basement workshop, you can use portable solutions like box fans in windows, or install window exhaust fans to help move fumes and dust outside. Air purifiers with HEPA filters are also useful for capturing fine particles. If windows aren’t available, consider using a door draft blocker combined with a fan to direct air out of the basement door. Always work with chemicals in small batches and store them safely.
When setting up a workshop in a basement, you mention watching for moisture and ensuring good lighting. Could you elaborate on the best ways to address moisture issues in basements, especially if I plan to store power tools and sensitive equipment?
To manage moisture in a basement workshop, start by using a quality dehumidifier to keep humidity low. Seal any cracks in the foundation or walls with waterproof sealant. Store power tools off the floor on shelves or in cabinets, preferably with silica gel packs for extra moisture protection. If possible, install a vapor barrier on floors and walls, and make sure your basement is well-ventilated to prevent dampness from building up.
When it comes to choosing between setting up in a garage or a shed, which one tends to be easier to equip with adequate power outlets and climate control, especially for someone on a limited budget?
Setting up a home workshop in a garage is usually easier and more budget-friendly for adding power outlets and climate control. Garages are often already connected to the main electrical panel and may have some outlets installed, making upgrades simpler. Climate control is also more straightforward because garages are typically attached to the house, so insulating or adding a space heater is less costly than outfitting a separate shed.
When setting up a workshop in a basement, you mention moisture and lighting as concerns. Do you have recommendations for affordable ways to control humidity and boost lighting, especially if there are no windows?
For humidity control in a basement workshop, a portable dehumidifier is a practical and affordable solution—set it to around 50% humidity to protect your tools and materials. For lighting, use bright LED shop lights or tube fixtures; these are energy-efficient and can easily be mounted to ceilings or walls. Try aiming for at least 4000 lumens per main work area to compensate for the lack of natural light.
If I’m setting up a workshop in a detached shed, what’s the most cost-effective way to run power out there for basic tools and good lighting without hiring an electrician for a whole new circuit?
For basic tools and lighting, a heavy-duty outdoor-rated extension cord from your main house to the shed can be a budget-friendly temporary solution. Make sure it’s long enough, has a high enough amp rating, and is protected from weather and tripping hazards. For more permanent or higher-powered setups, hiring an electrician is safest, but for light use, a quality extension cord should suffice.
For someone starting with a limited budget, which essential tools and equipment would you recommend prioritizing first to get a functional workshop up and running?
If you’re setting up a workshop on a limited budget, start with versatile hand tools like a hammer, screwdrivers (flathead and Phillips), measuring tape, adjustable wrench, and pliers. Add a cordless drill with a basic drill bit set and a handsaw for cutting. A sturdy workbench or work surface and a good set of clamps are also very useful. These basics will let you handle most beginner DIY repairs and upgrades without overspending.
When setting up a small workshop in a spare room or utility room, do you have any specific suggestions for managing ventilation, especially if the room doesn’t have windows?
Ventilation is really important in a windowless workshop, especially if you’re working with paints, adhesives, or power tools. You could install an exhaust fan that vents to the outside—this is effective for removing fumes and dust. Alternatively, a portable air purifier with a HEPA filter can help with dust and particles, although it won’t remove fumes. Also, consider using low-VOC materials and taking regular breaks to let the air clear.
When budgeting for essential tools and storage, do you have any suggestions on where to prioritize spending if I mostly do occasional repairs and small upgrades rather than big projects?
For occasional repairs and small upgrades, focus your budget on versatile hand tools like a quality screwdriver set, hammer, pliers, and a tape measure. These will cover most basic tasks. For storage, a sturdy toolbox or small shelving unit is usually enough at first. Save on expensive power tools or elaborate storage until you find you need them for bigger projects.
I’m trying to decide between setting up my workshop in a spare room or using a section of the garage. For someone mostly working on small electronics and occasional woodworking, which space generally works better in terms of noise control and ventilation?
For your needs, a section of the garage is usually better for noise control and ventilation. Garages often have concrete floors and better airflow, which helps with dust and fumes from woodworking. They’re also less likely to disturb others in the house. However, if climate control and easy access to power outlets are more important, a spare room could work, but you may need to add extra ventilation and be mindful of noise levels for electronics projects.
I run a small repair business from home, and I’m considering converting part of my garage into a workshop. How do you recommend handling ventilation for things like sanding or using chemicals when the garage shares air with the rest of the house?
For a garage workshop that shares air with your home, it’s important to install dedicated ventilation. Consider using a powerful exhaust fan near your work area, ideally vented directly outside to remove dust and fumes. Avoid sending air into shared spaces. Also, keep doors to the house closed while working, and use air purifiers with HEPA filters to catch fine particles. If possible, create a sealed barrier or use weatherstripping between the garage and house to further reduce airflow.
For someone who needs to fit a workshop into a shared garage, how do you suggest balancing space for cars and tools without losing efficiency? Are there storage systems or layouts you’ve found work best for multi-use spaces?
For a shared garage, wall-mounted storage like pegboards and shelving can keep tools organized and off the floor, leaving more room for cars. Foldable workbenches or rolling tool carts are also practical, as they can be moved or tucked away as needed. Zoning the space using tape on the floor can help define areas for each use, maintaining efficiency without overcrowding.
You mention making sure there’s enough power supply for tools and lighting. How do I estimate how many electrical outlets or circuits I might need if I plan on running a table saw, shop vac, and good lighting at the same time?
To estimate your needs, add up the amperage ratings for each tool—check the labels on your table saw, shop vac, and lighting fixtures. Many table saws and shop vacs require 10-15 amps each, and lighting might use 2-4 amps. Ideally, put heavy tools like the saw and vac on separate 20-amp circuits to prevent tripping breakers. Plan for multiple outlets along the walls, spaced every 6-8 feet for convenience and flexibility.
I share my garage with our family car and a lot of storage bins. Any advice on planning an efficient layout so my tools and projects are accessible, but I can still park the car and keep things organized?
To make the most of your shared garage, consider using vertical storage like wall-mounted shelves or pegboards for your tools. Rolling tool carts or workbenches can be moved when you need to park the car. Store seasonal items or less-used bins up high or in corners. Clearly label storage bins and keep your most-used tools within easy reach. Dedicated zones for car, storage, and workspace will help you stay organized and efficient.
I noticed you mentioned basements as a potential spot for a workshop, but moisture can be a problem there. What are some effective ways to handle humidity or prevent mold if I set up my workshop in a basement?
You’re right—humidity and moisture are common basement issues, but you can manage them effectively. Use a dehumidifier to keep humidity levels below 50 percent, and make sure your basement has good ventilation. Seal any cracks in walls or floors to prevent water seepage, and consider using moisture-resistant materials for work surfaces and storage. Regularly check for leaks or condensation to catch problems early.
If I’m working with a tight budget, which essential tools and storage solutions would you recommend prioritizing when first setting up a small DIY workshop in a garage?
When starting out on a budget, focus on versatile hand tools like a hammer, screwdrivers, pliers, a tape measure, and a utility knife. Add a cordless drill if possible, as it’s very useful. For storage, repurpose shelves or sturdy bins for organizing tools and hardware. Pegboards are also affordable and make it easy to keep tools visible and accessible as your collection grows.
I’m trying to decide between setting up my workshop in the basement or the garage like you mentioned. What factors should I weigh most heavily when it comes to moisture and ventilation? Are there specific solutions you recommend if I go with the basement?
Moisture and ventilation are definitely key concerns, especially in a basement. Basements tend to be more humid, so you’ll want to use a good dehumidifier and possibly seal the floors and walls to prevent dampness. For ventilation, consider installing a small exhaust fan or using portable fans to keep air circulating. Also, check for any existing leaks and address them before setting up. In a garage, while ventilation is often easier with doors and windows, you should still be mindful of temperature swings and dust control.
I have a small basement that I’m thinking of converting into a workshop, but it’s a bit damp at times. The article mentions moisture concerns—could you suggest specific ways to manage humidity or protect tools from rust in this type of space?
Managing humidity in a damp basement is important for both your comfort and tool longevity. Consider using a dehumidifier to keep moisture levels under control, and ensure the space is well-ventilated. Store tools in airtight containers or toolboxes with silica gel packs to absorb moisture. You might also apply a thin coat of oil to metal tools to help prevent rust. Regularly check for leaks or water entry points and address them promptly.
You mentioned budgeting tips for setting up a workshop, but I’m not sure where it makes sense to save versus invest a bit more. Which tools or setup features should I not cut corners on if I’m just starting out?
When starting your workshop, it’s wise to invest in quality for tools you’ll use often, like a cordless drill, measuring tape, and a sturdy workbench. These get heavy use and better versions last longer and work more safely. For storage, basic shelves or pegboards can be budget-friendly. You can save on specialty tools or extras until you know you’ll need them regularly.
The article mentions the importance of proper ventilation, especially when working with paint or chemicals. For a basement workshop where windows might be limited, what specific ventilation solutions would you recommend to ensure safety and air quality?
For a basement workshop with limited windows, installing a mechanical ventilation system is key. You could use an exhaust fan vented to the outside to actively remove fumes and bring in fresh air. A combination of an inline duct fan with flexible ductwork, or a window fan if any small window is available, can help. Also, using air purifiers with activated carbon filters can further improve air quality. Always ensure proper airflow when working with chemicals or paints to maintain safety.
Can you suggest any tips for organizing a shared garage workshop so that it’s efficient but still allows space for vehicles and household storage without feeling cramped?
To keep a shared garage workshop organized and spacious, consider installing wall-mounted shelves and pegboards for tools to free up floor space. Use labeled bins or cabinets for household items, and foldable or mobile workbenches that can be moved or stowed when not in use. Mark clear zones for vehicles, storage, and your workshop to keep everything accessible without overcrowding.
I have a basement that stays a bit damp and the lighting isn’t great. In your experience, what’s the best way to tackle moisture and improve lighting without breaking the bank if I want to set up my workshop down there?
To handle moisture, consider using a dehumidifier and sealing any visible cracks in the basement walls. For improved lighting, LED shop lights are an affordable and energy-efficient option—many can be plugged in and hung from the ceiling without complex installation. Focus on bright, cool-white bulbs for the best visibility at your workbench.
Could you share some tips for setting up essential electrical outlets and lighting in a detached shed, especially if it’s far from the main house? I’m trying to figure out the safest and most cost-effective way to get reliable power out there.
For a detached shed far from the main house, consider running a dedicated underground electrical line using conduit for safety. Install a small subpanel in the shed to manage circuits for outlets and lighting. Use bright overhead LED fixtures and place outlets every 6-8 feet for convenience. Always use weatherproof boxes and GFCI outlets for extra safety. It’s best to consult a licensed electrician to ensure everything meets local codes and is safely installed.
I have a pretty small utility room available and I’m mostly working on compact electronics projects. Based on your guide, what are the must-have safety features I should prioritize in such a small space?
For a compact utility room focused on electronics projects, prioritize excellent ventilation, a smoke detector, and a fire extinguisher designed for electrical fires. Use surge-protected power strips and keep your workspace free of clutter to avoid tripping hazards. Insulate any exposed wires and always have a first aid kit nearby. Good lighting and clear labeling of tools and materials also help maintain safety in a small area.
I have a pretty small spare room I could use, but I’m worried about ventilation for things like sanding or staining. Are there ways to improve ventilation in a space like this without doing major renovations?
You can definitely improve ventilation in a small room without major renovations. Try using a box fan or an exhaust fan placed in a window to help pull dust and fumes out. Opening windows on opposite sides of the room, if possible, creates cross-ventilation. Also, consider working with the door open and using portable air purifiers with HEPA filters to help clear the air.
When organizing a home workshop in a garage that also stores a car, do you have any suggestions for keeping tools accessible while still making sure everything stays safe and out of the way when the space needs to be used for parking?
Using wall-mounted pegboards or magnetic strips is a great way to keep your tools accessible and off the floor, saving space for your car. Consider rolling tool cabinets or workbenches that can be moved aside when not in use. Overhead storage racks can also hold less frequently used items, keeping the floor clear and your workspace flexible.
When figuring out the layout, how do you recommend prioritizing space for different zones if you mostly work on smaller repairs but occasionally tackle larger projects? Any tips for keeping the setup flexible?
Since you mainly do smaller repairs, dedicate most of your space to a well-organized, accessible workbench and tool storage. For larger projects, keep some open, adaptable floor space—perhaps with foldable tables or movable benches that you can reposition as needed. Using wall-mounted storage and mobile carts also helps keep the setup flexible, so you can quickly reconfigure your workspace for bigger tasks without losing efficiency during your usual repairs.
Could you expand on how to set up proper ventilation in a shed or outbuilding workshop, particularly if I’ll be doing a lot of sanding or painting? Are there specific types of fans or systems you recommend for DIYers?
For sanding and painting, it’s important to have both fresh air coming in and fumes or dust going out. You can install an exhaust fan (like a window-mounted or wall-mounted fan) to pull air outside, ideally opposite a vent or open window for good airflow. For frequent work, a basic inline duct fan with a filter can help remove fine dust. Make sure to position the exhaust near your main work area, and always wear a mask for added safety.
Could you give examples of ongoing maintenance tasks that keep a workshop in top condition? I’m wondering how often I should check things like tool safety, power outlets, or ventilation systems.
Regular maintenance is key for a safe and efficient workshop. Check tool condition and safety features monthly, cleaning and lubricating as needed. Inspect power outlets and cords every few months for wear or damage. Test ventilation systems seasonally to ensure good airflow, especially if you use paints or solvents. Also, keep work surfaces and floors clean weekly to avoid slips or clutter.
When you mention budgeting tips for workshops, could you share some advice on where it makes sense to invest a bit more versus areas where it’s okay to cut costs, especially for someone just starting out?
For beginners, it’s wise to invest more in a few essential hand tools and a sturdy workbench, as these see frequent use and affect both safety and comfort. On the other hand, you can save money by starting with basic power tools or buying them secondhand. Storage solutions and less-used specialty tools can also be more budget-friendly at first and upgraded later as your needs grow.
How should I prioritize my budget between essential tools, safety gear, and storage solutions when starting out with a home workshop setup?
When starting your home workshop, it’s wise to spend most of your initial budget on essential tools that you’ll use regularly for your projects. Next, invest in high-quality safety gear to protect yourself while working. Once those basics are covered, allocate remaining funds to storage solutions to keep your workspace organized. You can gradually upgrade your storage as your tool collection grows.
When it comes to setting up proper lighting, do you recommend going with LED shop lights or are there better options for small basement workshops? I’m concerned about both brightness and keeping costs down.
LED shop lights are a great choice for small basement workshops. They provide excellent brightness, are energy-efficient, and usually last longer than traditional fluorescent bulbs, which helps keep long-term costs down. For optimal lighting, aim for fixtures with a color temperature around 5000K (daylight) and check the lumen output to ensure adequate brightness. Generally, LEDs strike the best balance between performance and affordability for most DIY setups.
You mention that lighting is really important in a basement workshop, but I’m wondering what types of fixtures or bulbs you would recommend to keep things bright and avoid shadows, especially if there’s not much natural light available.
For a basement workshop with limited natural light, it’s best to use bright, cool white LED fixtures since they provide excellent clarity and energy efficiency. Opt for overhead LED shop lights or strip lights installed in parallel rows to minimize shadows. Adding adjustable task lights over your workbench can help illuminate detailed projects. Avoid relying on a single ceiling bulb, as this can create harsh shadows and leave areas too dim for safe, precise work.
When you talk about picking between a garage, basement, shed, or spare room, how do you figure out which one is best if you need both good ventilation and noise control? I’m not sure how to balance those priorities.
Balancing ventilation and noise control can be tricky. Garages and sheds usually offer better ventilation options, like big doors or windows, but may let more noise escape. Basements and spare rooms can help contain noise but are harder to ventilate. If noise is a bigger concern, a basement with added ventilation (like a window fan) could work. If fumes or dust are a priority, a garage or shed with weather-stripping for noise reduction might be better. Consider what you’ll be working on most often and see if you can add insulation or fans to improve your chosen space.
You mentioned that a basement workshop is great for noise isolation, but moisture can be an issue. Have you found any reliable solutions for managing humidity in a basement workspace, especially if you store power tools and electronics down there?
Managing humidity in a basement workshop is really important, especially for protecting your tools and electronics. A good dehumidifier is one of the most effective solutions—choose one with a built-in humidistat so you can maintain optimal levels. Also, make sure your basement has proper ventilation and consider using moisture barriers on floors or walls. Store tools in sealed containers or cabinets when not in use to add extra protection.
When choosing between using a garage and an outdoor shed for a home workshop, how do you prioritize between the convenience of accessibility and the potential challenges of climate control or limited space?
When deciding between a garage and an outdoor shed, first consider how often you’ll use your workshop. If you’ll visit it frequently, easy access from your home may outweigh space or climate concerns, making a garage more practical. If specialized tools or materials need careful temperature control or extra room, then climate and space could take priority. List your specific needs and see which location best matches them.
The article mentions budgeting tips, but how much should someone realistically expect to spend to set up a basic but functional home workshop for occasional repairs? Are there certain tools or equipment worth splurging on upfront?
For a basic but functional home workshop geared toward occasional repairs, you can expect to spend anywhere from $200 to $500, depending on the quality and number of tools you choose. Prioritize essentials like a cordless drill, hammer, screwdrivers, tape measure, and a sturdy workbench. It’s often worth investing a bit more in tools you’ll use frequently, like the drill and workbench, as better quality means longer life and safer use.
When picking between setting up a workshop in my garage versus the basement, how do you suggest handling moisture issues in the basement? Is there a certain flooring or insulation you’d recommend for a beginner?
Moisture is a common concern in basements. To help prevent issues, consider sealing any cracks and using a dehumidifier regularly. For flooring, look into interlocking rubber or vinyl tiles, which resist moisture and are easy to install. For insulation, rigid foam board works well because it doesn’t absorb water and provides good insulation. These solutions are beginner-friendly and help keep your tools and materials protected.
If I only have a spare room to work with and need to keep things quiet because of sleeping kids nearby, which tools or equipment would you recommend that are quieter or create less vibration, but still get the job done?
For a quiet home workshop, hand tools are your best bet—consider screwdrivers, hand saws, manual wrenches, and a cordless drill with adjustable speed, which tends to be quieter. If you need power tools, look for brushless models, which are typically quieter and create less vibration. Use a workbench with rubber feet or mats to dampen any vibrations, and avoid hammering or sanding when kids are sleeping. This way, you can still tackle most DIY tasks without disturbing anyone.
When setting up a workshop in a basement, you mentioned watching for moisture and making sure there’s good lighting. Do you have recommendations for dealing with humidity or dampness issues in basements, especially to protect tools and materials from rust?
To tackle humidity in basements, consider using a dehumidifier to keep moisture levels in check. Store tools in airtight containers or cabinets with silica gel packs to help prevent rust. You might also want to use a vapor barrier on floors and walls if moisture is a big issue. Regularly checking for leaks and improving ventilation can make a big difference, too.
When it comes to setting up power supply and outlets in a shed or outbuilding, what are some common mistakes to avoid? I want to make sure I install everything safely, especially since I plan to use power tools.
When installing power supply and outlets in a shed or outbuilding, avoid overloading circuits by calculating the total power needs of your tools first. Be sure to use proper outdoor-rated wiring and weatherproof outlets, and install a ground fault circuit interrupter (GFCI) for safety. Never run extension cords permanently and always follow local electrical codes. If you’re unsure, it’s best to consult a licensed electrician.
You mentioned that a shed or outbuilding needs power and climate control. Could you share some tips or cost-effective solutions for safely running electricity and keeping the temperature comfortable in a shed workshop?
For safe, cost-effective electricity, consider running an outdoor-rated extension cord temporarily, but for a permanent solution, hire a qualified electrician to install a dedicated circuit with proper weatherproofing. For climate control, portable heaters and fans work well in smaller spaces. Insulate the walls and ceiling to help maintain temperature, and use weatherstripping on doors and windows to reduce drafts. A small, energy-efficient window AC unit or a portable air conditioner can make summer work comfortable without a big investment.
You mentioned budgeting tips in the guide—about how much should I realistically expect to spend if I’m starting a workshop from scratch, including basic tools and storage solutions? Any advice on where to save or splurge?
If you’re starting a home workshop from scratch, expect to spend between $300 and $800 for essential hand tools, a basic power tool or two, and simple storage like shelves or pegboards. Try to save by buying quality used hand tools or starter tool kits, but consider splurging on a good cordless drill and a sturdy workbench since you’ll use them often. Prioritize tools you’ll actually need for your typical projects, and upgrade gradually.
You mention the importance of good lighting and multiple power outlets. Are there any recommended minimums for lighting brightness or the number of outlets for a small utility room workshop?
For a small utility room workshop, aim for at least 75–100 lumens per square foot for lighting—this usually means installing bright LED fixtures overhead and adding task lighting at your main work areas. As for outlets, try to have at least one double outlet on each wall, spaced every 6–8 feet, to avoid using too many extension cords and to keep things safe and convenient.
If I’m working with a smaller spare room, what are the most important safety features to prioritize, especially when it comes to ventilation for chemical use or dust from sanding?
In a smaller spare room, prioritizing good ventilation is key, especially if you’re using chemicals or doing sanding work. A portable exhaust fan or window-mounted fan can help remove fumes and dust. Also, consider using a respirator mask, keep flammable materials in sealed containers, and install a smoke detector. Always clean up dust regularly to reduce fire and health risks.
When you mention setting up a workshop in a garage that might need to be shared with vehicles or storage, do you have tips for keeping the workspace organized and easily convertible back and forth?
Absolutely, for a shared garage, consider mobile workbenches and tool carts that can be rolled aside when the space is needed for vehicles. Use wall-mounted pegboards, shelves, or cabinets to keep tools off the floor and organized. Modular storage bins are also helpful for quick packing and unpacking. Marking out a defined workspace with tape can help keep things tidy and make resetting the area easier.