


Introduction: Why Every DIYer Needs a Tool Maintenance Station
Whether you’re a seasoned DIY enthusiast or just starting your journey into home repairs, one thing quickly becomes clear: well-maintained tools make all the difference. A dedicated tool maintenance station isn’t just for pros—it’s a game-changer for homeowners who want to prolong the life of their equipment, work more efficiently, and keep their workspace safe and organized. Instead of scrambling for cleaning supplies or struggling to remember when you last sharpened your blades, imagine a single spot tailored for upkeep, repairs, and storage. In this comprehensive guide, you’ll learn exactly how to design, equip, and organize a home tool maintenance station, ensuring your gear is always ready for action. We’ll cover everything from choosing the right location and layout, to essential cleaning and repair supplies, to smart storage and workflow tips. Whether your space is a sprawling garage or a compact apartment corner, this step-by-step setup guide will help you build a maintenance hub that keeps your tools—and your home projects—in top shape.
Assessing Your Space and Needs
Choosing the Right Location
Start by evaluating where you can realistically set up your station. The ideal spot is:
- Well-ventilated: For safe use of cleaning solvents and lubricants.
- Well-lit: Good lighting is crucial for inspecting and repairing tools.
- Accessible: Near your main work area reduces time spent transporting tools back and forth.
- Spacious enough: Even a small station needs room for a work surface, storage, and supplies.
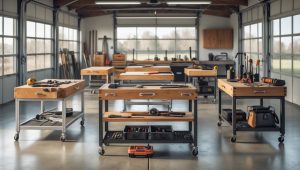
Popular options include a garage corner, basement area, outdoor shed (with weatherproofing), or a section of a utility room. Apartment dwellers can use a sturdy rolling cart or fold-out table in a laundry area or balcony.
Evaluating Your Tool Collection
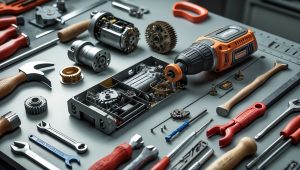
Inventory your tools. Note which ones require frequent maintenance—think hand tools (hammers, screwdrivers), power tools (drills, saws), and specialty gear (garden shears, paint sprayers). This will determine the size of your station and the types of cleaning and repair supplies you’ll need.
Designing Your Tool Maintenance Station
Work Surface Essentials
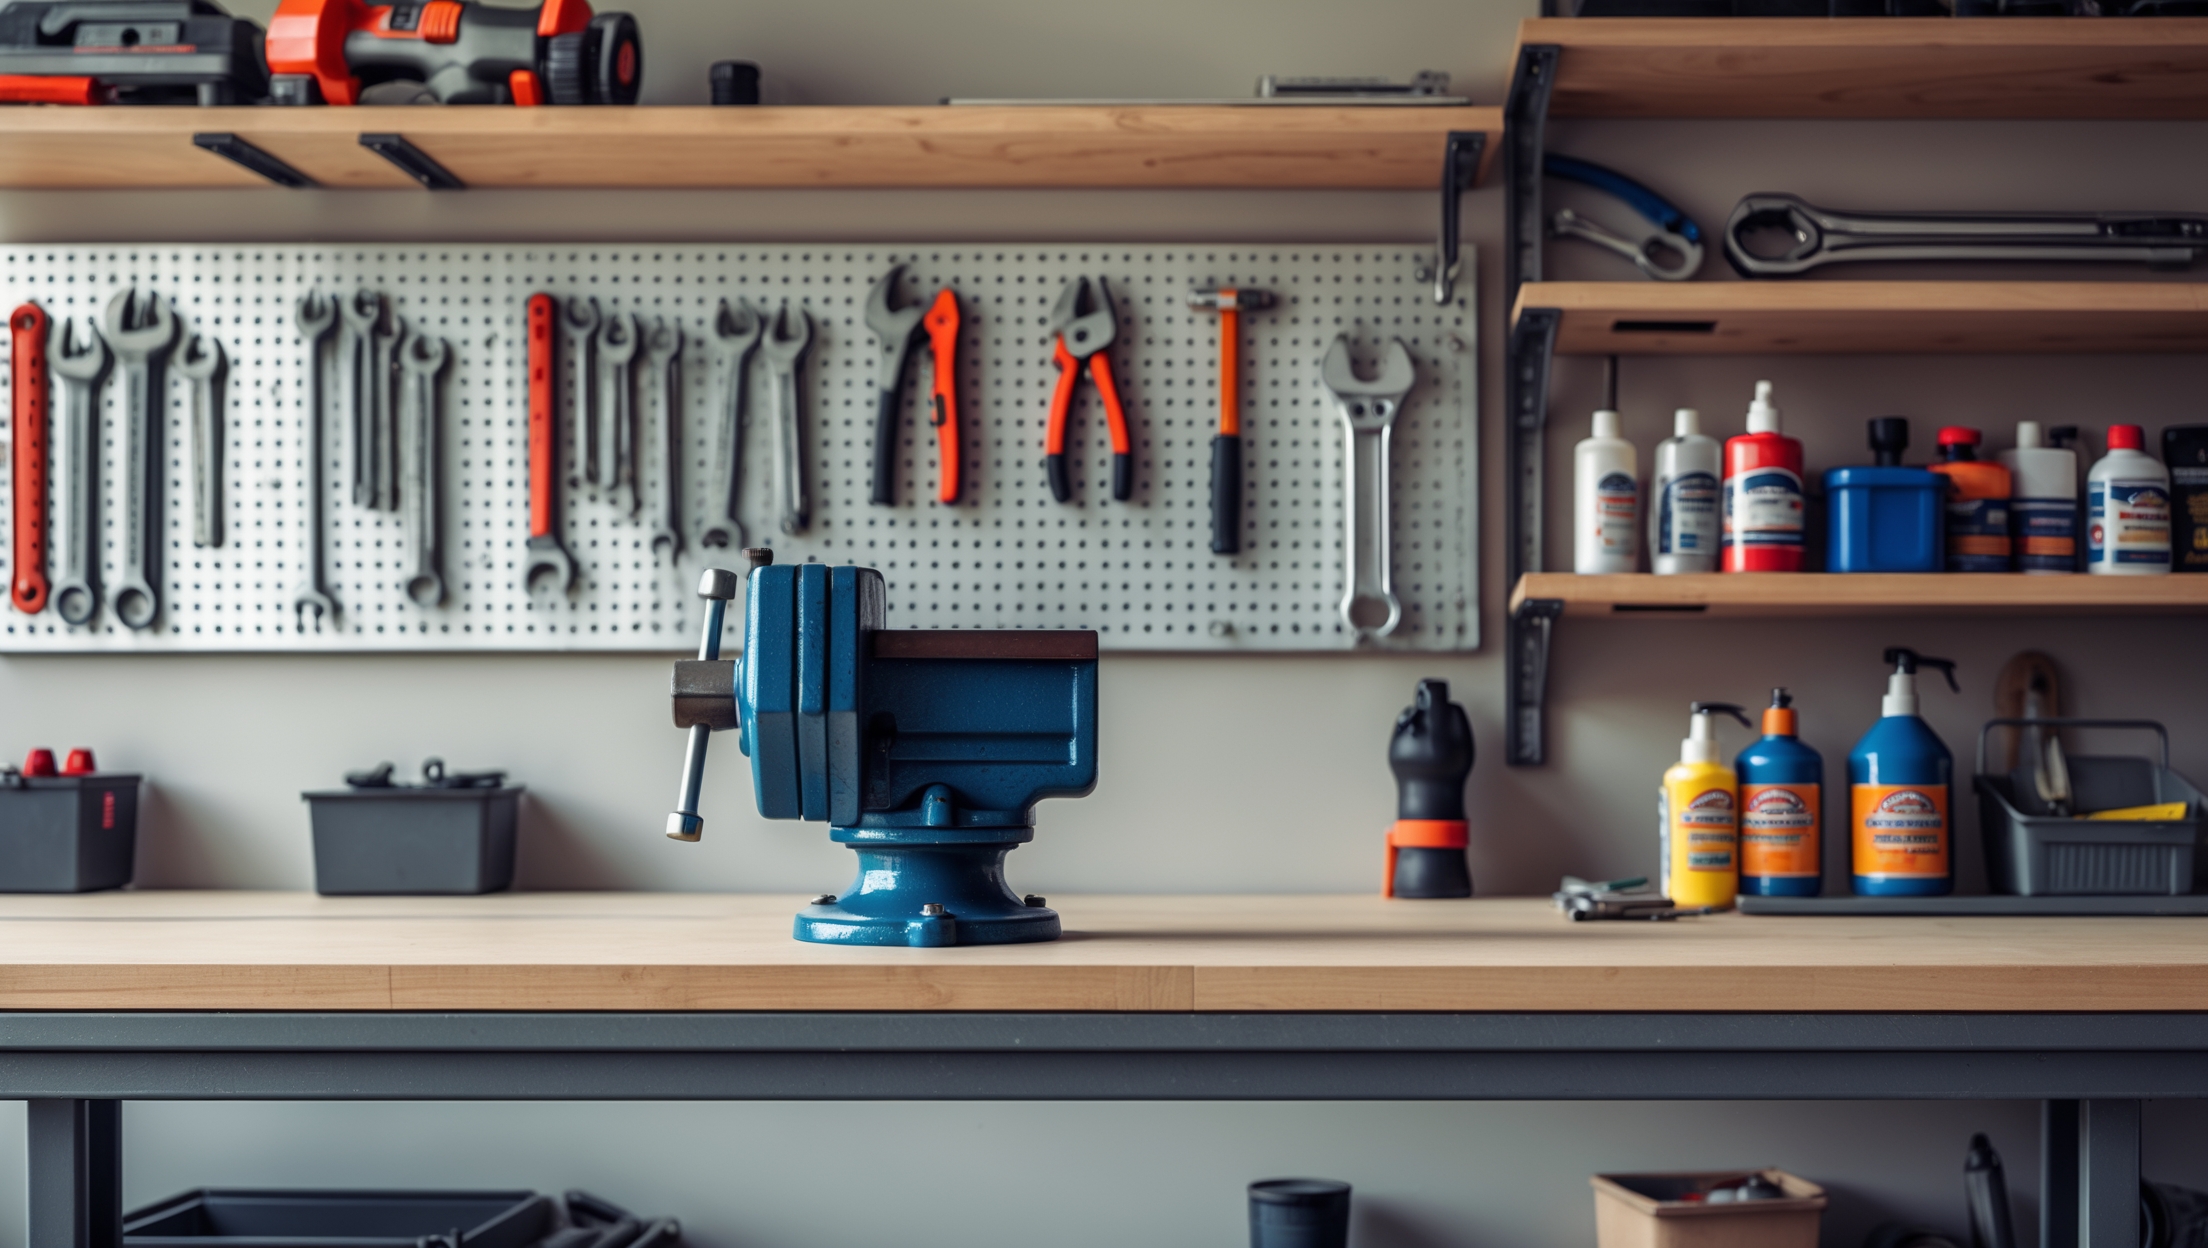
The heart of your station is a durable workbench. Key features to look for:
- Sturdy construction: A solid wood or metal bench supports heavy tools and repairs.
- Spacious top: Aim for at least 3 feet wide by 2 feet deep; more if space allows.
- Easy to clean: Smooth surfaces make cleanup simple.
- Integrated vice or clamps: For holding tools securely during maintenance.
If space is tight, consider a fold-down wall bench or a rolling tool chest with a flat top.
Lighting and Power Access
Mount a bright LED work light or install adjustable task lighting above the bench. Ensure the area has accessible outlets for power tools, chargers, and cleaning devices. Use surge-protected power strips to safely expand access.
Ventilation and Safety Features
Good airflow is essential, especially if you’re working with oils, lubricants, or solvents. Install a small fan, open windows, or use a portable air purifier. Keep a fire extinguisher and first aid kit within reach for emergencies.
Essential Tool Maintenance Supplies and Equipment
Cleaning Supplies
- Soft and wire brushes
- Rags and microfiber cloths
- Compressed air (cans or small compressor)
- Mild detergents and degreasers
- Rust remover and rust-inhibiting oil
Sharpening and Lubrication Gear
- Sharpening stones and files for blades and edges
- Lubricating oils (multi-purpose, machine oil, WD-40)
- Grease for moving parts
Repair and Adjustment Tools
- Small screwdrivers and hex keys
- Wrenches and pliers
- Soldering iron (for electronic/electrical repairs)
- Replacement parts (screws, springs, washers)
Storage and Organization Solutions
- Wall-mounted pegboards for frequently used items
- Drawer organizers for small parts
- Labeled bins for cleaning and repair supplies
- Magnetic strips for metal tools and bits
Step-by-Step Setup Guide
Step 1: Clear and Prepare the Area
Remove clutter and clean the chosen spot thoroughly. Address moisture issues to prevent rust. Paint or seal unfinished surfaces for easier cleaning and a brighter workspace.
Step 2: Install Work Surface and Storage
- Anchor your workbench or table securely to prevent wobbling.
- Mount pegboards and shelves above and beside the bench for vertical storage.
- Add hooks, baskets, or magnetic tool holders for easy access.
Step 3: Set Up Lighting and Power
- Install LED strip lights or gooseneck lamps above the bench.
- Plug in and secure power strips, ensuring cords don’t create tripping hazards.
Step 4: Organize Supplies and Equipment
- Group cleaning supplies in a caddy or bin.
- Sort small parts by type in divided containers.
- Label drawers, bins, and shelves for efficient workflow.
Step 5: Set Up Safety Gear
- Mount a fire extinguisher nearby (not directly above solvents).
- Keep a first aid kit and protective gear (gloves, goggles, masks) accessible.
Workflow: Routine Tool Maintenance at Your Station
Daily and Weekly Tasks
- Wipe down tools after use to prevent buildup and corrosion.
- Inspect for damage: Check for cracks, loose handles, dull edges.
- Return tools to their assigned spots for easy retrieval next time.
Monthly and Seasonal Maintenance
- Deep clean power tools: Remove dust, clean vents, lubricate moving parts.
- Sharpen blades and bits: Use files or sharpening stones.
- Check batteries and chargers: Test and replace as needed.
- Update inventory: Note missing or broken items to replace.
Quick Repairs and Adjustments
Use your station for minor repairs—tightening screws, replacing worn parts, soldering loose wires—or upgrading handles and grips for better ergonomics.
Pro Tips for Maximum Efficiency
- Implement a color-coding system for storage bins and labels—red for cleaning, blue for sharpening, green for lubricants.
- Hang a maintenance checklist on the wall as a reminder for routine tasks.
- Keep a logbook to track when each tool was last serviced or repaired.
- Invest in quality over quantity: Well-made organizers and containers last longer and look tidier.
- Use vertical space—pegboards can store far more than drawers alone.
- Consider a small shop vacuum dedicated to your station for fast cleanup.
Customizing for Specialty Tools and Projects
Garden and Outdoor Tools
Allocate a section for garden tool sharpening, oiling, and rust removal. Add a bucket of sand mixed with oil for easy cleaning of shovels and trowels.
Precision and Electronics Tools
Store delicate screwdrivers, soldering irons, and multimeters in padded drawers. Use anti-static mats and wristbands when servicing electronics.
Paint and Finishing Supplies
Dedicate a shelf for brushes, rollers, paint cleaners, and solvents, away from ignition sources. Use a small tray for drying and cleaning paint tools.
Budgeting for Your Tool Maintenance Station
Essential Investments vs. Optional Upgrades
- Must-have: Workbench, lighting, pegboard, cleaning supplies, sharpening gear, basic organizers (Expect to spend $150–$400 depending on size and quality).
- Nice-to-have: Vices, specialty organizers, shop vacuum, anti-fatigue mats, advanced sharpening systems (Add $50–$250 more).
Save by reusing salvaged shelves or containers, and gradually upgrade as needs grow.
Common Mistakes to Avoid
- Underestimating the space required for projects and cleaning tasks.
- Ignoring ventilation, leading to lingering fumes or musty odors.
- Mixing chemicals or storing flammables near heat sources.
- Neglecting regular cleanup, leading to clutter and lost tools.
- Skipping safety gear—always have gloves, goggles, and a first aid kit ready.
Maintaining Your Station: Best Practices
- Schedule monthly cleanouts and reevaluate storage solutions.
- Rotate tools seasonally to keep only current projects on hand.
- Check expiration dates on cleaning agents and lubricants.
- Regularly test lighting and power strips for safe operation.
Conclusion: The Lasting Benefits of a Dedicated Maintenance Station
Establishing a dedicated tool maintenance station isn’t just about organization—it’s a proactive investment in the longevity and reliability of your most valuable DIY assets. With even a modest setup, you’ll notice tools stay sharper, projects run smoother, and time spent searching for supplies plummets. More importantly, a well-maintained station promotes safer work habits and encourages regular inspection, catching small issues before they become costly replacements. As your DIY skills and tool collection grow, this station will evolve with you, becoming the hub for repairs, upgrades, and creative problem solving. Take the time to set up your maintenance area with care, and it will pay dividends in saved money, less frustration, and projects you can tackle with confidence. Remember: the best DIYers aren’t just those with the fanciest tools, but those who take pride in caring for the tools they have. Start building your maintenance station today, and turn routine upkeep into an efficient, satisfying part of your home improvement journey.


When it comes to choosing between a garage corner and a basement area for the station, what are the main pros and cons you’ve found in terms of moisture and temperature affecting tool care?
A garage corner typically experiences more temperature fluctuations and can be more humid, which may increase the risk of rust on tools. Basements are usually cooler and maintain steadier temperatures, but they can have higher humidity, especially if they are not well-ventilated. Both spaces benefit from using a dehumidifier and keeping tools off the ground to reduce moisture exposure. Consider your local climate and whether either area is prone to water leaks when making your choice.
How do you recommend keeping track of when each tool was last maintained or sharpened? Do you use a log or any app for this, or is it more about building a routine?
Keeping track of tool maintenance is much easier with a simple log. You can use a dedicated notebook in your workshop or create a spreadsheet to record each tool, the maintenance performed, and the date. Some people prefer using apps or reminders on their phone, but even a wall calendar marked with maintenance dates works well. The key is to choose a method you’ll actually keep up with, whether it’s digital or physical, to ensure no tool gets overlooked.
How do you recommend organizing power tools that require frequent maintenance if my available space is limited to just a corner in my garage? Should I prioritize certain tools or supplies in a small setup?
In a small garage corner, focus on vertical storage like wall-mounted pegboards or shelving to keep frequently used power tools accessible and visible. Prioritize organizing your most-used tools and essential maintenance supplies first, such as batteries, chargers, and cleaning materials. Store less frequently used items in stackable bins or higher shelves to maximize limited space and keep your maintenance area tidy.
When setting up a maintenance station in a shared space like a laundry room or small apartment, how do you manage ventilation for things like solvent fumes without causing issues for other people in the household?
To handle ventilation in shared spaces, work near a window and use a small fan to direct fumes outdoors if possible. Choose low-odor or water-based solvents to reduce strong smells. If windows aren’t available, consider a portable air purifier with a HEPA and activated carbon filter. Always store solvents in tightly sealed containers and only use them when others aren’t present to minimize disruption.
When you talk about choosing a spot that’s well-ventilated and well-lit, could you suggest any budget-friendly lighting solutions or ventilation tricks for people setting up in a basement or utility room?
For budget-friendly lighting in basements or utility rooms, consider LED shop lights or clamp lights, which are inexpensive and easy to install. For ventilation, a simple box fan placed near a window or door can help circulate air. If there’s no window, use a portable fan to keep air moving, and try to avoid using harsh chemicals in enclosed spaces.
I’m just getting started with my DIY toolkit and I don’t have a garage or basement. Would a rolling cart in my laundry area really work for a maintenance station, and are there any space-saving tips you recommend for apartments?
A rolling cart in your laundry area is actually a great solution for a maintenance station in an apartment. Opt for a sturdy cart with multiple shelves and hooks. Use pegboards or magnetic strips on the sides to hang tools, and bins or drawer organizers for smaller items. Try to keep only essential tools on the cart to save space, and store less-used items in labeled boxes nearby. This setup keeps everything mobile and organized, even in tight spaces.
If I don’t have access to a garage or shed and need to use a rolling cart in my apartment, are there any recommendations for keeping the station stable and minimizing mess during tool repairs or cleaning?
Using a rolling cart in your apartment works well with a few adjustments. Choose a cart with locking wheels to keep it stable while you work. Place a non-slip mat on the cart surface to prevent tools from sliding. To minimize mess, keep absorbent mats or old towels handy to catch debris and use small bins or trays for sorting parts and waste. Clean up immediately after each session to keep your space tidy.
For someone just starting out with a basic toolkit, what’s the minimum amount I should expect to spend setting up an effective tool maintenance station? I’d like to prioritize the essentials without overbuying.
If you’re starting with a basic toolkit, you can set up an effective tool maintenance station for around $40 to $80. Focus on getting good-quality essentials like a sturdy organizer or pegboard, a cleaning brush, some rags, basic lubricants, and a sharpening tool if you use blades. You can always add more specialized items later as your needs grow.
Is there a certain type of ventilation or specific safety setup you recommend when using cleaning solvents in a basement tool station? I want to make sure I am not overlooking any hazards, especially since my workspace doesn’t have windows.
When using cleaning solvents in a windowless basement, it’s important to have proper ventilation to avoid inhaling fumes. Consider installing a mechanical exhaust fan to directly vent air outside. Always use solvents in small amounts and keep them sealed when not in use. Store flammable substances in approved containers away from heat sources, and have a fire extinguisher nearby. Wear gloves and a mask for additional protection.
I noticed you mentioned both garage corners and weatherproofed outdoor sheds as possible locations. In your experience, is there a big difference in keeping tools rust-free between an indoor versus outdoor maintenance station?
Yes, there is a noticeable difference. Indoor locations like garage corners generally provide more consistent temperature and lower humidity, making it easier to keep tools rust-free. Outdoor sheds, even when weatherproofed, can be more exposed to moisture and temperature swings, which increases the risk of rust. If you choose an outdoor shed, consider using dehumidifiers or silica gel packs and check your tools regularly.
We have both hand tools and a few power tools, but not a ton of space in our garage. Should the maintenance station be right next to our main workbench, or is it better to keep it separate to avoid clutter? How do you balance accessibility and organization?
Placing your maintenance station close to your main workbench can make it more convenient, especially in a small space. To prevent clutter, consider mounting pegboards, using wall-mounted shelves, or installing drawers under the bench for tool maintenance supplies. Keep only essential items at arm’s reach and store less-used tools elsewhere. This way, you maintain accessibility without overcrowding your workspace.
How often should basic tool maintenance like sharpening and cleaning actually be done if I mostly use my tools for small weekend projects? I don’t want to overdo it but also don’t want to risk damaging anything from neglect.
For small weekend projects, basic tool maintenance like cleaning should be done after each use to prevent buildup and rust. Sharpening depends on the tool and frequency of use, but for most hand tools, sharpening every few months or when you notice reduced performance is usually enough. Regular light upkeep keeps tools in good shape without being excessive.
Could you give more details on what kind of ventilation is necessary if I’m planning to use cleaning solvents in a basement area? I want to make sure I’m handling fumes safely without a big renovation.
For safe use of cleaning solvents in a basement, you’ll need adequate airflow to remove fumes. A simple solution is using a portable exhaust fan to vent air outside through a window or duct. Also, always open any available windows and avoid working in enclosed spaces. If possible, use low-VOC or less toxic solvents and keep the area well-ventilated during and after cleaning.
For those of us working with limited space, like in an apartment, could you elaborate a bit more on setting up a maintenance station using a rolling cart or fold-out table? What organizational tips or storage solutions work best for really tight areas?
Using a rolling cart is a smart solution for small spaces—it can be moved easily and tucked away when not in use. Choose one with multiple tiers or drawers to separate tools, cleaning supplies, and spare parts. For a fold-out table, mount pegboards or magnetic strips on nearby walls to keep essentials off the surface but within reach. Stackable bins or clear containers help organize smaller items and keep everything visible and accessible without taking up much room.
You mentioned that good ventilation is important for safety when using cleaning solvents and lubricants in the maintenance station. If my only available space is a basement with small windows, are there any specific ventilation solutions or products you’d recommend to help keep the air safe?
In a basement with small windows, consider using a portable exhaust fan or window fan to help remove fumes by placing it directly in the window while you work. Air purifiers with activated carbon filters can also help reduce airborne chemicals. Always keep the door open if possible to improve airflow, and remember to take breaks to ventilate the area as much as you can during and after using solvents or lubricants.
The article mentions using a garage corner or a utility room for the station, but I’m wondering how to keep things well-ventilated if those spaces have limited airflow. Are there any low-cost ventilation tips for someone who can’t install a window or exhaust fan?
If installing a window or exhaust fan isn’t possible, you can still improve ventilation with a few budget-friendly tricks. Try leaving the door open while working, especially when using chemicals or power tools. Portable box fans or oscillating fans can help move air in and out. You might also consider using door draft stoppers to prevent fumes from lingering and placing air-purifying plants nearby to help with air quality.
How extensive should my initial inventory be when assessing which tools require frequent maintenance? Is there a simple way to track this over time so I don’t overlook items I use less often?
Your initial inventory should include all tools you own, not just your frequently used ones. This helps you identify maintenance needs you might otherwise miss. To track tool usage and maintenance over time, consider using a basic spreadsheet or a notebook. Log each tool, including its type, last maintenance date, and any issues noticed. Review and update the list regularly—this makes it easy to spot neglected tools and ensures nothing is overlooked.
Could you explain a bit more about what kind of lighting works best for a tool maintenance station? I mainly work in my garage, and the lighting isn’t great, so I’m wondering if specific types of bulbs or setups make a big difference when inspecting tools.
Proper lighting really helps with tool maintenance, especially for spotting rust or damage. In a garage, LED shop lights are usually the best choice—they’re bright, energy-efficient, and last a long time. Aim for lights with a color temperature around 5000K (daylight), which gives a clear, natural tone. Positioning a few overhead fixtures and adding a movable task light near your workbench will make inspections much easier.
When evaluating which tools need more frequent maintenance as suggested, how do I know which power tools or hand tools should be prioritized in my setup? Are there typical signs that a tool should be moved to the maintenance station sooner rather than later?
Prioritize tools that see heavy or frequent use, such as drills, saws, or wrenches, since they wear out faster. Move any tool to the maintenance station if you notice signs like diminished performance, odd noises, sticking parts, visible rust, or fraying cords. Regular checks for dirt buildup or loose fittings also help you catch issues early and keep your tools in top shape.
When choosing a location for a tool maintenance station, how important is ventilation compared to lighting? For example, if my basement is super well-lit but not very ventilated, would that be a problem for cleaning tasks that use solvents, or are there ways to make it safer?
Ventilation is just as important as lighting, especially if you plan to use solvents or chemicals for cleaning your tools. Without good airflow, fumes can build up and pose health risks. If your basement is well-lit but not ventilated, consider options like installing an exhaust fan, opening windows, or using air purifiers to help remove fumes and keep your workspace safer.
The article mentions using things like cleaning solvents and lubricants, especially in a home maintenance station. What are some good ventilation solutions if I’m setting up my station in a basement or laundry area without windows?
For a windowless basement or laundry area, consider installing a portable exhaust fan or a ducted vent fan to help remove fumes. You can also use an air purifier with a HEPA and activated carbon filter to reduce odors and particles. Always keep the door open when working with chemicals, and avoid using strong solvents in tight spaces without adequate airflow.
With apartment living, you suggest a rolling cart or fold-out table in a laundry area or balcony. How do you recommend securing or locking up power tools on a cart so they stay safe around young kids?
For apartment living, you can secure power tools on a rolling cart by using lockable toolboxes or storage bins with built-in locks. Store the tools inside these boxes and attach them to the cart with cable locks or zip ties. If your cart has drawers, consider adding child safety locks. Always store the cart in a spot that’s out of easy reach, like a corner or behind a door, for extra safety.
Could you give some insight on how to estimate a reasonable budget for equipping a basic but effective tool maintenance station, especially for someone just starting to invest in their DIY setup?
To set up a basic but effective tool maintenance station as a beginner, you can expect to spend around $100 to $300. Focus on essentials: a sturdy workbench, basic tools (like a screwdriver set, pliers, hammer), storage bins or pegboards, and cleaning supplies. Prices vary by quality and whether you buy new or used. Start small and gradually add items as your needs grow to stay within your budget.
For someone just getting started and on a budget, what are the must-have cleaning and repair supplies you would prioritize first, before adding more specialized equipment to a maintenance station?
For beginners on a budget, start with basics like a wire brush, shop rags or old towels, all-purpose cleaner or degreaser, a set of screwdrivers, pliers, a basic wrench set, and lubricating oil. These cover most cleaning and simple repairs. As you get more tools or specific needs arise, you can add items like rust removers, specialty oils, or sharpening stones later.
When it comes to budgeting for essential cleaning and repair supplies for a starter station, what are the most important items to invest in first, and are there any affordable alternatives you’d recommend?
For a starter tool maintenance station, prioritize buying a sturdy wire brush, a set of basic screwdrivers, lubricating oil, cleaning rags, and a simple sharpening stone. These essentials cover most cleaning and minor repairs. For affordable alternatives, you can use old toothbrushes for scrubbing, repurpose worn-out t-shirts as rags, and buy multi-use lubricants instead of specialty oils. Local hardware stores often have budget-friendly starter kits that bundle several of these items together.
In your section about choosing the right location for a maintenance station, you mention options like garages and utility rooms. For someone in an older home with limited outlets and poor lighting, what are some practical ways to address electrical and lighting needs without a major renovation?
If your home has limited outlets and poor lighting, you can use heavy-duty extension cords or power strips with surge protection to increase your available plugs. For lighting, consider plug-in LED work lights or clamp lights, which are energy-efficient and don’t require rewiring. Battery-powered LED lamps or motion sensor lights are also easy to install and can brighten your workspace without any major changes.
I have a pretty small utility room and I’m trying to set up a maintenance station without taking up a lot of space. Do you have any recommendations for maximizing storage and workflow efficiency in cramped quarters, especially for power tools?
For small utility rooms, consider using wall-mounted pegboards and magnetic strips to keep tools visible and easy to reach. Install shelves above your workspace for bins or boxes to store accessories. A fold-down workbench can save floor space and provide a sturdy surface when needed. For power tools, stacking containers or drawers under the bench work well, and labeling each compartment will make your workflow faster and more organized.
When deciding between using a rolling cart versus dedicating a corner of my garage for the station, what are the main pros and cons in terms of workflow and organization based on your guide?
A rolling cart gives you flexibility, letting you move your maintenance station wherever you need it, which is handy for larger garages or when working in different spots. It also makes cleanup easier. Dedicating a garage corner creates a permanent workspace, so you can set up shelves, pegboards, and fixed storage for better organization. However, it’s less portable. Choose a cart if mobility is key; pick a corner if you prefer a stable, highly organized setup.
You mention choosing a well-ventilated spot when working with solvents and lubricants. Are there any specific ventilation solutions or products you’d recommend for basement setups where windows might be limited?
For basement setups with limited windows, consider using a portable fume extractor or a small workshop air purifier that features a HEPA and carbon filter. Box fans near doorways can help circulate air, and installing a basic exhaust fan through an exterior wall is another effective solution. Whenever possible, open any available doors to maximize airflow during maintenance tasks involving solvents and lubricants.
You mentioned using well-ventilated and well-lit spots for the maintenance station, but what if my only available space is a basement with limited airflow and natural light? Any tips on making that work safely?
If your only option is a basement with limited airflow and light, you can still create a safe workspace by adding a few key upgrades. Use bright LED work lights to improve visibility, and set up a portable fan or install a small exhaust fan to increase airflow. When working with fumes or dust, consider wearing a respirator mask and keep the door open if possible. These adjustments will help make your basement station much safer and more comfortable.
Could you provide a checklist of essential cleaning and repair supplies for a basic station? I want to make sure I have the necessities before getting into more specialized items.
Here’s a checklist of essentials for your tool maintenance station: all-purpose cleaner, degreaser, rags or microfiber cloths, wire brushes, scrub pads, a stiff-bristle brush, lubricating oil, WD-40 or similar, replacement screws and nails, a sharpening stone or file, super glue or epoxy, and safety gloves. These basics will cover most cleaning and minor repairs before you move on to specialized supplies.
I live in a small apartment and only have room for a rolling cart setup. Do you have any suggestions for keeping cleaning solvents or lubricants secure and spill-proof in such a compact space?
For a rolling cart in a small apartment, choose tightly sealing bottles or containers for your solvents and lubricants—look for ones with locking lids. Store them upright in a plastic bin or tray on the lowest shelf of your cart to catch any accidental leaks. Label each container clearly, and avoid overfilling. If possible, use small quantities to minimize risk, and keep the cart away from direct heat or sunlight.
When budgeting for a tool maintenance station, what are the must-have items versus things I could add later as my needs grow? I want to get started without overspending but not miss anything essential.
To start your tool maintenance station on a budget, focus on essentials like a sturdy workbench, basic hand tools (screwdrivers, pliers, wrenches), a sharpening stone, cleaning supplies, and safe storage for frequently used tools. Optional upgrades for later include power tool organizers, specialized racks, a vise, extra lighting, and advanced sharpening systems. Begin with the basics to cover all standard maintenance tasks, then expand as your toolkit and needs evolve.
When organizing the maintenance station, how do you recommend deciding between a rolling cart versus a fixed table for those of us with pretty limited space? Are there any trade-offs with stability or storage that I should know about?
If space is tight, a rolling cart can be a great option because it offers flexibility—you can move it out of the way when not in use. However, carts may have less surface area and can be less stable, especially when loaded with heavy tools. Fixed tables usually provide more stability and storage but take up permanent space. Think about your tool weight and whether you need mobility or a dedicated spot.
Once the station is up and running, do you have tips for creating an efficient system to track when each tool was last cleaned, sharpened, or serviced? A manual or digital method would both be helpful to hear about.
To keep track of tool maintenance, you could use a simple manual logbook stored at your station, noting the date and type of care for each tool. Alternatively, create a spreadsheet or use a maintenance tracking app where you can set reminders for cleaning, sharpening, or servicing. Color-coded tags on tools can also help you quickly see when each was last maintained.
I noticed you mentioned using well-ventilated spaces due to cleaning solvents and lubricants. For someone who only has a basement or laundry area available, are there specific safety precautions or products that are safer to use indoors?
When working in a basement or laundry area, choose low-odor, water-based cleaning solvents and lubricants, which are generally safer for indoor use. Always keep windows open and use a fan to improve airflow if possible. Wear gloves and a mask to minimize exposure, and store all chemicals in sealed containers away from heat sources or open flames. Avoid using products labeled as highly flammable or for outdoor use only when indoors.
How do you recommend keeping track of when tools were last sharpened or cleaned, especially if I have a mix of hand and power tools? Is there a simple system you suggest for beginners?
A simple way to track tool maintenance is to use a wall-mounted whiteboard or clipboard in your tool area. Create columns for each tool, with rows for the last sharpened or cleaned date. For beginners, jotting down dates after each session keeps things organized without needing special apps. Color-coded stickers on tools can also quickly show which ones need attention soon.
I’m trying to keep costs reasonable as I set up my first maintenance hub. Could you break down which supplies and storage solutions are most essential to start with, and which ones can be added later as my tool collection grows?
To start affordably, focus on essentials like a sturdy workbench, basic pegboard or wall hooks for hanging frequently used tools, and clear containers or bins for smaller items. Invest in a good toolbox for portability. As your collection grows, consider adding drawer units, specialized racks, or modular shelving for bulkier tools and more advanced organization. Begin simple, then expand as your needs become clearer.
How do you suggest figuring out which cleaning and repair supplies are really essential for a beginner who doesn’t own a lot of power tools yet? I don’t want to buy a bunch of stuff I’ll never use.
Start by listing the hand tools and any basic power tools you currently own. For cleaning, simple supplies like a soft brush, mild detergent, and a few rags should be enough. For repair, a multipurpose oil, a screwdriver set, and some sandpaper cover most needs. As your collection grows, you can add more specific items, but there’s no need to buy specialized products until you actually need them.
When setting up a tool maintenance station in a small apartment, do you have recommendations for ventilation and safe storage of things like solvents and lubricants? I want to be sure I’m not creating any safety hazards, but my space options are limited.
For a small apartment, choose low-odor, less volatile solvents whenever possible, and use them near an open window or with a portable fan to improve ventilation. Store all solvents and lubricants in tightly sealed, clearly labeled containers, preferably in a lockable metal box or cabinet away from heat sources. Keep only small quantities on hand and never store them near food or living areas to minimize risk.
I noticed the guide talks about both permanent setups like in a garage and more portable options like a rolling cart for apartments. Do you have suggestions for maximizing storage and organization when space is really limited, like in a small studio?
In a small studio, vertical storage is your friend. Consider wall-mounted pegboards or magnetic strips to keep tools easily accessible without using up floor space. Use stackable bins or drawer organizers for smaller items. A compact rolling cart with multiple levels can double as storage and a work surface, and it can be tucked into a closet when not in use. Prioritize keeping only the essentials to prevent clutter.
When it comes to choosing a location, is there a particular reason you recommend a basement or garage corner over, say, a utility room? I’m concerned about ventilation and whether certain locations are better for handling fumes from cleaning products.
A basement or garage corner is usually recommended because these areas tend to have better ventilation options, like windows or larger doors, which help disperse fumes from cleaning products. Utility rooms are often smaller and may lack good airflow, making it harder to manage fumes safely. If you use a utility room, consider adding a fan or making sure there’s adequate ventilation to keep the space safe.
When you talk about evaluating your tool collection for maintenance needs, is there a simple way to track when each tool was last cleaned or sharpened? I always forget and end up with dull blades.
A simple way to track tool maintenance is to use labels or a small notebook in your tool area. For each tool, write the date it was last cleaned or sharpened. Alternatively, you can set reminders on your phone or a calendar app for regular maintenance intervals. This helps you keep blades sharp and tools in top shape without guessing.
Could you give more details on what essential cleaning and repair supplies should be included for someone mainly maintaining hand tools and a couple of basic power tools? I want to make sure I don’t forget anything important when I start setting up.
For maintaining hand tools and a few basic power tools, make sure you have these essentials: wire brushes, rags, soft cloths, mild detergent, lubricating oil or spray, a rust remover, a file or sharpening stone, a multi-bit screwdriver, pliers, spare screws and bolts, replacement blades, and a small set of hex keys. For power tools, add compressed air and a can of contact cleaner. A dedicated storage box for these supplies helps keep everything organized and handy.
For the ‘essential cleaning and repair supplies’ part, are there any low-cost or multipurpose products you suggest for someone who doesn’t want to spend a lot on separate cleaners and lubricants for different kinds of tools?
You can use basic items like WD-40, which works as both a cleaner and lubricant for many metal tools. White vinegar is also great for removing rust and grime, and baking soda can help with scrubbing. For wiping and drying, old rags or T-shirts work well. These multipurpose products keep your toolkit simple and budget-friendly.
When you mention using cleaning solvents and lubricants at the station, are there safety guidelines or ventilation tips that DIYers should keep in mind, especially if the setup is in a basement or utility room?
Absolutely, safety is important when using cleaning solvents and lubricants indoors. Always make sure your workspace is well-ventilated—open windows or use a fan to circulate air if possible. Store chemicals in clearly labeled, sealed containers and keep them away from heat sources. If your station is in a basement or utility room, consider using a portable exhaust fan or working near an open door to help disperse fumes. Wearing gloves and safety glasses is also a good idea.
When you mention choosing a well-ventilated location for the station, is there a specific type of ventilation I should look for if I’ll be using cleaning solvents in a basement area? I’m a bit worried about fumes and safety indoors.
If you’ll be using cleaning solvents in a basement, it’s important to have strong ventilation. Look for either a window you can open or, ideally, install an exhaust fan that vents directly outside. A standard ceiling or oscillating fan isn’t enough, since you need to actively remove fumes from the room. Always keep the area well-aired during and after use, and consider using solvents labeled as low-VOC for additional safety.
When selecting a well-ventilated spot, do you have any advice for apartment dwellers who might not have access to windows or outdoor areas? Are there specific products or setups that help with ventilation in small, enclosed spaces?
For apartments without windows or outdoor access, consider using a portable air purifier with a HEPA filter or an air circulator fan to keep air fresh while working. If you frequently use chemicals or generate dust, a tabletop fume extractor or mini air filtration unit can be helpful. Always choose low-odor, low-VOC products when possible and take breaks to allow any fumes to dissipate.
How much should I realistically budget for setting up a basic tool maintenance station with just the essentials if I’m starting from scratch and don’t already own things like a rolling cart or extra lighting?
If you’re starting from scratch, you should budget around $150 to $250 for a basic setup. This covers a rolling cart, basic shelving, a work light, pegboard, hooks, and a few storage bins or drawers. Prices will vary depending on quality and local availability, but shopping at discount or hardware stores can help keep costs down.
Do you have any tips for organizing supplies and tools on a budget, especially when space is tight? I want to avoid clutter but not overspend on storage solutions.
To keep things organized on a budget, try repurposing everyday items like jars, cans, or small boxes for storing screws, nails, and small hand tools. Wall-mounted pegboards or even a simple piece of plywood with hooks can help you use vertical space efficiently. Shelves made from reclaimed wood are another low-cost storage option. Keep only the tools you use most often easily accessible and consider rotating out seasonal items to free up space.
Do you have any tips for figuring out how much space I really need? I have a mix of hand tools and a few small power tools, but I’m worried about outgrowing my setup if my collection gets bigger over time.
To estimate the right amount of space, lay out your tools and measure the area they currently use, allowing a bit of extra room for comfortable access and movement. Consider adding at least 25–30% more space than you need now to accommodate future tools. Modular shelving or pegboards can help you adjust your setup easily as your collection grows.
The article mentions the importance of good lighting and ventilation for the maintenance station. Do you have any advice on specific types of lighting or low-cost ventilation solutions for someone setting up their station in a basement without windows?
For basement tool stations, LED shop lights are a great choice—they’re bright, energy-efficient, and easy to install on ceilings or under shelves. For ventilation, you might consider a small windowless exhaust fan or a portable air purifier with a HEPA filter. Both are relatively affordable and help keep air fresh, especially during tasks that create dust or fumes.
I noticed you mentioned using solvents and lubricants, especially in a well-ventilated area. What would be your suggestions for safe storage and disposal of these chemicals if my only available location is a basement?
For basement storage, always keep solvents and lubricants in their original, clearly labeled containers with tightly sealed lids. Store them on a high shelf, away from heat sources and out of children’s reach. Use a metal or plastic bin to contain spills. For disposal, never pour them down drains; instead, collect used chemicals and take them to your local hazardous waste facility. Improve ventilation if possible, and only use chemicals when you can air out the space afterward.
When evaluating my tool collection, how do I decide which cleaning and repair supplies are essential to buy right away if I’m on a tight budget? Are there must-haves versus nice-to-haves for getting started?
If you’re on a tight budget, focus first on must-haves: a good wire brush, multi-purpose oil (like WD-40), basic rags, and a screwdriver set for tightening or quick repairs. These cover most basic cleaning and maintenance. Nice-to-haves, like specialized rust removers or tool-specific lubricants, can be added over time as needed. Prioritize based on the tools you use most often and their condition.
How much should I budget to get started with all the essential cleaning and repair supplies you recommend? I already have a basic toolbox but not much else for maintenance.
Since you already have a basic toolbox, you can expect to budget around $50 to $100 for essential cleaning and repair supplies. This covers items like a bench brush, cleaning rags, lubricants, rust remover, a wire brush, sharpening stones, and protective gloves. Prices can vary depending on the brands you choose, but this range should allow you to set up a solid maintenance station without overspending.
You mentioned that a well-ventilated and well-lit spot is ideal for a maintenance station. In a small apartment without much natural light or ventilation, what are some practical ways to address safety concerns when using cleaning solvents or power tools?
In a small apartment, use a portable fan near an open window to improve ventilation when working with solvents, and always clean up spills right away. For lighting, opt for bright LED work lights to avoid shadows. When using power tools, work during daytime hours if possible, keep a fire extinguisher nearby, and wear safety gear like gloves and goggles to further minimize risks.
After organizing the maintenance station, how do you suggest setting up a simple system to track when each tool was last cleaned or sharpened? Is there a low-tech solution you recommend, or do you find digital tracking works better?
A low-tech solution that works well is to use a wall-mounted dry-erase board or a clipboard with a printed log sheet near your maintenance station. List each tool with columns for the date last cleaned or sharpened and any notes. This makes it easy to see at a glance which tools need attention. If you prefer digital tracking, a simple spreadsheet on your phone or computer also works, but many find the physical log more accessible when working in the shop.
I have a small workshop in my basement and ventilation is a bit limited. Could you recommend specific ways to improve airflow or keep things safe when using solvents in a space like this?
In a basement workshop with limited ventilation, using solvents safely is important. You could set up a window fan to exhaust air outside, or use a portable air purifier with a HEPA and activated carbon filter. Always open doors and any available windows while working. Store solvents in sealed containers, and consider wearing a respirator rated for organic vapors. Avoid open flames and make sure rags are disposed of in a fire-safe container.
When evaluating my tool collection like you suggested, should I also keep track of how often each tool needs maintenance or just focus on what types of tools I own? How detailed should this inventory be to really help with organizing the station?
It’s helpful to include both the types of tools you own and how often each one needs maintenance in your inventory. This extra detail will make it easier to schedule upkeep and organize storage based on usage frequency. A detailed inventory can include the tool name, condition, last maintenance date, and maintenance schedule. This will really streamline your organization and keep your station running smoothly.
I have a pretty small apartment and most of my tools are just basic hand tools, but I do want to be more organized with maintenance. The article mentions using a rolling cart or fold-out table—do you have any tips for setting up a maintenance station that can be easily moved or stowed away when space is limited?
For a small apartment, a rolling cart is a great option since you can organize your hand tools in bins or drawers and simply wheel it away into a closet or corner when not in use. Consider pegboards or magnetic strips on the cart for vertical storage. If using a fold-out table, keep a portable toolbox for quick clean-up. Choose stackable containers for cleaning supplies and lubricants to save space.
You mention setting up the station near your main work area for convenience. My garage is pretty tight on space, but my basement is bigger. Do you think location or available space should be the bigger priority for a beginner DIYer?
For a beginner DIYer, having enough space to organize tools and work comfortably is often more important than being right next to your main work area. If your basement has the room to set up an organized and functional maintenance station, it will likely make your projects easier and more enjoyable, even if you have to walk a little farther to access it.
If my workspace is limited to just a balcony or laundry area, what are your best suggestions for keeping things ventilated and dealing with fumes from cleaning solvents without annoying my neighbors?
If you’re working in a balcony or laundry area, choose water-based or low-odor cleaning solvents whenever possible, as they produce fewer fumes. Always work with doors or windows open to maximize airflow. Setting up a small box fan facing outward can help direct any fumes away from your workspace and neighbors. Clean and store tools promptly to minimize lingering odors. If you’re especially concerned, do your cleaning during times when neighbors are less likely to be around.
When setting up my first maintenance station in a basement, what kind of ventilation is usually needed if I plan on using cleaning solvents? I want to make sure it’s safe since there are no windows.
Since your basement has no windows, you’ll need to ensure proper ventilation when using cleaning solvents. An exhaust fan that vents air outside is essential to remove fumes safely. Look for a fan rated for chemical use, and install it near your work area. Always avoid using solvents in confined spaces without adequate airflow, and consider wearing a respirator for extra protection.
When you’re evaluating your tool collection for frequent maintenance, are there any apps or tracking systems you’d recommend for scheduling upkeep and keeping an inventory, or do you find a simple checklist works best?
Using an app or digital tracking system can be really helpful if you have a large tool collection or want reminders for maintenance schedules. There are apps designed for inventory and upkeep, letting you log details and set alerts. However, if your collection is smaller or you prefer low-tech solutions, a simple checklist or spreadsheet works well too. The best approach depends on your personal workflow and how detailed you want your tracking to be.
I live in an apartment with very limited space and no garage or shed, so the rolling cart setup sounds appealing. Could you share some suggestions for keeping solvents and lubricants safely stored in an apartment setting, especially with pets and kids around?
Storing solvents and lubricants safely in an apartment is important, especially with kids and pets. Choose containers with childproof lids, and keep them on a high shelf or in a locked section of your rolling cart. Consider using a small, portable, locking toolbox or cabinet to store these supplies. Always keep products in their original containers with labels intact, and store them away from heat sources.
For someone just starting out with DIY projects, what are the absolute essential cleaning and repair supplies you would recommend buying first to set up a basic but functional maintenance station?
For a beginner, start with a few key items: a soft brush and microfiber cloths for cleaning, a multipurpose cleaner or degreaser, lubricating oil, a basic set of screwdrivers and pliers, a small hammer, and some all-purpose glue. Add a sharpening stone for blades and a roll of tape for quick fixes. These essentials will cover most basic cleaning and minor repairs as you get started.
Could you give some tips on how to inventory and organize tools that are a mix of bulky power tools and small hand tools? The article mentions evaluating your collection, but I get stuck figuring out the best storage solutions for different tool sizes.
For bulky power tools, consider using sturdy shelves or dedicated cabinets where each tool has its own spot—labeling the shelves helps, too. For small hand tools, pegboards or drawer organizers work well to keep everything visible and tidy. Group similar items together and, if possible, create an inventory list (even a simple spreadsheet) to keep track of what you have and where it’s stored.
I live in a pretty small apartment, so I’m wondering how practical it really is to fit a tool maintenance station onto a rolling cart or fold-out table like you mentioned. Do you have any tips for organizing cleaning supplies and storage when space is super limited?
A rolling cart or fold-out table can work really well in a small apartment since you can tuck it away when not in use. Use vertical space by adding pegboards or magnetic strips to the sides for tools and cleaning supplies. Small bins or drawer organizers keep items separated and accessible. Store only your most-used supplies on the cart, and stash less-used items in labeled containers elsewhere to minimize clutter.
You mention using cleaning solvents and lubricants at the tool maintenance station. Are there safer, less toxic alternatives recommended for apartment dwellers who might be concerned about fumes or ventilation?
Absolutely, there are safer options for apartment dwellers concerned about fumes. For cleaning, you can use citrus-based degreasers or mild soap and water instead of strong solvents. For lubrication, products like food-grade mineral oil or plant-based lubricants work well and have low odor. Always work near an open window or use a fan to help with ventilation, even with these gentler alternatives.
The article mentions inspecting tools and sharpening blades, but I’m not sure what basic supplies or equipment I really need to get started with those tasks. Could you give a checklist for essential cleaning and repair items for a beginner with mostly hand tools?
For a beginner maintaining hand tools, you’ll want a few key items: a stiff brush or rag for cleaning, a bottle of light machine oil, sandpaper (120–220 grit), a file or sharpening stone for blades, a small screwdriver set, a pair of pliers, and rust remover or steel wool. This basic kit will cover cleaning, rust removal, tightening, oiling, and sharpening for most common hand tools.
I have a small apartment and barely any extra space—do you have any specific tips or examples for setting up a tool maintenance station in really tight quarters, like inside a closet or on a balcony?
For very limited spaces, consider using a wall-mounted pegboard or magnetic strip inside a closet door to keep essential tools visible and within reach. Stackable bins or hanging organizers can maximize vertical space. On a balcony, a weatherproof storage bench with compartments can double as seating and a tool station. Fold-out shelves or portable toolboxes are also great for setups that need to be tucked away when not in use.
When it comes to organizing supplies and tools on a rolling cart, what do you recommend for keeping everything stable and accessible, especially if the cart will be moved between rooms often?
To keep tools and supplies stable on a rolling cart, use drawer liners or non-slip mats on shelves to prevent sliding. Store heavier items on the bottom to lower the center of gravity. Use bins, dividers, or pegboards to separate smaller items and make them easy to grab. Label sections or containers so you can quickly find what you need, even while moving between rooms.
I noticed you mention setting up a station even in small spaces like apartments. Can you suggest some clever storage or organization solutions that work well for people with very limited room, especially when it comes to safely managing things like cleaning solvents around kids?
For small spaces, consider using wall-mounted pegboards or magnetic strips to keep tools off surfaces and within reach. Over-the-door organizers can hold smaller items. For cleaning solvents, store them in lockable, high-mounted cabinets or sturdy lockboxes to keep them out of reach of children. Always label everything clearly and make sure ventilation is adequate in your storage area.
You mention that good ventilation is important for using cleaning solvents and lubricants. If my only option is the basement, are there specific ways to improve airflow or make it safer to work with these chemicals in an enclosed space?
Working with solvents and lubricants in a basement does require extra care. You can improve airflow by using a portable fan near a window or door to direct fumes outside, or by installing a window exhaust fan if possible. Make sure to keep chemical containers closed when not in use and consider using low-odor or less toxic products. Always have the area well-lit and take regular breaks to step outside for fresh air.
Could you give more detail on what kind of lighting works best for this setup? I’m not sure if I need to invest in special shop lights or if regular lamps would be enough for inspecting and repairing my tools.
For a tool maintenance station, bright and even lighting is really important, especially for inspecting and repairing tools. Overhead LED shop lights are a popular choice because they’re energy-efficient and provide clear, shadow-free light. If your station is in a garage or basement, shop lights are usually better than regular lamps. However, you can supplement them with adjustable task lamps or clip-on lights for close-up detail work. Aim for lights with a high color rendering index (CRI) to help you see details and colors accurately.
When inventorying my tool collection, what’s the best way to track maintenance schedules for each tool, especially if I have a mix of hand and power tools? Do you recommend a manual log, app, or something else?
To track maintenance schedules efficiently, consider using a dedicated app or spreadsheet. Apps designed for tool management can send reminders and let you set custom intervals for each tool, which is especially helpful with a mix of hand and power tools. If you prefer a manual approach, a simple spreadsheet or notebook categorized by tool type and last service date can work well. Choose the method you’ll consistently update.
When setting up a tool maintenance station in a small apartment, do you have any tips for keeping cleaning solvents and lubricants safely stored, especially if there are kids or pets around?
To keep cleaning solvents and lubricants safe in a small apartment, store them in a lockable cabinet or box placed out of reach of children and pets. Always keep containers tightly sealed and clearly labeled. Consider using wall-mounted shelves with locking doors, and never store these items near food or in high-traffic areas. Make sure the storage area is dry and well-ventilated to minimize any risks.
I’m just starting to build my tool collection and don’t have a lot of equipment yet. Should I wait until I have more tools before setting up a full maintenance station, or can you suggest a minimalist setup for beginners that works in small spaces?
You don’t need to wait until you have a large tool collection to set up a maintenance station. A minimalist setup works well for beginners and can fit into small spaces. Start with a sturdy surface or small workbench, a wall-mounted pegboard for basic tools, and a bin or drawer for cleaning supplies like rags and lubricant. As your collection grows, you can expand the station to fit your needs.
Could you elaborate on what kind of lighting works best for inspecting and repairing tools, especially in a basement or garage corner? I want to avoid eye strain, but I’m not sure if I need to invest in specialized fixtures or if regular LED work lights will do.
For inspecting and repairing tools in dim or enclosed spaces like basements or garage corners, bright LED work lights are usually sufficient. Look for daylight or ‘cool white’ LEDs (around 5000K color temperature) to reduce eye strain and provide clear visibility. Adjustable fixtures or portable work lights let you direct light where needed. Under-cabinet LED strips can also help. You don’t need specialized fixtures unless you’re doing precision work—just ensure lights are bright, flicker-free, and cover your workspace evenly.
When setting up a maintenance station in a small apartment, is there an effective way to organize cleaning supplies and sharpener tools on a rolling cart without them getting mixed up or causing safety issues?
To keep cleaning supplies and sharpener tools organized and safe on a rolling cart, designate separate sections or bins for each type of item. Store sharpeners and blades in a lidded, labeled container to prevent accidental contact. Place cleaning products in a caddy or tray on a different shelf. Using drawer organizers or small baskets can also help keep everything in its place and reduce the risk of mixing or spills.
For those of us working with a really limited space, like a small apartment or even just a balcony, do you have any tips on managing ventilation when using cleaning solvents without causing issues indoors or bothering neighbors?
When working in tight spaces, try to use water-based or low-odor cleaning solvents whenever possible to minimize fumes. Keep windows and balcony doors open for airflow, and use a small fan to direct fumes outside. If you’re on a balcony, work during times when neighbors are less likely to be outside, and avoid spraying solvents directly into the wind to prevent drift. Always store solvents in sealed containers when not in use.