

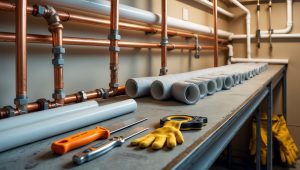


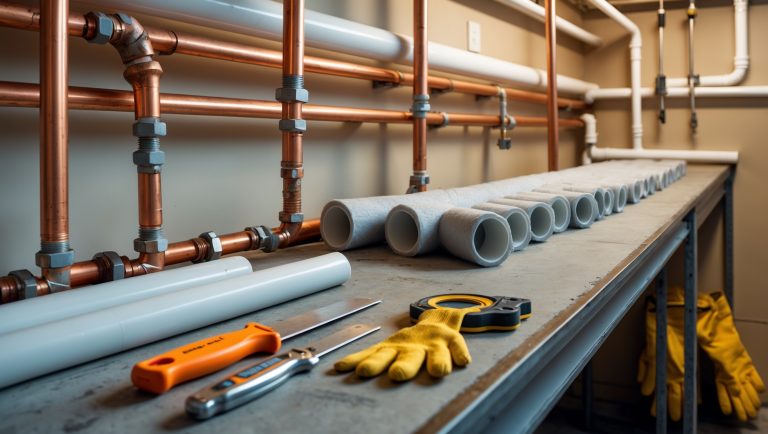
Introduction: Why Every DIYer Needs an Electrical Tester
Whether you’re fixing a faulty outlet, installing a new light fixture, or troubleshooting a mysterious power outage, electrical testers are indispensable tools for any homeowner who tackles DIY repairs. The world behind your home’s walls is alive with electricity, and without the right tester, even a simple swap of a wall switch can become dangerous—or frustrating. But with so many types of voltage and continuity testers available, choosing the right one, using it safely, and maintaining it for reliable results isn’t as straightforward as grabbing the first tool off the shelf. This comprehensive guide unpacks everything you need to know about selecting, using, and maintaining electrical testers—specifically voltage and continuity testers—so you can work confidently and safely on your home’s electrical systems. We’ll cover key features to compare, rookie mistakes to avoid, maintenance best practices, and step-by-step instructions for common DIY scenarios. By the end, you’ll have the practical know-how to simplify repairs, prevent costly errors, and ensure your home’s electrical upgrades are safe and reliable.
Understanding Electrical Testers: Types and Functions
What Is an Electrical Tester?
An electrical tester is a handheld device designed to detect, measure, or verify the presence (or absence) of electrical voltage or continuity in a circuit. The two most crucial testers for home DIYers are voltage testers and continuity testers. Each serves a unique role in diagnosing and resolving electrical issues.
Voltage Testers: Detecting Live Circuits
- Non-Contact Voltage Testers (NCVT): Detect AC voltage without touching bare wires. Ideal for quick checks—just bring the tip near an outlet or wire, and the tester lights up or beeps if voltage is present.
- Contact Voltage Testers: Require you to touch the probe to the conductor. Some are simple (neon light testers); others are more advanced (solenoid or electronic testers).
- Multimeters: The Swiss Army knife of testers—measure AC/DC voltage, continuity, resistance, and more. Digital models (DMMs) are preferred for home use due to their accuracy and ease of reading.
Continuity Testers: Ensuring Complete Circuits
- Simple Continuity Testers: Battery-powered device with a probe and a lead. Confirms if a complete path exists in a wire or circuit. If the circuit is complete, the tester lights up or buzzes.
- Multimeters: Most digital multimeters have a dedicated continuity mode—when the circuit is continuous, you’ll hear a beep.
How to Choose the Right Electrical Tester for Home Use
Key Factors to Consider
- Intended Tasks: Are you mostly checking for live wires, or will you be diagnosing deeper electrical issues?
- Safety Features: Look for testers with insulated probes, sturdy casings, and clear voltage ratings. CAT ratings (e.g., CAT II, CAT III) indicate protection levels against surges.
- Ease of Use: Features like audible indicators, large digital displays, and ergonomic grips make a big difference, especially for beginners.
- Accuracy: For troubleshooting or repairs, accurate readings prevent costly mistakes. DMMs with auto-ranging functions are particularly user-friendly.
- Budget: Basic voltage testers start under $15, while advanced multimeters can exceed $60. For most DIYers, a reliable mid-range DMM and a non-contact voltage tester cover all needs.
Comparing Popular Home Tester Models
- Klein Tools NCVT-2: Dual-range non-contact tester, detects standard and low voltages. Pocket-sized and robust—ideal for beginners.
- Fluke 101 Digital Multimeter: Compact, reliable, measures AC/DC voltage, continuity, and resistance. Considered a gold standard for accuracy and durability.
- Gardner Bender GVD-3504: Simple, affordable contact voltage tester—useful for quick outlet or switch checks.
Beginner Mistakes to Avoid with Electrical Testers
1. Not Testing the Tester
Always verify your tester is working before and after use. Use a known live outlet or battery to check. This step prevents false negatives, which can be dangerous.
2. Using the Wrong Tester for the Job
Never use a continuity tester or DMM in continuity mode on a live circuit—it can damage the tester and pose a shock hazard. Non-contact testers are not suitable for measuring continuity or voltage levels.
3. Ignoring Safety Precautions
Always turn off breakers before probing outlets or fixtures. Wear insulated gloves, and never touch metal parts of the probes during testing.
4. Misinterpreting Results
Non-contact testers are convenient but can give false positives near static or poorly grounded circuits. Confirm with a second tool if results seem odd.
5. Skipping Maintenance
Dead batteries, damaged probes, or cracked casings can make testers unreliable or unsafe. Regularly inspect and maintain your tools (see below for details).
Step-by-Step Guide: Using Voltage and Continuity Testers Safely
Preparing for a Test
- Wear insulated gloves and safety glasses.
- Ensure your tester is rated for the voltage level you expect.
- Verify the tester’s operation on a known live circuit (for voltage) or with a battery (for continuity).
How to Use a Non-Contact Voltage Tester
- Switch the tester ON and confirm it beeps/lights up on a known live outlet.
- Hold the tip near the wire, socket, or switch terminal—do not insert it into the slot.
- If voltage is detected, the tester will beep or illuminate.
- Test both hot and neutral sides for full confirmation.
How to Use a Digital Multimeter for Voltage
- Set the multimeter to the correct voltage range (AC or DC as needed).
- Insert the black lead into COM (common), the red lead into VΩ.
- Touch the probes to the two points you’re testing (e.g., outlet slots).
- Read the voltage. For a standard US outlet, expect ~120V AC.
- Remove probes, turn off the meter, and store safely.
How to Use a Continuity Tester
- Ensure the power is OFF to the circuit (test with your voltage tester first).
- Connect the tester’s leads to both ends of the wire or device.
- If the circuit is complete, you’ll see a light or hear a beep.
- No light/beep indicates an open circuit or break in the wire.
Maintenance Best Practices for Electrical Testers
Routine Care
- Inspect before each use: Look for cracks, frayed wires, loose probes, or corroded battery contacts.
- Replace batteries promptly: Weak batteries give unreliable results.
- Clean contacts: Use isopropyl alcohol and a soft cloth to clean probe tips and battery contacts as needed.
- Store properly: Keep testers in a dry, padded case away from extreme temperatures and direct sunlight.
Calibration and Accuracy Checks
- DIY calibration: For most home testers, periodic checks against known voltages (e.g., standard wall outlet, 9V battery) suffice.
- Professional calibration: For advanced or expensive multimeters, consider annual professional calibration—especially if you rely on them for precise troubleshooting.
When to Replace Your Tester
- Persistent inaccuracies despite fresh batteries and clean contacts.
- Physical damage (cracked case, loose probes) or water intrusion.
- Failed self-test or no response on known live circuits.
Advanced Tips: Getting the Most from Your Electrical Testers
Tracing Dead Outlets and Faulty Switches
Use your non-contact tester to identify where voltage stops along a circuit. For continuity issues, isolate the suspect wire and test end-to-end with your continuity tester. This pinpoints breaks or bad connections.
Testing Extension Cords and Power Strips
- Unplug the cord, then use your continuity tester to check each wire from plug to socket.
- Test for shorts by checking continuity between hot, neutral, and ground—there should be no continuity between these.
Verifying Fixture Installations
After installing a new switch or fixture, use your voltage tester to confirm correct wiring before restoring power. For peace of mind, check continuity across the switch terminals with the switch in both positions (power off).
Common Myths About Home Electrical Testers Debunked
- “All testers are the same.” Not true—each has specific voltage and safety ratings.
- “Non-contact testers are infallible.” They can miss voltage in shielded cables or give false alarms near static.
- “Continuity testers can be used on live circuits.” Never! Continuity tests are for de-energized wires only.
- “Any multimeter will work for home use.” Cheap or unbranded models may be unsafe or inaccurate—always check certifications and reviews.
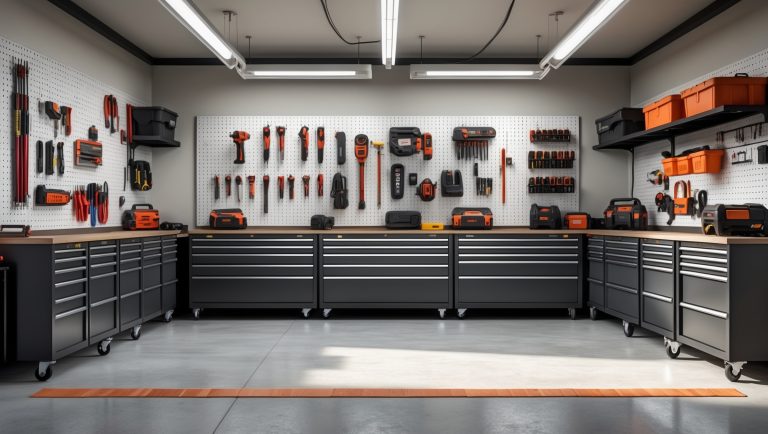
DIY Electrical Tester Kit: What Should Be in Every Home Toolbox?
- Non-contact voltage tester for quick safety checks
- Digital multimeter for measuring voltage, continuity, and resistance
- Simple continuity tester for rapid circuit checks
- Spare batteries (AAA, 9V, or as required by your devices)
- Insulated gloves and safety glasses
- Small flashlight for dark panels or crawlspaces
- Padded storage case to protect your investment
Conclusion: Mastering Home Electrical Safety and Efficiency
Electrical testers are more than just gadgets—they’re your first line of defense against hazards and your best ally for diagnosing problems quickly and safely. By understanding the differences between voltage and continuity testers, choosing models that fit your needs, and following best practices for use and maintenance, you empower yourself to tackle a wide range of home electrical repairs and upgrades with confidence. Avoiding rookie errors—like using the wrong tester for the job or skipping pre-use checks—can prevent dangerous missteps and costly damage.
Investing in a quality non-contact voltage tester and a reliable digital multimeter pays off not just in safety, but also in peace of mind and project success. Regular maintenance extends the life of your tools and ensures accurate results every time you reach for them. Don’t forget to keep your user manuals handy, periodically test your devices on known circuits, and replace any testers that show signs of wear or inaccuracy.
With the right knowledge and equipment, you’ll find that even complex home electrical tasks become manageable—and you’ll save time and money by spotting issues early. Whether you’re a seasoned DIYer or just getting started, a well-chosen electrical tester kit is an essential investment in your safety and your home’s reliability.

I’m trying to decide between a basic neon light contact tester and a more expensive digital multimeter for casual home repairs. Is a simple tester sufficient for most troubleshooting, or does a multimeter offer important advantages for a DIYer?
A basic neon light tester is handy for quickly checking if an outlet or wire is live, and it’s simple to use for basic tasks. However, a digital multimeter offers much more: it can measure voltage, continuity, and sometimes even resistance and current. If you plan to do more than just check for live wires—like diagnosing circuit problems or checking batteries—a multimeter is worth considering. For occasional, simple jobs, a neon tester is sufficient, but a multimeter gives you greater versatility and safety.
The article mentions both non-contact and contact voltage testers. Is one of these generally more reliable or accurate for figuring out which wire is live when rewiring outlets, or does it mostly come down to user preference?
Contact voltage testers are generally more reliable and accurate for identifying a live wire, as they give a definitive reading when the probe touches the conductor. Non-contact testers are useful for a quick check but can sometimes be triggered by nearby wires or static. For rewiring outlets, using a contact tester is recommended for precise results.
I see the article talks about rookie mistakes when using electrical testers. Can you give some examples of common errors homeowners make with continuity testers specifically, and how to avoid them?
Homeowners often forget to disconnect power before using a continuity tester, which can damage the tester or cause injury. Another common error is not zeroing or testing the tester on a known good circuit before use, leading to false readings. To avoid mistakes, always turn off power at the breaker, double-check the tester’s operation, and ensure the circuit is fully isolated before checking for continuity.
Your mention of rookie mistakes makes me wonder—what’s the most common safety error people make when using a continuity tester, and how can I make sure my team avoids it when working on simple electrical fixes?
One of the most common safety errors is using a continuity tester on a live circuit, which can damage the tester and pose a shock risk. To prevent this, always double-check that the power is off at the breaker and verify with a voltage tester before using the continuity tester. It’s a good practice to train your team to follow this step every time.
When choosing between non-contact voltage testers and contact voltage testers for general home use, are there specific household wiring scenarios where one type consistently works better than the other? I sometimes find non-contact testers give false positives near bundled wires.
Yes, there are scenarios where one tester type is more reliable than the other. Non-contact testers are great for quickly checking if a wire is live without touching it, but as you noticed, they can pick up stray voltages or interference in bundled wires, leading to false positives. Contact voltage testers, which require touching the wire or terminal, are more accurate for confirming if a specific wire is truly live. For diagnosing issues inside electrical boxes or with tightly packed wires, a contact tester usually gives more reliable results.
When choosing between a non-contact voltage tester and a contact voltage tester for typical home repairs like replacing outlets or switches, is there a scenario where one is noticeably safer or more accurate than the other? The article mentioned both types but I’m unsure which to rely on for peace of mind.
For typical home repairs like replacing outlets or switches, a non-contact voltage tester is safer because it lets you check for live wires without touching any exposed metal. However, a contact voltage tester is generally more accurate since it confirms voltage presence with direct contact. Many people use both: start with a non-contact tester for safety, then double-check with a contact tester for accuracy, especially before touching any wiring.
When it comes to maintaining these testers for reliable results, are there specific steps or checks I should do every time before using them, or is occasional inspection enough?
For the most reliable results, it’s a good idea to do a quick pre-use check each time. Look for obvious damage to the leads and casing, make sure the display works, and confirm the batteries have enough charge. Testing the device on a known working circuit before use helps ensure accuracy. Regular, more thorough inspections and cleaning are still important, but these simple checks before every use can prevent most issues.
Could you provide more detail on the differences between non-contact and contact voltage testers when it comes to accuracy and safety for DIY projects? I’m wondering if one is generally a better choice for someone new to home electrical work.
Non-contact voltage testers are generally safer for beginners because you don’t have to touch any wires—they detect voltage through insulation and let you know if a wire is live. However, they can sometimes give false positives or miss low voltages. Contact voltage testers are more accurate since they make direct contact, but they require touching exposed metal, which can be riskier if not done carefully. For most DIY home projects, a non-contact tester is a good starting point for safety, but always double-check with a contact tester if you’re unsure.
The article mentions rookie mistakes to avoid when using voltage and continuity testers. What are some of the most common errors small business owners make with these tools, and how can I make sure my staff don’t run into safety issues during basic maintenance?
Common mistakes small business owners make include using the wrong tester for the job, not checking the tester’s condition before use, and failing to de-energize circuits before testing. To help your staff avoid safety issues, provide clear instructions, regular training updates, and ensure everyone double-checks both the tester’s calibration and the work area for live power before starting maintenance tasks.
You mention both non-contact and contact voltage testers for home use. Are there situations where one type would be much safer or more reliable than the other, especially if I’m not experienced with electrical work?
Non-contact voltage testers are generally safer for beginners because you don’t have to touch any wires directly—just bring the tester close to the wire or outlet to check for voltage. They help avoid accidental shocks. Contact testers, on the other hand, require direct contact with the conductor and are more reliable for confirming if power is truly off, but they do involve more risk if you’re inexperienced. For safety, stick with a non-contact tester unless you’re confident and need extra confirmation.
The article mentions both non-contact and contact voltage testers, but as a beginner, how do I know when to use one over the other? Are there specific situations where a contact tester would be safer or more reliable than a non-contact tester?
A non-contact voltage tester is ideal for quickly checking if a wire or outlet is live without touching any metal parts, making it safer for general use and beginners. A contact voltage tester, on the other hand, gives a more precise reading and is better when you need to confirm both the presence of voltage and the quality of a connection. For troubleshooting or confirming results, a contact tester is often more reliable, especially when non-contact testers give unclear indications.
I’m just starting to build my DIY toolkit. For someone on a budget, do you recommend getting a combined voltage and continuity tester, or is it better to invest in separate tools for each purpose? Are there any trade-offs in terms of accuracy or safety?
For a budget-friendly toolkit, a combined voltage and continuity tester is a practical choice. These 2-in-1 testers save money and space, and most modern models are accurate enough for typical home projects. The main trade-off is that separate tools might offer more specialized features or slightly higher precision, but for general DIY use, a quality combo tester is safe and reliable if you follow the instructions carefully.
I noticed the article mentions both non-contact and contact voltage testers. Is one type more accurate or reliable for troubleshooting old wiring in older homes, or should I have both on hand for different situations?
For troubleshooting old wiring in older homes, it’s best to have both non-contact and contact voltage testers. Non-contact testers are great for quickly checking if wires are live without touching them, but contact testers (like multimeters) provide more precise voltage readings and can check continuity. Having both lets you safely detect voltage presence and also accurately measure or diagnose wiring issues.
I noticed you talk about maintaining electrical testers for reliability. What are some common mistakes people make when storing or handling these testers that I should watch out for to make them last longer?
Some common mistakes include storing testers in damp or dusty environments, which can damage internal components. People often forget to remove batteries during long-term storage, leading to leaks. Dropping testers or pulling on their leads can cause internal wiring issues. Also, avoid exposing them to extreme temperatures. Keeping testers in a protective case and regularly checking for wear or corrosion will help extend their lifespan.
The article mentions that non-contact voltage testers are great for quick checks, but are there any situations where a non-contact tester might give a false reading or not be reliable enough for certain DIY tasks?
Non-contact voltage testers can sometimes give false positives if they’re near strong electromagnetic fields or sensitive electronics. They may also miss detecting voltage in shielded wires or cables with thick insulation. For tasks like verifying that a circuit is completely de-energized before working, it’s best to follow up with a contact voltage tester or a multimeter for extra safety and reliability.
When you mention maintenance best practices for these testers, are there specific steps or frequency I should follow to make sure they’re always reliable? I can’t afford to have faulty readings during business hours.
To keep your electrical testers reliable, inspect them regularly for physical damage or worn leads, and replace batteries as soon as you notice weak readings or dim screens. Clean the contacts with a dry cloth every month to prevent debris buildup. It’s also a good idea to test your device on a known live circuit before starting work each day to confirm accuracy.
If I’m interested in upgrading from a basic neon light tester to something more advanced without breaking the bank, what key features should I prioritize when choosing between all the voltage and continuity testers available?
When upgrading from a neon tester, consider getting a digital multimeter or a non-contact voltage tester. Look for features like clear digital readouts, the ability to test both AC and DC voltage, continuity checking with an audible alert, and basic safety ratings. Automatic range selection and a sturdy build can also make home testing easier and safer without adding too much to the cost.
I noticed you mention non-contact and contact voltage testers. For a parent with young kids around, is one type generally safer or more reliable when doing basic checks on outlets or light switches?
For homes with young children, a non-contact voltage tester is generally considered safer. It allows you to detect voltage without touching any wires or exposed metal, reducing the risk of accidental shocks or electrical contact. Non-contact testers are also easy to use and reliable for quick checks on outlets and switches. Always remember to follow the safety instructions and keep testers out of children’s reach when not in use.
I get confused between all the different testers at the hardware store. For a parent who mainly needs to handle quick checks like swapping out outlets and light fixtures, is it better to stick with a basic non-contact tester, or should I spend extra on a multimeter with more features?
For basic tasks like swapping outlets and light fixtures, a simple non-contact voltage tester is usually enough. It quickly tells you if wires are live, which is key for safety. A multimeter offers more functions, like measuring exact voltage or continuity, but if you don’t plan on diagnosing complex electrical problems, you can skip it. Stick with a quality non-contact tester for your needs.
If I am planning to upgrade the lighting fixtures in my business, is there a specific kind of voltage or continuity tester you recommend for frequent DIY use by someone without a professional electrical background?
For frequent DIY use, a non-contact voltage tester is a great choice for safely checking if wires are live without direct contact. For added versatility, consider a digital multimeter, which tests both voltage and continuity and is user-friendly. Look for models with clear displays, audible alerts, and safety ratings suitable for home or light commercial use.
You mentioned rookie mistakes to avoid with electrical testers. Could you give a few specific examples of what people commonly do wrong, especially when trying to diagnose a dead outlet or light fixture?
Absolutely. Some common mistakes include not turning off the power before opening an outlet or fixture, which can be dangerous. People often forget to test their tester on a known live circuit first, so they don’t realize the tester itself may be faulty. Another issue is using the tester incorrectly, such as not making good contact with metal terminals or using the wrong mode (like continuity instead of voltage). Misreading the tester’s display or ignoring safety warnings can also lead to incorrect conclusions or unsafe conditions.
When choosing between non-contact voltage testers and contact voltage testers for simple home repairs, are there situations where one type is clearly safer or more reliable than the other? The article mentions both types but I am unsure when to use each.
Non-contact voltage testers are generally safer for basic home repairs because they let you detect voltage without touching any wires, reducing the risk of electric shock. They’re ideal for checking if an outlet or wire is live before starting work. Contact testers, while more reliable for confirming exact voltage presence, require touching the wire, so extra caution is needed. For most simple tasks, start with a non-contact tester for safety.
Do you have any tips for maintaining a voltage or continuity tester to make sure it stays accurate over time? I don’t want to find out mine’s faulty in the middle of a project, but I’m not sure what I should be doing between uses.
To keep your voltage or continuity tester reliable, store it in a dry place and avoid exposing it to extreme temperatures. Periodically check the batteries and replace them when needed, as weak batteries can affect accuracy. Inspect the test leads for cracks or wear, and clean the probes with a soft cloth. It’s also a good idea to test your device on a known live circuit before starting a project to confirm it’s working correctly.
When using non-contact voltage testers, are there certain situations where they might give a false reading or not detect live wires properly? I want to make sure I’m not missing any electrical hazards when I check my outlets.
Non-contact voltage testers can sometimes give false positives or miss live wires in certain situations. For example, if the battery is low, or if you’re testing through thick insulation or metal shielding, the tester might not detect voltage accurately. Also, very low voltage or a broken neutral wire may go undetected. It’s always a good idea to double-check with another type of tester and ensure your non-contact tester is functioning properly before use.
You touched on maintenance best practices for electrical testers. Can you give some examples of what regular maintenance looks like for these tools? For instance, do you need to recalibrate them or just check the batteries?
Regular maintenance for electrical testers includes checking and replacing batteries to ensure accurate readings, inspecting leads and probes for wear or damage, and cleaning the tester with a dry cloth to keep contacts free from dust and debris. For digital testers, recalibration is sometimes necessary, especially if you’re using them for precise measurements or if the manufacturer recommends it. Always store testers in a dry, safe place to prevent moisture damage.
When the guide mentions rookie mistakes to avoid with voltage and continuity testers, could you give examples of what some of those common mistakes are? I worry about damaging my tester or getting inaccurate readings.
Some common mistakes include using the wrong tester for the job, such as trying to measure voltage with a continuity tester or vice versa. People sometimes forget to check if their tester is set to the correct mode or range, which can lead to inaccurate readings. Another frequent error is not testing the tester on a known live source before and after use, which helps confirm it’s working properly. Also, touching metal probe tips together while testing live circuits can damage the tester or cause short circuits.
You mention both non-contact voltage testers and contact voltage testers as essentials, but are there specific scenarios where one is better than the other for diagnosing issues in older homes with mixed wiring? I’d like some guidance on when to reach for each type while avoiding rookie mistakes.
For older homes with mixed wiring, use a non-contact voltage tester first to safely detect live wires without touching them—ideal for quick checks in crowded or unknown setups. If you need to confirm if a wire or terminal is actually carrying voltage or to troubleshoot faulty outlets, a contact voltage tester is more accurate. Always double-check results since old wiring may have false neutrals or miswired grounds.
The article mentions maintenance best practices for electrical testers. What sort of regular checks should I do to make sure my voltage or continuity tester stays reliable, especially if I only use it a few times a year?
To keep your electrical tester reliable, check the batteries regularly—even if you use it rarely—to prevent corrosion or weak power. Inspect the leads and probes for any cracks or wear. Before each use, test your tester on a known live circuit to confirm it’s working accurately. Store your tester in a dry, dust-free place to avoid moisture damage.
The article talks about maintenance best practices for testers. What are common signs that my voltage or continuity tester isn’t working reliably anymore, and how often should I be calibrating or replacing them for safe DIY use?
Common signs your voltage or continuity tester may be unreliable include inconsistent readings, failure to light up or beep, visible damage, or erratic display behavior. For safe DIY use, it’s wise to check your tester with a known voltage source before each use. Calibration should be done according to the manufacturer’s recommendation, usually once a year, while replacement is advised if you notice any faults or damage that could affect accuracy.
The article talks about maintenance best practices for electrical testers. Can you share some advice on how often voltage and continuity testers should be calibrated or replaced in a busy retail environment to ensure safety and accuracy?
In a busy retail environment, it’s best to calibrate voltage and continuity testers at least once a year, or more frequently if the manufacturer recommends it or if the testers are heavily used. You should also inspect them regularly for physical damage and replace any tester that shows signs of wear, inconsistent readings, or fails calibration checks to maintain safety and accuracy.
Can you talk more about maintaining these testers? I’ve had cheap voltage testers go flaky after a year or so in my toolbox. Are there specific brands or types you’ve found to be more reliable over time, especially for people who only use them occasionally?
Keeping your testers in good shape involves storing them in a dry, padded place and removing batteries if you won’t use them for a while, which helps prevent corrosion. Flakiness often happens with cheaper models due to poor build quality. Brands like Fluke and Klein Tools are known for durability and reliability, even with occasional use. Investing in a mid-range tester rather than the cheapest option usually means better longevity and accuracy.
When comparing non-contact voltage testers and contact testers, are there situations in a typical home where one type is clearly safer or more effective than the other? I want to make sure I choose the right tester for checking outlets and switches.
For basic outlet and switch checks in a typical home, a non-contact voltage tester is often safer because it doesn’t require direct contact with wires, reducing your risk of electric shock. They’re great for quickly checking if wires or devices are live. However, contact testers are more effective if you need to confirm if a circuit is truly dead, as they give a more definitive reading. Use non-contact testers for simple presence checks and contact testers for detailed troubleshooting or when absolute certainty is needed.
If I want to use a continuity tester to figure out why a light fixture isn’t working, do I need to turn off the power first? Also, would you recommend a basic continuity tester or is it worth spending extra on a digital multimeter for most home repairs?
Always turn off the power before using a continuity tester, as these tools are designed for use on non-energized circuits. Testing a live circuit can be dangerous and may damage your tester. For most home repairs, a digital multimeter is a good investment because it can test both voltage and continuity, offering more versatility than a basic continuity tester.
The article mentions both non-contact and contact voltage testers. For a small business owner who frequently has to troubleshoot outlets and fixtures, is it worth investing in both types, or would one suffice for most everyday electrical repairs?
For a small business owner handling frequent outlet and fixture troubleshooting, having both non-contact and contact voltage testers is valuable. A non-contact tester quickly checks for live wires and is great for initial safety checks. A contact tester, like a multimeter, provides more detailed information, such as voltage level and continuity. While a non-contact tester covers basic needs, a contact tester is essential for accurate diagnosis, making both worthwhile for regular electrical repairs.
You mention key features to compare when selecting a voltage or continuity tester. What are the top features you personally look for in a tester for occasional DIY use, especially if I’m on a tight budget but still want something dependable?
For occasional DIY use on a budget, I focus on reliability, ease of use, and safety features. Look for testers with clear displays, audible indicators, and sturdy build quality. Essential safety certifications like CAT ratings are important, even for basic home work. I also prefer testers that can check both voltage and continuity, so you only need one tool. Brands with good reviews and basic warranties can offer extra peace of mind without breaking the bank.
If I only have the budget to get one tester right now, is it better to start with a voltage tester or a continuity tester for basic home repairs like outlets or light fixtures? Would one be enough to handle most beginner DIY electrical tasks?
For most basic home repairs like checking outlets or light fixtures, a voltage tester is the more versatile choice. It helps you safely confirm whether a circuit is live before you start working, which is essential for safety. While a continuity tester is useful for checking if a wire or connection is intact, a voltage tester will cover most beginner needs and is a safer starting point. One should be enough for most entry-level DIY tasks.
When selecting between non-contact and contact voltage testers for basic home repairs, is one generally considered safer or more reliable for beginners? Also, are there certain tasks where one type is definitely preferred over the other?
Non-contact voltage testers are generally considered safer for beginners because you don’t have to touch any wires, reducing the risk of shock. They’re great for quickly checking if a wire or outlet is live. However, contact testers are more reliable when you need precise readings, like checking if a wire is truly dead before working on it. For most basic troubleshooting, non-contact testers are preferred, but for confirming power is fully off, a contact tester is the better choice.
When you mention maintenance best practices for electrical testers, could you elaborate on how often these testers should be calibrated or checked to ensure accurate readings, especially for someone who does DIY work only occasionally?
For occasional DIY users, it’s a good idea to check your electrical tester’s accuracy at least once or twice a year. Many testers can be checked using their built-in self-test features or by verifying with a known voltage source, like a tested outlet. If you notice inconsistent readings or if the tester has been dropped, calibrate or replace it right away. Regular battery replacement also helps maintain accuracy.
You talk about maintenance best practices for electrical testers, but could you list some specific steps or routines to keep them accurate and reliable? Is there a recommended timeframe for recalibrating or replacing testers for someone who does regular DIY projects?
To keep your electrical testers accurate, always check the battery and replace it as needed, clean the probes with a soft cloth, and store them in a dry place to avoid moisture damage. Before each use, test your device on a known live circuit to confirm it’s working. For regular DIY use, recalibrate testers annually if possible, or at least every two years. Replace testers if you notice inconsistent readings, physical damage, or if they fail self-tests.
Could you explain a bit more about the differences between non-contact voltage testers and contact voltage testers when troubleshooting outlets or switches in an older home? I’m trying to figure out which one is safer and more reliable for basic DIY repairs.
Non-contact voltage testers let you detect the presence of voltage simply by holding the tester near an outlet or wire—no direct contact needed. This makes them very safe, especially in older homes where wiring might be unpredictable. Contact voltage testers, on the other hand, require you to touch a probe to the wire or terminal, which is more reliable for confirming voltage but does involve more risk. For basic DIY repairs, most people prefer the safety and convenience of a non-contact tester, but for verifying exact voltage presence, contact testers are more precise.
In the section about maintenance best practices, do you have suggestions for how frequently a homeowner should test their electrical tester itself to make sure it’s still working properly?
It’s a good idea for homeowners to check their electrical tester before every use, especially if it hasn’t been used in a while. This can be done by testing the device on a known live circuit or using the tester’s built-in self-test feature if it has one. Regular checks ensure accurate readings and help identify if the tester needs new batteries or repairs.