


Introduction: Why DIY HVAC Filter Replacement Matters
When it comes to home maintenance, few tasks deliver as much bang for your buck as regularly replacing your HVAC filter. Whether you’re battling seasonal allergies, seeking lower energy bills, or simply want your heating and cooling system to last longer, a clean filter is critical. Yet, many homeowners either neglect this simple chore or overcomplicate it, leading to poor air quality and unnecessary strain on their systems. This guide breaks down everything you need to know about DIY HVAC filter replacement—from choosing the right tools and filters to understanding the perfect replacement schedule, plus insider maintenance tips that go beyond the basics. If you’ve ever wondered, “Am I doing this right?” or “Which filter is best for my needs?”—you’re in the right place. With step-by-step instructions, troubleshooting advice, and practical maintenance secrets, you’ll confidently tackle this essential home upgrade, ensuring cleaner air and a more efficient home environment.
Understanding Your HVAC System and Filter Types
How HVAC Systems Use Filters
HVAC stands for Heating, Ventilation, and Air Conditioning. Your home’s HVAC system circulates air, and the filter captures dust, pollen, pet dander, and other contaminants. A clogged filter restricts airflow, causing your system to work harder—leading to increased energy bills and potential breakdowns.
Main Types of Home HVAC Filters
- Fiberglass Filters: Inexpensive, disposable, and offer basic dust protection. Best for budget-minded homeowners without allergies.
- Pleated Filters: Made from polyester or cotton paper. They trap finer particles and last longer than fiberglass.
- Electrostatic Filters: Use self-charging fibers to attract particles. Available as disposable and washable.
- HEPA Filters: Capture up to 99.97% of particles. Not always compatible with standard residential HVAC units, so check your manual.
- Washable/Reusable Filters: Eco-friendly and cost-effective over time. Require regular cleaning and drying.
MERV Ratings Demystified
Minimum Efficiency Reporting Value (MERV) rates filter effectiveness on a scale of 1-20. For most homes, MERV 8-12 is ideal—offering a balance between filtration and airflow. Higher ratings trap finer particles but may restrict airflow if your system isn’t designed for them.
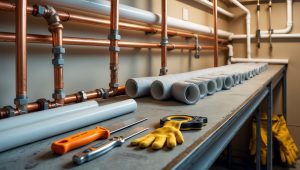
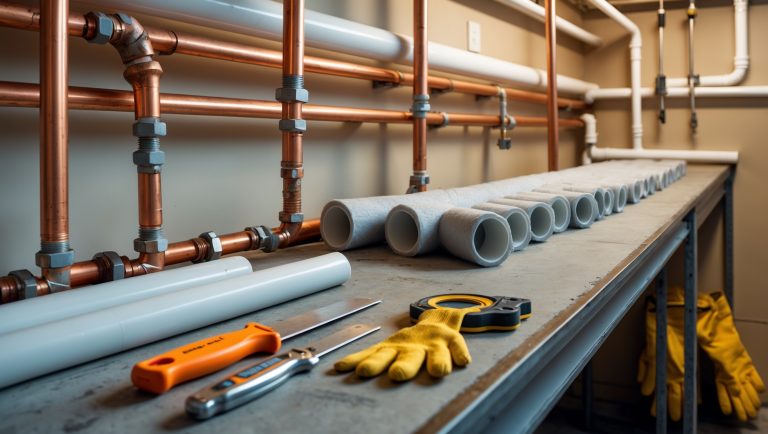
Essential Tools and Supplies for DIY Filter Replacement
- Replacement Filter: Check your HVAC manual or existing filter for size and type.
- Flathead Screwdriver or Nut Driver: For filter access panels that use screws.
- Shop Vacuum or Handheld Vacuum: To clean dust and debris around the filter slot.
- Flashlight or Headlamp: Illuminates tight or dimly-lit spaces.
- Gloves: Protect your hands from dust and sharp edges.
- Permanent Marker: For labeling the installation date on the filter.
Step-by-Step: How to Replace Your HVAC Filter
1. Turn Off the System
Safety first: Switch your HVAC system off at the thermostat or breaker. This prevents unfiltered air from circulating and protects you while working.
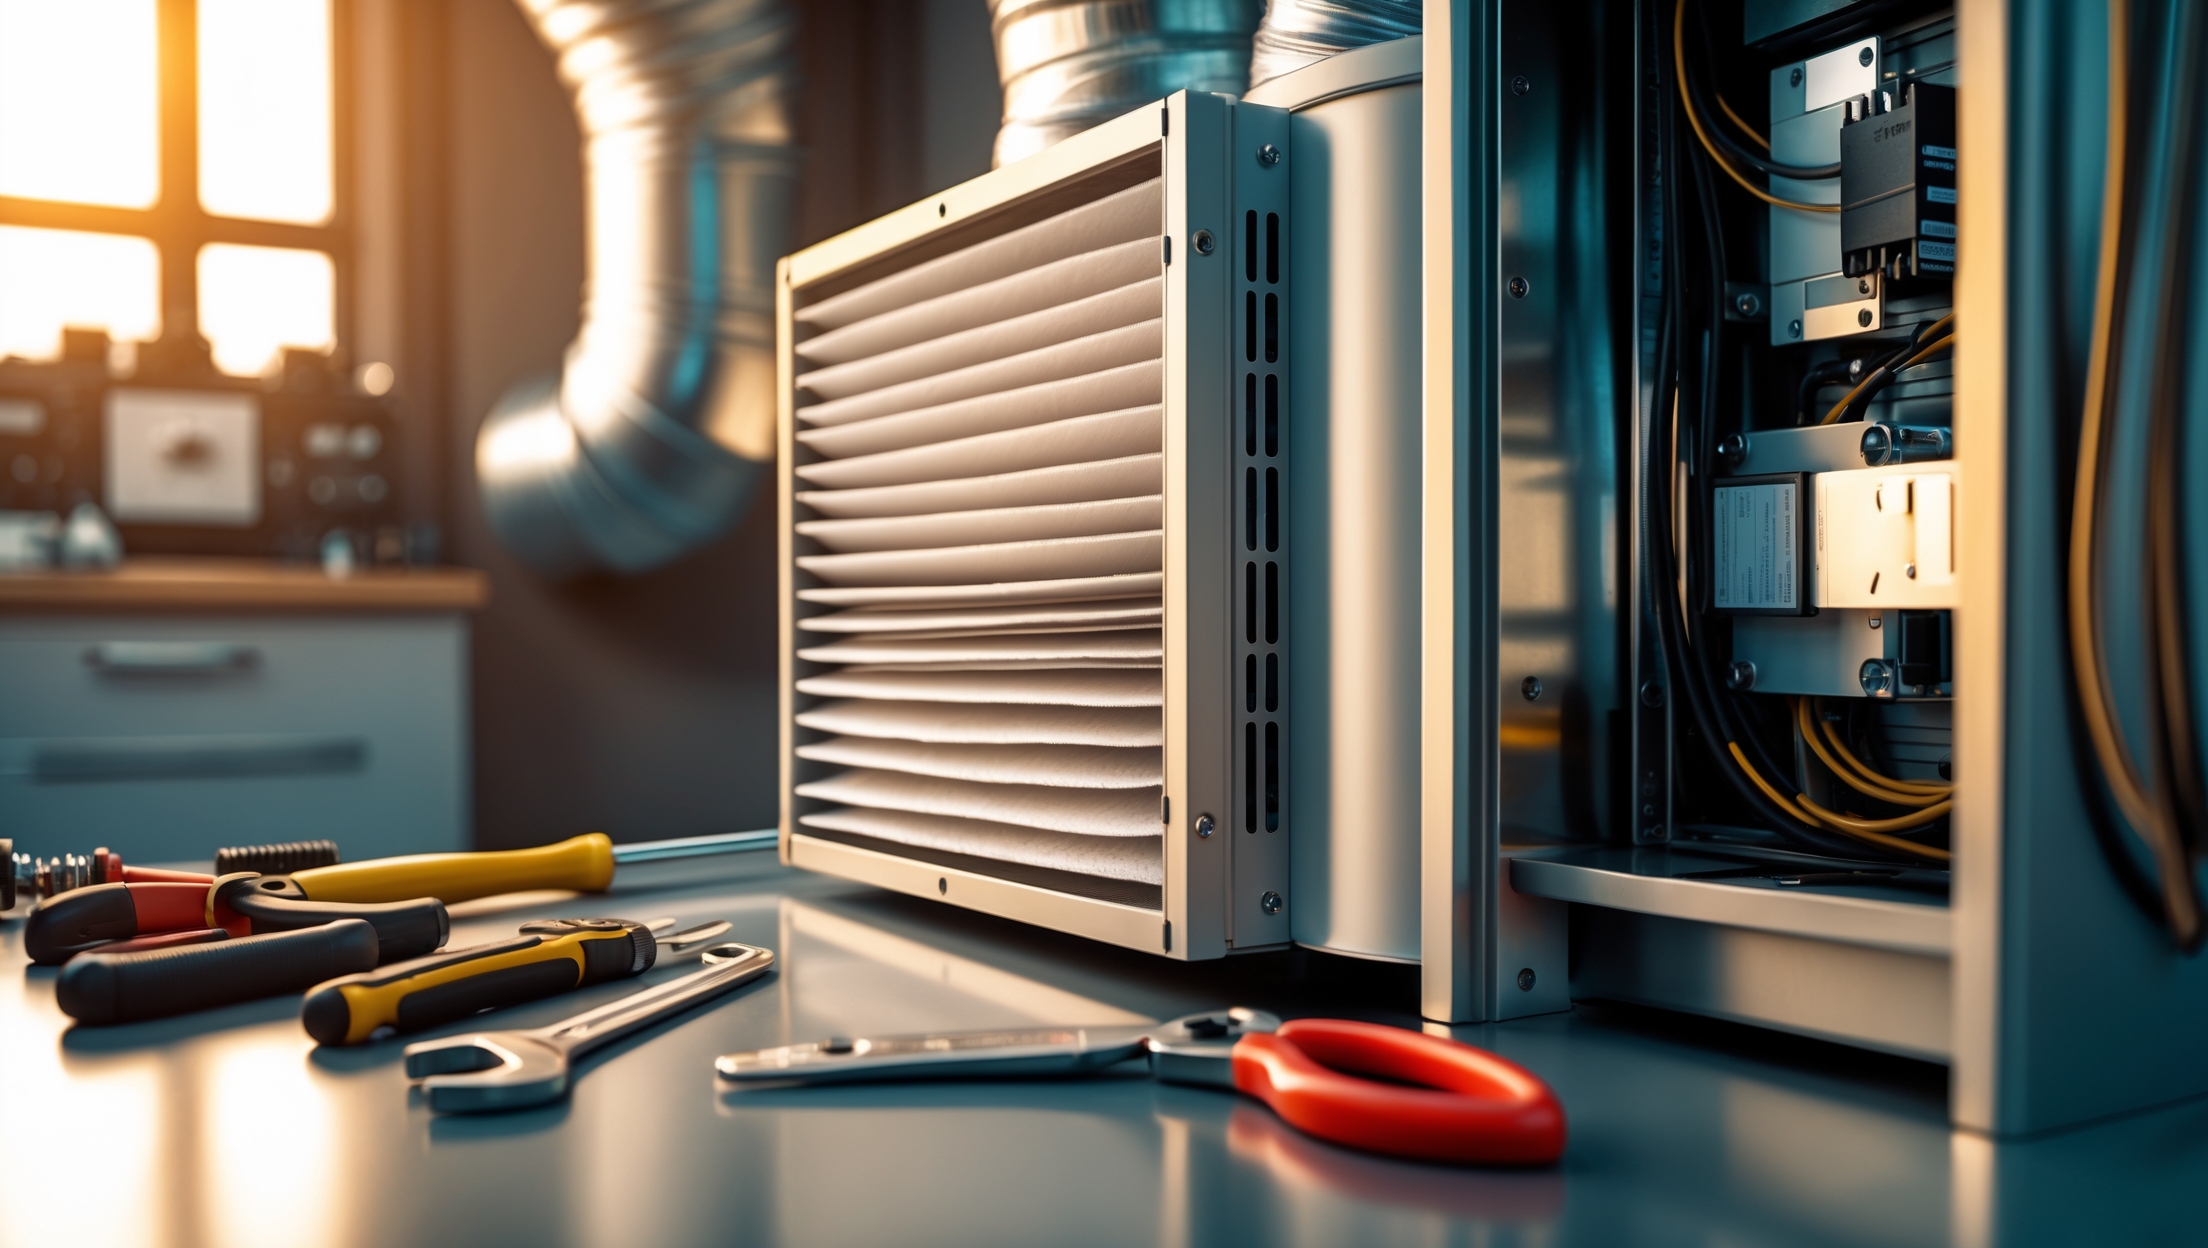
2. Locate the Filter Compartment
Common locations include behind a return air grille, inside a furnace or air handler, or within a ceiling or wall vent. Check your owner’s manual if you’re unsure.
3. Remove the Access Panel
If there’s a panel or grille, loosen screws or latches using your screwdriver or nut driver. Place the panel aside carefully.
4. Remove the Old Filter
Note the direction of the airflow arrows on the filter frame. Gently slide out the old filter—avoid shaking out dust. Inspect for excessive dirt, unusual discoloration, or damage (potential signs of system issues).
5. Clean the Filter Slot
Use a shop or handheld vacuum to remove built-up dust and debris from the slot and surrounding area. This step helps prevent contaminants from entering your system during installation.
6. Insert the New Filter
Ensure the airflow arrows on the new filter point toward the blower motor (usually into the ductwork). Slide the filter snugly into place, making sure it fits without bending or forcing.
7. Label and Log
Use a permanent marker to write the installation date on the filter’s edge. This helps you stay on schedule for the next replacement. Optionally, keep a maintenance log in a notebook or digital calendar.
8. Replace the Access Panel
Secure the panel or grille with screws or latches. Double-check for a tight, draft-free fit.
9. Turn the System Back On
Restore power at the breaker or thermostat. Listen for unusual noises and ensure proper airflow from vents.
Timing: How Often Should You Replace Your Filter?
Standard Recommendations
- Basic Fiberglass Filters: Every 30 days
- Pleated Filters: Every 60–90 days
- HEPA or High-MERV Filters: Every 6–12 months (if compatible)
- Washable Filters: Clean monthly, replace every 2–3 years
Factors That Affect Replacement Frequency
- Pets: More dander and hair require frequent changes
- Allergies or asthma: Use higher MERV filters and swap more often
- Location: Urban or wildfire-prone areas may need quicker changes
- Renovations: Construction dust can clog filters fast
- System usage: Heavy heating or cooling cycles shorten filter life
Pro Maintenance Secrets for Cleaner Air and Longer HVAC Life
Seal Filter Gaps
Use weatherstripping or foam tape if you notice air bypassing the filter. This ensures all air passes through the filter, maximizing efficiency and cleanliness.
Monitor Airflow and System Performance
If you notice reduced airflow or higher energy bills after a filter change, inspect for improper fit, incorrect MERV rating, or other installation issues. Persistent problems may indicate duct leaks or blower motor issues—consider a professional inspection.
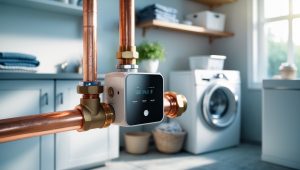
Upgrade to Smart Filter Reminders
Install a Wi-Fi thermostat or smart air quality monitor that tracks filter life and sends replacement alerts. Some even estimate filter wear based on usage, not just calendar days.
Combine with Seasonal Maintenance
Pair filter changes with other routine HVAC tasks: clean vents and registers, clear debris around outdoor units, and check for unusual noises or leaks. This holistic approach keeps your system in top shape year-round.
Choose the Right Filter for Your Needs
- Allergy sufferers: Opt for high-MERV pleated or electrostatic filters.
- Pet owners: Select filters designed for pet dander and hair.
- Eco-conscious: Try washable filters, but follow cleaning instructions carefully.
- Energy efficiency: Use the lowest MERV filter that meets your air quality needs to minimize system strain.
Common Mistakes—and How to Avoid Them
- Wrong Filter Size: Always check your old filter or system manual for correct dimensions.
- Incorrect Airflow Direction: Watch for arrows on the filter frame—installing backward reduces effectiveness and can damage your system.
- Overusing Filters: Set calendar reminders or use a maintenance log to change or clean filters on time.
- Skipping Cleaning: Neglecting the filter slot invites dust and reduces filter lifespan.
- Ignoring Unusual Noises: A whistling or rattling sound after replacement may signal an improper fit or panel issue—double-check your work.
Budgeting for Filter Maintenance: What to Expect
Filter Cost Breakdown
- Fiberglass: $1–$5 each
- Pleated: $5–$20 each
- Electrostatic: $10–$30 each
- HEPA: $20–$60 each
- Washable: $30–$80 (reusable for years)
Annual costs depend on filter type and replacement frequency. Pleated filters changed quarterly average $40–$80 per year for a standard home. Washable filters cost more upfront but pay off after 1–2 years.
Where to Buy
- Home improvement stores: Wide selection, instant pickup
- Online retailers: Greater variety, auto-ship options for convenience
- HVAC suppliers: Specialty filters and bulk discounts
DIY Troubleshooting: What to Check If You Have Issues
Persistent Dust or Allergy Symptoms
Try a higher MERV-rated filter and check for gaps around the filter slot. Clean ducts and vents if symptoms persist.
Reduced Airflow
Ensure you’re not using an overly restrictive filter for your system. Check for blockages or a dirty blower assembly.
Unusual Noises After Replacement
Double-check fit and panel installation. If noises continue, inspect for loose components or warped ductwork.
System Won’t Start
Check that you restored power and closed access panels fully. Some HVAC systems have safety switches tied to the access door.
Going Beyond: Advanced Tips for DIYers
Measure Air Quality
Invest in an indoor air quality monitor to assess the real impact of filter changes. These devices track particulate levels, humidity, and even VOCs—helping you select the right filter and replacement routine.
Seal and Insulate Ductwork
Leaky ducts can undermine even the best filters. Use foil tape or mastic to seal visible leaks, and consider adding insulation in unconditioned spaces.
Install Filter Alarms
Third-party filter slot alarms alert you if air bypasses your filter or if airflow is restricted, providing extra peace of mind.
Conclusion: Breathe Easier with Confident DIY HVAC Filter Care
Replacing your HVAC filter is a small task with big rewards. Cleaner indoor air, lower utility bills, and a longer-lasting system all start with this simple bit of DIY home care. Armed with the right tools, knowledge of filter types and ratings, and a practical maintenance schedule, you’ll sidestep common mistakes and keep your home’s air fresh and healthy. Don’t underestimate the power of consistency—set reminders, track changes, and pay attention to your indoor air quality. If you encounter persistent issues, don’t hesitate to consult a professional, but rest assured that most filter replacements are well within the reach of any motivated homeowner. With each filter swap, you’re not just maintaining equipment; you’re investing in your family’s comfort and well-being. So grab your gloves, check your filter size, and make HVAC filter replacement a cornerstone of your home maintenance routine. You—and your lungs—will thank you for years to come.
You mention that HEPA filters capture the most particles, but may not be compatible with all residential HVAC units. How can I tell if my current system can use a HEPA filter safely, and are there modifications needed to make it work?
To determine if your HVAC system can handle a HEPA filter, check your owner’s manual or contact the manufacturer for compatibility details. Most standard residential units aren’t designed for high-resistance HEPA filters and may suffer decreased airflow or strain. Installing a HEPA filter often requires system modifications like a stronger blower or a separate HEPA bypass unit. Consulting an HVAC professional before making changes is the safest approach.
The article talks about how a clogged HVAC filter can increase energy bills. How often should I realistically be checking and changing my filter if I have pets in the house or run the system constantly during summer?
If you have pets or use your HVAC system heavily in summer, it’s best to check your filter every month. Pet hair and dander can clog filters faster, and continuous use means more airborne particles get trapped. Most households in these situations need to change the filter every 1-2 months, but monthly checks let you adjust based on how dirty it gets.
When replacing my HVAC filter, how important is it to stick to the replacement schedule versus waiting until I see visible dirt? Sometimes my filter looks pretty clean at the recommended replacement time, so I wonder if I can stretch the intervals a bit.
It’s tempting to wait until your filter looks dirty, but HVAC filters can trap small particles you might not see. Following the recommended replacement schedule helps keep your system running efficiently and protects indoor air quality. Even if the filter appears clean, it may still be clogged with fine dust. Sticking to the schedule is a good habit, especially if you have pets, allergies, or live in an area with high pollen or dust.
I noticed you listed both pleated and electrostatic filters as options. In your experience, is there a big difference in how often these need to be replaced or cleaned? I’m trying to figure out which offers the best balance between maintenance and air quality.
Pleated filters usually need to be replaced every 2–3 months, while electrostatic filters are reusable and should be cleaned about once a month. Electrostatic filters can save money over time and are easy to rinse, but pleated filters generally trap finer particles, offering better air quality. If you want less frequent maintenance and top filtration, pleated is best. If you prefer to clean rather than buy new filters, electrostatic is a good choice.
If I’m trying to save on my energy bills, do pleated filters make a noticeable difference compared to fiberglass ones, or is the cost difference not really worth it in the long run?
Pleated filters generally trap more dust and allergens than fiberglass ones, which helps your HVAC system stay cleaner and operate more efficiently. While pleated filters cost a bit more, they may actually save you money by reducing strain on your system and potentially lowering energy bills. Over time, the improved air flow and protection can offset the higher upfront cost, making pleated filters a worthwhile investment for energy savings.
The article talks about insider maintenance tips that go beyond the basics. Could you share some examples of advanced filter care or troubleshooting steps for someone who’s already comfortable with regular replacements?
Absolutely! For advanced filter care, you might want to check the filter slot for dust buildup and vacuum it before installing a new filter. Inspect the filter housing for air leaks and consider sealing small gaps with HVAC tape. If you notice frequent clogging, check your home’s humidity levels or ductwork for leaks, as these can introduce extra dust. Lastly, keep an eye on airflow after replacement—if it’s still restricted, your blower or ducts could need cleaning.
If my HVAC system manual doesn’t mention whether it supports HEPA filters, is there a safe way to figure out compatibility before I buy one, or should I always stick to pleated or fiberglass?
If your HVAC manual doesn’t specify HEPA filter compatibility, it’s best not to assume it will work. HEPA filters often restrict airflow more than standard filters, which could strain your system. Before buying, check the filter slot size and model, and consult the manufacturer’s customer support or a qualified HVAC technician. Until you confirm compatibility, stick with pleated or fiberglass filters to avoid damaging your system.
If I want to use a washable or reusable filter to save money over time, are there specific maintenance steps or cleaning products I should avoid to prevent damaging the filter or the HVAC system?
When using a washable or reusable filter, rinse it gently with water—avoid strong jets that could tear the filter material. Don’t use harsh chemicals, bleach, or soap unless the manufacturer says it’s safe, as these can damage the filter or leave residues that harm your HVAC system. Let the filter dry completely before reinstalling to prevent mold growth.
I noticed you recommend regularly replacing filters to keep energy bills down. For households with multiple pets, would the typical replacement schedule change, and are there certain filter types that work better for homes with lots of pet hair and dander?
Households with multiple pets usually need to replace HVAC filters more often, typically every 1–2 months instead of the standard 3 months. Pet hair and dander can clog filters more quickly. For better results, look for filters labeled as high-efficiency or those with a higher MERV rating (8–13), as they are designed to capture smaller particles like pet dander.
I noticed you touched on reusable filters being eco-friendly. Are there any special cleaning methods or products you recommend for washable HVAC filters to ensure they don’t harbor mold or lose effectiveness over multiple uses?
For washable HVAC filters, rinse them thoroughly with warm water, ideally using a gentle spray to avoid damaging the material. If they’re especially dirty, you can use a mild dish soap. Make sure the filter is completely dry before reinstalling to prevent mold growth. Avoid harsh chemicals or high-pressure washers, as these can degrade the filter’s fibers and reduce effectiveness over time.
The article mentions that HEPA filters might not be compatible with all home HVAC systems. How can I tell if my system can handle a HEPA filter, and what risks are there if I install one that isn’t recommended?
To check if your HVAC system can handle a HEPA filter, review your system’s user manual or consult the manufacturer. HEPA filters are denser and can restrict airflow in systems not designed for them, which may strain the blower, reduce efficiency, and even cause damage over time. If you’re unsure, a qualified HVAC technician can assess your system and recommend suitable filter options.
I noticed you covered several filter types, including washable and disposable options. From a budget and maintenance perspective, is it actually cheaper and easier in the long run to go with reusable filters for a family with mild allergies?
For a family with mild allergies, washable (reusable) filters can save money over time since you don’t need to buy replacements regularly—just wash and reuse. However, they do require consistent cleaning, usually monthly, to stay effective. Disposable filters are easier since you just swap them out, but costs add up. If you’re comfortable with the extra maintenance, reusable filters can be both economical and effective for mild allergies.
If I’m mostly worried about keeping costs down, do budget fiberglass filters still do a decent job of protecting the HVAC system, or should I invest a bit more in pleated filters even if I don’t have allergies?
Budget fiberglass filters are affordable and will protect your HVAC system from large dust and debris, helping to keep it running reliably. However, they don’t catch smaller particles as effectively as pleated filters. If your main priority is keeping costs low and you don’t have allergies or pets, fiberglass filters are a reasonable choice, just be sure to change them regularly as recommended.
When you say to change filters on a regular schedule, does that vary much based on region or season? For example, do homes in the Southeast really need to swap them out more often during pollen season, or is the standard 3-month guideline enough?
The recommended 3-month guideline is a good rule of thumb, but it can vary depending on your region and season. In the Southeast, especially during heavy pollen seasons, you may need to replace your filter more often—sometimes even monthly—to maintain good air quality and system efficiency. Check your filter regularly, and if it looks dirty or clogged, it’s time to change it.
I see you recommend replacing filters regularly, but is there a way to gauge when a washable or electrostatic filter actually needs to be cleaned, especially if I have pets? Sometimes the usual schedules feel a bit generic for my needs.
You’re right—schedules are just a starting point, especially with pets in the home. For washable or electrostatic filters, check them visually every few weeks. If you see visible dust, hair, or discoloration, it’s time to clean them. You might also notice reduced airflow or extra dust settling around your vents, which are good signs the filter needs attention sooner than the usual schedule.
The article talks about the importance of replacing filters on schedule, but I often forget when the last replacement was. Are there any tricks or tools you recommend to help small business owners remember to replace filters on time?
A simple way to stay on track is to set recurring calendar reminders on your phone or computer, scheduling them based on your specific replacement interval. Some smart thermostats can alert you when it’s time to change filters. You might also keep a logbook near your HVAC unit to jot down each replacement date. These small habits can help make timely filter changes much easier to manage.
I see regular filter changes are important for lowering energy bills. Is there an average timeframe for how often filters should be replaced, or does it vary a lot depending on the type and local conditions? Just trying to plan this into my maintenance schedule.
The timeframe for replacing HVAC filters does vary, but a general guideline is every 1 to 3 months. If you have pets, allergies, or live in a dusty area, monthly changes are best. For less frequent use or minimal dust, you might stretch it to three months. Always check your filter every month to see if it looks dirty, and replace it as needed.
I noticed you mentioned that HEPA filters aren’t always compatible with standard residential HVAC units. Are there any risks or potential issues if someone tries to use a HEPA filter anyway, or would the system simply not function properly?
Trying to use a HEPA filter in a standard residential HVAC system can cause several issues. HEPA filters are much denser than regular filters, which can restrict airflow and make your system work harder. This might lead to reduced efficiency, higher energy bills, or even damage the blower motor over time. It’s best to use filters recommended by your HVAC manufacturer to avoid these problems.
When it comes to pleated vs. electrostatic filters, is there a big difference in how they impact airflow and energy bills over time? I’m hoping to choose a filter that balances air quality with keeping my costs low.
Pleated filters usually offer better air filtration than basic fiberglass types, but they can slightly restrict airflow if not changed regularly, which may increase energy costs. Electrostatic filters are designed to capture fine particles while maintaining good airflow and can be washed and reused. If you want a balance of air quality and energy efficiency, a high-quality pleated filter with a moderate MERV rating (8–11) is a reliable, cost-effective choice for most homes.
The article mentions that HEPA filters are not always compatible with standard residential HVAC units. How can I tell if my system will handle a HEPA filter, and what could happen if I use one that’s not recommended?
To check if your HVAC system can use a HEPA filter, consult your unit’s manual or contact the manufacturer. Most standard residential systems aren’t designed for HEPA filters because these restrict airflow more than typical filters. Using a non-recommended HEPA filter can strain your system, reduce efficiency, increase energy bills, and possibly damage components over time. It’s safest to use the filter type specified for your unit.
If I have indoor pets and mild allergies but also want to keep my energy bills reasonable, would you recommend going with pleated filters over electrostatic ones? Are there any key differences in maintenance between those two types?
Pleated filters are usually recommended for pet owners and allergy sufferers because they trap more dust, dander, and allergens than basic filters, and they don’t restrict airflow as much as some electrostatic options, helping keep energy bills in check. Electrostatic filters are washable and reusable, but they need regular cleaning and may not capture as many fine particles. Pleated filters are disposable and just need to be changed every 1–3 months, making them lower-maintenance overall.
I’m a little confused about the replacement schedule you mentioned. Is there a general timeframe you recommend for switching out pleated filters versus fiberglass ones, or does it mainly depend on whether you have pets or allergies?
Pleated filters generally last about 3 months, while fiberglass filters often need replacement every 1 to 2 months. However, if you have pets, allergies, or a lot of dust, it’s best to check and possibly change them more often—sometimes monthly. Regularly inspecting your filter is the easiest way to know if it needs changing sooner.
You say fiberglass filters are budget-friendly but only offer basic protection, while pleated filters trap finer particles. For a small business with a lot of foot traffic, would you recommend upgrading to pleated, or is fiberglass sufficient?
For a small business with high foot traffic, pleated filters are a better choice than fiberglass. They capture smaller particles like dust, pollen, and even some bacteria, which helps improve air quality for customers and staff. The extra filtration is especially useful in busy areas. While pleated filters cost a bit more, their performance makes them worth it in high-use environments.
I noticed you mentioned that HEPA filters aren’t always compatible with standard residential HVAC units. How can I find out if my system can handle a HEPA filter, or could using one cause any issues?
To determine if your system can handle a HEPA filter, check your HVAC unit’s manual or contact the manufacturer with your model number. Many standard units aren’t designed for the dense material of HEPA filters, which can restrict airflow and strain the blower motor. If in doubt, ask a licensed HVAC technician to evaluate your system before making any changes.
Can you clarify what extra maintenance steps go beyond just swapping the filter? I replace mine regularly, but I’m not sure what else I might be missing to keep my system efficient.
Besides changing the filter, you can keep your HVAC system efficient by vacuuming dust from the air vents and registers, checking for debris around the outdoor unit, ensuring the condensate drain line isn’t clogged, and making sure your thermostat works properly. It’s also wise to inspect visible ductwork for leaks or buildup. Scheduling professional maintenance once a year can help catch any issues you might miss.
If I’m mainly concerned about lowering my energy bills and don’t have allergies, would you recommend sticking with basic fiberglass filters, or is it worth investing in pleated or electrostatic filters for a long-term payoff?
If lowering your energy bills is your main goal and you don’t have allergies, basic fiberglass filters are a good, cost-effective choice. They offer low airflow resistance, which can help your HVAC system run more efficiently. Pleated or electrostatic filters capture more particles but can slightly reduce airflow and cost more. Unless air quality is a top concern, sticking with fiberglass filters should work well for you.
You mentioned that HEPA filters might not be compatible with some standard residential HVAC systems. How can I tell if my unit will work with a HEPA filter, and is it worth modifying my system for better air quality?
Check your HVAC system’s manual or look at the filter slot size to see what type of filters it supports. Most standard residential units aren’t designed for true HEPA filters, as these can restrict airflow and strain your system. Upgrading to HEPA is only recommended if your unit is compatible or if an HVAC professional can safely modify it. Alternatively, high-quality pleated filters with a higher MERV rating offer better air filtration without major modifications.
The article talks about the importance of a good replacement schedule for filters. For a household with pets and allergy concerns, how often should filters realistically be changed, and are there any maintenance secrets that apply specifically to these situations?
For homes with pets and allergy concerns, it’s best to change your HVAC filters every 1 to 2 months rather than the typical 3-month interval. Pet hair and dander can clog filters faster, and more frequent changes help keep allergens in check. As a maintenance tip, vacuum around vents regularly and consider using high-efficiency (HEPA) filters for extra protection against allergens.
I noticed you listed both pleated and electrostatic filters as options for better air quality. Is there a significant performance or maintenance difference between those two, particularly if I have pets and mild allergies?
Pleated filters generally trap more dust, dander, and allergens than basic filters, making them a solid choice for homes with pets and mild allergies. Electrostatic filters use static electricity to attract particles and can be reusable, but their effectiveness varies by brand. Pleated filters usually need replacing every 2–3 months, while electrostatic ones require monthly washing. For consistent performance with pets and allergies, pleated filters are often favored, but electrostatic filters can be cost-effective with regular cleaning.
I saw you mentioned that HEPA filters aren’t always compatible with standard residential systems. How do I know for sure if my HVAC can handle a HEPA filter, and what could happen if I use one that’s not recommended?
To find out if your HVAC system can handle a HEPA filter, check your system’s manual or ask your HVAC manufacturer or a professional technician. HEPA filters restrict airflow more than standard filters, which can strain your system, reduce efficiency, or even cause damage if your system isn’t designed for them. It’s always safest to use the type of filter your system recommends.
After replacing the filter, are there any signs I should look for to make sure I installed it correctly and the system is working efficiently? I’m worried I might miss something and accidentally mess up my HVAC system.
Once you’ve replaced your HVAC filter, check that the airflow feels normal from your vents and listen for any unusual noises from the system. Make sure the filter sits snugly in its slot with the airflow arrow pointing in the correct direction. If you notice rattling, reduced airflow, or the filter is not secure, double-check the installation. Also, monitor your energy bill and indoor air quality in the weeks after—if all seems steady, you likely did everything right.
I’m a small business owner with a couple of rental properties, and I’m wondering if pleated filters are worth the extra expense compared to basic fiberglass ones. Are there signs that the cheaper filters just aren’t cutting it, especially if my tenants have pets?
Pleated filters generally offer better filtration than basic fiberglass ones, capturing more dust, pet dander, and allergens. For rentals where tenants have pets, you might notice faster buildup of dust around vents or inside units when using cheaper filters—this is a sign they’re not trapping enough particles. Pleated filters can help improve air quality, protect your HVAC system, and reduce the frequency of maintenance issues, which can save you money and hassle over time.
If my energy bills have recently gone up but my filter still looks relatively clean, could there be other HVAC maintenance issues I should check for beyond just replacing the filter?
Yes, there could be other HVAC issues affecting your energy bills aside from the filter. Check for blocked vents, dirty coils, thermostat calibration, and duct leaks. Also, make sure your system is properly sized for your home and that nothing is obstructing the outdoor unit. Scheduling a professional tune-up can help identify and fix less obvious problems.
You touch on replacement schedules in the guide—could you clarify if factors like running the HVAC more during extreme weather or having multiple people in the home should change how often filters are replaced?
Yes, both increased HVAC usage during extreme weather and having more people in your home can mean your filters collect dust and debris more quickly. In these situations, it’s a good idea to check your filters monthly instead of waiting for the typical 2-3 month replacement period. If they look dirty sooner, replace them to keep your air clean and system running efficiently.
If I switch to a reusable electrostatic filter, are there any special cleaning methods or maintenance routines I should follow to keep it performing as well as a new disposable filter?
Reusable electrostatic filters do need some extra care compared to disposable ones. About once a month, remove the filter and rinse it gently with water. You can use a mild detergent if there’s heavy buildup, but always let it dry thoroughly before reinstalling. Avoid using high-pressure sprays or harsh chemicals, as these can damage the filter material and reduce effectiveness.
You mention that a clogged filter can increase energy bills and cause breakdowns. If my airflow is already weak after replacing the filter, what troubleshooting steps should I try before calling a professional?
If your airflow is still weak after replacing the filter, check that the filter is installed correctly and matches the size recommended for your system. Make sure all air vents and registers are open and not blocked by furniture or dust. Inspect your thermostat settings to ensure the fan is set properly. Also, look for any visible obstructions or debris around the indoor unit and return grilles. If these steps don’t help, it might be time to consult a professional.
The article recommends a replacement schedule but doesn’t specify how to adjust if I have multiple pets or live in an area with heavy pollen. Would you suggest changing the filter more often in those cases, and if so, by how much?
If you have multiple pets or live in a high-pollen area, it’s a good idea to change your HVAC filter more frequently than the standard recommendation. Instead of every three months, consider replacing the filter every one to two months. This helps maintain good air quality and keeps your system running efficiently. Always check the filter monthly, especially during peak shedding or pollen seasons.
I have pets and mild allergies, so I’m trying to figure out if pleated filters or electrostatic filters would be more effective for my situation. Do you have any practical insights into how often each type really needs replacing and how well they work for pet owners?
For homes with pets and mild allergies, pleated filters usually do a great job trapping pet dander and allergens, and they generally need replacing every 1–3 months depending on shedding and air quality. Electrostatic filters can also be effective, especially the washable kind, but require monthly cleaning to maintain efficiency. Pleated filters often provide better filtration overall for pet owners, but may need more frequent changes if you have multiple pets.
If I have allergies and want better air quality, should I try a HEPA filter even if my HVAC manual doesn’t say anything about compatibility? Is there any downside to using a higher-rated filter than what is standard?
Using a HEPA or higher-rated filter can improve air quality for allergies, but it’s important to check if your HVAC system can handle it. Higher-rated filters may restrict airflow, making your system work harder or less efficiently. If your manual doesn’t mention HEPA compatibility, consult with an HVAC professional before upgrading, or consider using the highest MERV rating your system supports safely.
You mentioned that HEPA filters aren’t always compatible with standard residential HVAC units. How can I tell if my system can actually handle a HEPA filter, and what could happen if I try to use one that’s not recommended?
To check if your HVAC system can use a HEPA filter, review your unit’s manual or contact the manufacturer. HEPA filters are much denser than standard filters, so using one in an incompatible system can restrict airflow, making your HVAC work harder and possibly causing damage or reduced efficiency. Always use the filter type and size specified for your system.
In your maintenance section, do you have any tips for remembering when to replace the filter? I tend to forget, especially since timing can depend on things like pets or allergies. Are there any easy routines or reminders you use?
It’s easy to lose track of filter replacement, especially with factors like pets or allergies. Setting a recurring calendar reminder on your phone or using a smart home app can help. You might also write the replacement date on the filter itself. For pet owners or allergy sufferers, try checking the filter monthly, even if it doesn’t always need changing.
I understand a clogged filter can increase energy bills, but I’m not sure how often to check mine. Are there certain signs or symptoms (besides dirty air) I should look for to know it’s time to change the filter earlier than the recommended schedule?
Absolutely, besides visible dirt, there are a few signs that your HVAC filter may need changing sooner. If you notice reduced airflow from your vents, more dust settling around your home, unusual HVAC noises, or your system running longer than usual, these can all suggest a clogged filter. Also, if anyone in your household has allergies worsening, it could be a sign the filter isn’t working efficiently.
Could you elaborate on how often pleated filters should be replaced compared to fiberglass filters? I want to keep my energy bills low but also avoid frequent trips to the store.
Pleated filters typically last about 3 months before needing replacement, while fiberglass filters should be changed every 1 to 2 months. Pleated filters are more efficient at trapping dust and allergens, so they help maintain good airflow and can slightly lower energy bills if replaced regularly. If you want fewer store trips, pleated filters might be a better choice for your needs.
The article mentions that HEPA filters aren’t always compatible with standard residential HVAC units. If I want better filtration for allergies but my system isn’t rated for HEPA, what filter type would be the next best option without risking airflow issues?
If your HVAC system isn’t designed for HEPA filters, a high-quality pleated filter with a MERV rating between 8 and 13 is typically the best alternative. These filters capture smaller particles like pollen and dust without overly restricting airflow. Just make sure your system can handle the selected MERV rating—check your unit’s manual or consult a technician to be safe.
As someone trying to keep maintenance costs down, is it more economical in the long run to use washable filters versus replacing pleated or fiberglass filters every few months?
Washable filters can be more economical over time since you only purchase them once and clean them regularly, rather than buying new pleated or fiberglass filters every few months. However, you’ll need to factor in the time and effort required to clean them properly. If you’re comfortable with the upkeep, washable filters usually pay off after a year or so of use, making them a good budget-friendly option for many homeowners.
After replacing my HVAC filter, are there any particular signs I should watch for to make sure I installed it correctly and that my system is running efficiently?
After replacing your HVAC filter, check that air flows freely from your vents and listen for any unusual noises from the system. Make sure the filter is installed in the correct direction (look for arrows on the frame), and the filter fits snugly without gaps. If you notice restricted airflow, rattling, or a sudden increase in dust around your home, double-check the installation.
About the replacement schedule—if we run our HVAC almost constantly in the summer, is there a general rule for how much more often I should be swapping the filter compared to what’s recommended for average use?
If your HVAC runs nearly nonstop during summer, it’s wise to replace your filter more often than the standard recommendation. Instead of every 90 days (average use), check and likely replace it every 30 to 45 days. Heavy use means the filter clogs faster, so monthly checks will help keep your system running efficiently and maintain good air quality.
If I run a small business out of my home and have clients coming in, would you recommend upgrading from basic fiberglass filters to pleated or electrostatic filters to improve air quality, or is that overkill?
Upgrading to pleated or electrostatic filters can be a smart choice if you have clients visiting regularly. These filters trap smaller particles, helping to improve indoor air quality by reducing dust, allergens, and other pollutants. It’s not overkill, especially if you want to create a healthier environment for your clients and make a positive impression.
The article mentions that a clogged filter can increase energy bills. Is there a rule of thumb for how much a dirty filter might impact monthly costs, or any warning signs before seeing a big jump in utility bills?
A clogged filter can increase your HVAC energy use by 5 to 15 percent, which could noticeably raise your monthly bill. Before costs spike, watch for warning signs like more dust at home, weaker airflow from vents, or your system running longer than usual. Replacing filters regularly helps prevent unexpected jumps in utility bills.
You talked about both pleated and electrostatic filters as options for capturing finer particles. Is there a noticeable difference in how often these need to be replaced, or does one type tend to last longer than the other in a typical home?
Pleated filters and electrostatic filters can differ in how long they last. Pleated filters usually need replacing every 2 to 3 months, though high-quality ones might last up to 6 months depending on usage and air quality. Electrostatic filters, especially the washable types, can last longer if cleaned regularly—typically every month. So, electrostatic filters may offer longer service with proper maintenance, but pleated filters are often replaced more frequently.
You list several filter types, like fiberglass, pleated, and electrostatic. Is there a noticeable difference in how often I need to replace each type, or can I expect to stick with the same schedule as long as the filter fits my system?
There is definitely a difference in replacement schedules based on the filter type. Fiberglass filters usually need changing every 30 days, while pleated filters often last about 90 days. Electrostatic filters can last even longer if they’re washable, sometimes several months with regular cleaning. It’s best to follow the specific guidelines for your filter type rather than using the same schedule for all.
About the maintenance tips—if I replace my HVAC filter regularly but still notice a lot of dust in my home, could that mean I’m missing another step? What else should I check for better indoor air quality?
If you’re still seeing a lot of dust after changing your HVAC filter regularly, it’s possible other sources are at play. Check for leaky ducts, as gaps can pull in dust from attics or crawl spaces. Make sure vents and registers are clean, and vacuum with a HEPA filter often. You might also consider upgrading to a higher MERV-rated filter if your system allows it, and ensure your home is properly sealed to prevent outdoor dust from coming inside.
When it comes to the maintenance tips beyond just swapping out the filter, what are some warning signs that indicate the HVAC system might already be under strain from a clogged or mismatched filter? I want to avoid costly repairs.
Some warning signs that your HVAC might be struggling due to a clogged or incorrect filter include weak airflow from vents, uneven room temperatures, unusual noises from the unit, and higher energy bills than usual. You might also notice the system running longer than normal to reach the set temperature. Addressing these early can help prevent more expensive repairs down the line.