


Introduction: Why Smart Thermostat Integration Kits Matter for DIYers
Smart thermostats have revolutionized home climate control, offering energy savings, remote access, and intelligent scheduling. But for many homeowners, the biggest barrier to upgrading is integration—specifically, ensuring your new thermostat works seamlessly with your existing HVAC system. That’s where smart thermostat integration kits come in. These kits bridge the gap between advanced smart thermostats and the sometimes outdated wiring or hardware found in many homes. If you’re a DIYer looking to simplify your next home upgrade, choosing the right integration kit can mean the difference between a smooth, one-hour install and a frustrating, day-long ordeal.
This guide is designed for hands-on homeowners who want a hassle-free smart thermostat installation. We’ll compare the leading integration kits, break down compatibility, offer detailed setup guidance, and tackle common troubleshooting scenarios. If you’re ready to level up your home’s comfort and efficiency, but want to be confident in your toolkit and your process, read on for practical, expert advice.
Understanding Smart Thermostat Integration Kits
What Is a Smart Thermostat Integration Kit?
At its core, an integration kit is a collection of adapters, wiring modules, and sometimes relay devices that bridge compatibility gaps between smart thermostats and a wide variety of HVAC systems. These kits solve common problems like missing C-wires, incompatible voltage, or unique system architectures found in older homes.
- C-Wire Adapters: For systems lacking a dedicated common wire (C-wire), which is essential for powering most smart thermostats.
- Voltage Converters: For homes with line-voltage systems incompatible with most low-voltage smart thermostats.
- Relay Modules: For complex setups such as multi-stage HVAC, heat pumps, or dual-fuel systems.
Why Not Just Use the Thermostat Out of the Box?
While some homes are “plug-and-play” ready, many aren’t. Integration kits save you from running new wires through walls, hiring an electrician, or risking damage to expensive equipment. For DIYers, they’re the key to a professional-grade finish—without the professional price tag.
Top Smart Thermostat Integration Kits: In-Depth Comparison
Below, we compare the most popular and reliable integration kits on the DIY market. Selection criteria include ease of installation, compatibility, build quality, and included support resources.
1. Nest Power Connector
- Best for: Homes with no C-wire, compatible with Nest thermostats
- Included: Power connector, mounting hardware, detailed instructions
- Installation Difficulty: Low—color-coded wires, no need to access HVAC board in most cases
- Pros: Seamless integration, reliable power delivery, compact design
- Cons: Only works with Nest models, not universal
2. ecobee Power Extender Kit (PEK)
- Best for: Homes with no C-wire, compatible with ecobee thermostats
- Included: PEK module, quick-connect wires, adhesive backing
- Installation Difficulty: Moderate—requires access to furnace control board
- Pros: Reliable, supports multi-stage systems
- Cons: Not universal, requires opening furnace panel
3. Venstar Add-a-Wire Adapter
- Best for: Any low-voltage smart thermostat, homes missing extra wires
- Included: Adapter module, wiring harness, mounting tape
- Installation Difficulty: Moderate—requires basic wiring skills
- Pros: Universal compatibility, works with most brands
- Cons: Can be bulky inside tight control boards, limited support for complex HVAC
4. Honeywell C-Wire Power Adapter
- Best for: Honeywell smart thermostats, no C-wire situations
- Included: C-wire adapter, mounting hardware, step-by-step guide
- Installation Difficulty: Low to moderate
- Pros: Durable, clear instructions
- Cons: Not designed for non-Honeywell models
5. Aube RC840T-240 Relay
- Best for: Homes with line-voltage baseboard heaters
- Included: Relay module, wiring diagram
- Installation Difficulty: High—requires comfort with electrical wiring
- Pros: Enables smart thermostat use with high-voltage heating
- Cons: Not a DIY project for beginners, professional install recommended for safety
6. Lux GEO C-Wire Adapter
- Best for: Lux smart thermostats, basic C-wire adaptation
- Included: Adapter, wire labels, instructions
- Installation Difficulty: Low
- Pros: Simple, cost-effective
- Cons: Limited brand compatibility
How to Choose the Right Integration Kit for Your Home
Step 1: Identify Your HVAC System Type
Before you select an integration kit, it’s crucial to know your system’s wiring and voltage type. Remove your existing thermostat cover and look for the following:
- Number and color of wires: Most smart thermostats need at least four wires (often labeled R, W, Y, and G). A C-wire (common wire) is often blue or black.
- Voltage: Low-voltage systems (24V) are most common. Line-voltage (120V or 240V) systems require specialized adapters.
- System complexity: Heat pumps, multi-stage heating/cooling, and dual-fuel setups may need extra relays or modules.
Step 2: Match Kit to Thermostat Brand and Model
Most major smart thermostat brands (Nest, ecobee, Honeywell, Lux) offer their own integration kits, optimized for their hardware. Universal kits like the Venstar Add-a-Wire are ideal if you’re mixing brands or want flexibility for future upgrades.
Step 3: Assess Your Comfort Level with Electrical Work
Some kits require simple wire splicing at the thermostat location, while others demand access to the furnace control board or even working with high-voltage wiring. Choose a kit that matches your DIY experience, and never hesitate to hire a pro if you’re unsure—especially with line-voltage systems.
Step 4: Consider Support and Troubleshooting Resources
Look for kits that come with:
- Clear, visual instructions
- Online video tutorials
- Customer support (phone, chat, or email)
- Active online user communities
If you hit a snag, robust support can save you hours of frustration.
Step-by-Step Setup: Installing a C-Wire Adapter Kit
Below is a general guide for installing a C-wire adapter, the most common integration need. Always follow the brand-specific instructions included with your kit.
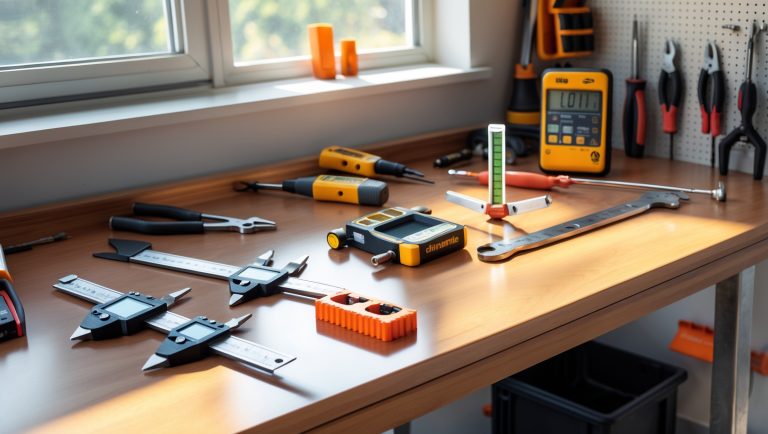
Tools and Materials Needed
- Integration kit (e.g., Venstar Add-a-Wire, ecobee PEK, or Nest Power Connector)
- Phillips and flathead screwdrivers
- Wire stripper/cutter
- Voltage tester (for safety)
- Smartphone or camera (to take reference photos of wiring)
DIY Installation Steps
- Turn Off Power: Shut off your HVAC system at the circuit breaker to prevent shock or damage.
- Remove Old Thermostat: Unscrew and disconnect wires, labeling them as you go if not already labeled.
- Access Control Board (if needed): For some kits, you’ll need to open the furnace panel to reach the wiring terminals.
- Connect Adapter Module: Follow the kit’s wiring diagram to splice the adapter in place. For example, with the Venstar Add-a-Wire, connect the module to the G (fan) wire at both the thermostat and control board locations.
- Reattach Wires: Connect all wires to the smart thermostat base using the labeled terminals.
- Secure Everything: Mount the adapter module using included tape or screws. Tidy up wires to prevent pinching or interference.
- Restore Power and Test: Turn the breaker back on. Follow the thermostat’s setup process, confirming Wi-Fi connectivity and HVAC response.
Common Pitfalls and How to Avoid Them
- Wiring Mix-Ups: Take photos before disconnecting anything. Double-check with the wiring diagram.
- Loose Connections: Tug gently on each wire to ensure it’s secure in the terminal block.
- Forgotten Breakers: Always turn off power—HVAC boards are sensitive and expensive to replace.
- Misreading the System Type: Don’t assume your system is low-voltage; check the voltage rating on the control board or consult your HVAC manual.
Troubleshooting: When Things Don’t Go as Planned
Symptom: Thermostat Won’t Power On
- Check: Is the C-wire or adapter properly connected at both ends?
- Solution: Re-seat all wires; ensure breaker is on; inspect adapter for damage.
Symptom: HVAC System Doesn’t Respond
- Check: Are the R, W, Y, and G wires correctly matched to the terminals?
- Solution: Power cycle the furnace and thermostat; verify wiring order.
Symptom: Thermostat Reboots or Disconnects Frequently
- Check: Is the adapter delivering sufficient, stable power?
- Solution: Try a different power adapter or consult the kit’s support resources.
Maintenance Best Practices for Smart Thermostat Integration Kits
- Inspect Connections Annually: Remove the thermostat faceplate and check for corrosion or loose wires.
- Update Firmware: Keep your smart thermostat’s software up to date for optimal performance and new features.
- Check Adapter Placement: Ensure modules or adapters are still firmly mounted and not exposed to moisture or excessive heat.
- Monitor for Error Codes: Many smart thermostats will alert you to power or communication issues—don’t ignore these warnings.
Frequently Asked Questions (FAQs)
Can I use a universal adapter with any smart thermostat?
Most universal adapters (like Venstar Add-a-Wire) are compatible with a wide range of low-voltage thermostats, but always check the manufacturer’s list. Some advanced features (multi-stage, heat pump) may require brand-specific kits.
What if my system uses high-voltage (line voltage)?
You’ll need a relay module (e.g., Aube RC840T-240) to safely convert high-voltage to a level safe for smart thermostats. If you’re not comfortable with electrical work, hire a licensed electrician.
Will using an adapter void my thermostat warranty?
As long as you follow installation instructions and use recommended kits, most major brands honor their warranties. Improper wiring or non-approved adapters may void coverage—always check the fine print.
Conclusion: Simplifying Your Smart Thermostat Upgrade
Upgrading to a smart thermostat is one of the most rewarding home improvements—both for the comfort it brings and the energy savings it delivers. But the real secret to a successful DIY installation is choosing the right integration kit for your system. By investing a little time up front—identifying your wiring, selecting a compatible kit, and following detailed setup steps—you can avoid the most common pitfalls and enjoy a smooth, professional-quality upgrade.
Each integration kit has its strengths: brand-specific adapters (like Nest Power Connector or ecobee PEK) offer streamlined installation for their respective thermostats, while universal options (like Venstar Add-a-Wire) provide unmatched flexibility for mixed-brand or future-proof setups. For more complex or high-voltage systems, specialized relays open up smart thermostat benefits to homes that might otherwise be left behind.
Before you start, gather your tools, read through the instructions, and don’t hesitate to leverage manufacturer resources or DIY communities. If you ever feel out of your depth—especially with high-voltage wiring—remember that safety always comes first. Sometimes, calling in a professional for a quick consult is the smartest DIY move you can make.
With the right integration kit and a methodical approach, you’ll be able to upgrade your home’s comfort, boost energy efficiency, and enjoy the full capabilities of your chosen smart thermostat—all without unnecessary headaches. Happy DIYing!


You mentioned that some kits have relay modules for complex setups like heat pumps or dual-fuel systems. How can I tell before buying which kit is actually compatible with my specific multi-stage HVAC system?
To make sure a kit works with your multi-stage HVAC system, check the kit’s compatibility list or detailed specs before buying. Look for terms like ‘multi-stage,’ ‘two-stage,’ or specific support for heat pumps and auxiliary heat. If the documentation isn’t clear, contact the manufacturer with your system’s model and wiring details—they can confirm compatibility.
In your comparison of integration kits, do you mention whether any of them are particularly well-suited for homes without a C-wire but with older two-wire heating systems? I’m curious if certain kits are easier for true DIYers to install in these trickier setups.
Yes, the article specifically highlights which integration kits cater to homes without a C-wire and older two-wire heating systems. It points out kits that include power adapters or add-a-wire solutions, making them easier to install for DIYers in such setups. The descriptions note which ones require minimal wiring changes and provide clear instructions, helping you pick an option that’s truly hassle-free for older systems.
For someone on a tight budget, what features should I focus on in an integration kit to make sure I don’t end up with extra components I don’t need for a basic single-stage furnace upgrade?
For a basic single-stage furnace, you only need the essentials: a C-wire adapter if your thermostat wiring doesn’t include a C-wire, and clear instructions for installation. Avoid kits with extra relays, multi-stage or heat pump support, or extra sensors since those are for more complex systems and will just add unnecessary cost.
As a small business owner, I’m worried about both downtime and costs. Do the more budget-friendly integration kits deliver reliable performance, or is it worth investing more upfront to avoid troubleshooting headaches down the road?
Budget-friendly integration kits can work well for simpler setups, but they may lack advanced features or require more setup time, which can lead to unexpected troubleshooting. Investing a bit more upfront often gets you better support, easier installation, and more robust compatibility—especially important for businesses where downtime affects operations. It’s usually worth choosing a kit known for reliability and strong customer service to minimize hassles later.
Could you clarify how to tell which integration kit I need if my HVAC system is missing a C-wire but also has a pretty unusual setup? Are there certain brands or kits that are better for more complex, older wiring situations?
To choose the right integration kit for a system without a C-wire and an unusual setup, start by identifying your HVAC wiring at the control board—note any unique wire colors or connections. Some smart thermostat kits, like those from ecobee and Nest, include power extenders or adapters specifically for older or complex systems. These brands are often more flexible with non-standard wiring, but double-check their compatibility charts and consider contacting their support with your wiring details for extra guidance.
I have an older building with a pretty outdated HVAC system and no dedicated C-wire. Based on your comparison, which integration kit would you recommend that handles missing C-wires most reliably, especially for someone who’s not an experienced electrician?
For an older building without a dedicated C-wire, the Venstar Add-A-Wire kit stands out as the most reliable and user-friendly option from our comparison. It’s specifically designed to address missing C-wire issues and is known for straightforward installation, even for those with limited electrical experience. Just follow the included instructions carefully, and you should be able to upgrade your thermostat without major hassle.
You mention voltage converters for homes with line-voltage systems. Do any of the leading integration kits handle both voltage conversion and C-wire supplementation, or would I typically need to buy two separate products for a more complex setup?
Most leading integration kits focus on either voltage conversion or C-wire supplementation, but rarely both in a single package. If you have a line-voltage system and also need a C-wire adapter, you’ll typically need two separate products: a voltage converter to step down the power for the thermostat and a C-wire kit to provide constant power. Double-check your thermostat’s requirements, as integrating both solutions ensures safe and reliable operation.
If I’m hoping to upgrade my thermostat in just a few hours on a weekend, which integration kits are the easiest and most foolproof for someone with limited wiring experience? Do the kits really speed up installation as much as the article suggests?
For a quick weekend upgrade with minimal wiring experience, kits like the Nest Power Connector and Ecobee Power Extender Kit are among the easiest options. They’re designed for straightforward DIY installation and come with clear instructions. These kits can definitely speed up the process, often cutting out tricky wiring steps and making installation much more manageable for beginners. Most users finish in under two hours.
The article talks about missing C-wires being a common issue. If I use a C-wire adapter from one of these integration kits, does it impact the long-term reliability or warranty of either my HVAC system or the smart thermostat itself?
Using a C-wire adapter from a reliable integration kit is generally safe and widely recommended when your system lacks a dedicated C-wire. Most major smart thermostat brands design their adapters not to affect HVAC performance or void warranties, but it’s important to install them according to both the manufacturer’s and thermostat’s instructions. For peace of mind, double-check your HVAC and thermostat warranties to confirm that using an adapter is permitted.
You mentioned that choosing the right kit can mean the difference between a quick install and a day-long ordeal. For someone on a tighter budget, are there hassle-free options that don’t compromise on compatibility with older systems?
Absolutely, there are budget-friendly integration kits that simplify installation without sacrificing compatibility, even with older HVAC systems. Look for kits specifically labeled as universal or designed for multi-system support. Many affordable options include clear instructions and adapter wires, which help avoid complex rewiring. Checking for compatibility with your thermostat brand and system type before purchase will ensure the process is straightforward and successful.
When choosing between integration kits that include just a C-wire adapter and those with more advanced features like voltage converters or relay modules, how can I tell what my specific HVAC setup actually needs? I want to avoid overcomplicating things if I don’t have to.
To figure out what your HVAC system needs, start by checking whether your thermostat wiring already has a C-wire (common wire). If it does, a kit with just a C-wire adapter or even no adapter may be enough. If not, look at your system’s voltage and whether it’s compatible with your chosen thermostat—older or high-voltage systems might need voltage converters or relay modules. Reviewing your HVAC unit’s manual or consulting a photo of your control board can clear up what’s required, preventing unnecessary extras.
After reading the section on relay modules for dual-fuel or multi-stage systems, I’m wondering: how complicated is it to identify if my system needs one of these? Are there signs or simple tests a homeowner can do before buying an integration kit?
Identifying whether your system needs a relay module mainly depends on your current thermostat wiring and HVAC setup. Look for multiple wires labeled W1, W2, Y1, Y2, or an emergency/aux heat terminal. If your system switches between gas and electric or has more than one stage of heating or cooling, you may need a relay module. Checking your HVAC manual or taking a clear photo of your wiring and labels can help clarify before you buy an integration kit.
I live in an older home and my HVAC setup doesn’t have a C-wire. Are all C-wire adapter kits pretty much universal, or are there certain brands or models that work better depending on the thermostat or system age?
C-wire adapter kits aren’t completely universal—compatibility often depends on your thermostat brand and the specifics of your HVAC system. Some kits, like those from Nest or Ecobee, are designed to work best with their own thermostats and may have limitations with older systems. It’s a good idea to check both your thermostat’s requirements and your HVAC wiring before choosing a kit to ensure a smooth installation.
You mentioned integration kits often solve missing C-wire issues and voltage incompatibilities. How do I figure out if I specifically need a voltage converter versus just a C-wire adapter for my older home’s HVAC system?
To determine what you need, start by checking your thermostat’s wiring. If you’re just missing a C-wire, a C-wire adapter will usually solve the problem. However, if your HVAC system uses a different voltage than the thermostat (for example, high-voltage systems with line voltage instead of low-voltage), you’ll need a voltage converter. Check your system’s specs or consult your HVAC manual to confirm the voltage before purchasing.
If I just want a hassle-free upgrade and my main concern is avoiding a long installation, which integration kit typically offers the fastest install time for someone who has never done this before?
For a quick and easy installation, look for a smart thermostat integration kit that features a plug-and-play design and requires minimal wiring. Kits that come pre-configured or include adhesive mounting options tend to have the shortest install times, often under 30 minutes. Models specifically labeled for DIY beginners usually include clear instructions and all necessary tools, making the process straightforward even if you’ve never installed one before.
I have an older home and I’m not sure if I need just a C-wire adapter or if something like a voltage converter or relay module is necessary. Can you explain how I can figure out exactly which type of integration kit matches my HVAC setup before I buy anything?
To determine the right integration kit, start by checking if your thermostat wiring includes a C-wire, which provides continuous power. If your system lacks a C-wire, a C-wire adapter is usually enough for most homes. However, if your HVAC system uses line-voltage (120V or higher) or is a millivolt system, you might need a voltage converter or relay module. It’s helpful to look at your HVAC control board’s wiring diagram or consult your HVAC system’s manual to confirm what type of power and connections it supports.
I’m interested in your comparison of leading integration kits, but I have a question about setup. Are there any kits that are particularly beginner-friendly, especially for those who have never dealt with wiring before, or do they all require similar DIY skill levels?
Some integration kits are definitely more beginner-friendly than others. Kits from brands like ecobee and Google Nest often include clear step-by-step instructions and color-coded wires, which can really help if you’re new to wiring. Some even include adapter kits or power extenders to simplify the process. However, most kits still require basic handling of wires, so if you’re uncomfortable with that, you might want to look for a model marketed as ‘no-C wire required’ or one that highlights easy installation in its description.
Can any of these integration kits truly turn a complicated install into a one-hour project, or are there still situations where calling a professional is safer? I want to know what the realistic expectations are for someone with basic DIY skills.
Most integration kits highlighted in the article are designed to simplify the installation, and many users with basic DIY skills can complete the process in about an hour, especially if their wiring is straightforward. However, if your HVAC system is older, lacks standard C-wires, or you encounter unclear wiring diagrams, it’s safer to consult a professional. Realistically, the kits reduce hassle, but some situations can still be tricky for beginners.
Do any of these integration kits include voltage converters as standard, or is that something I’d have to buy separately? I’m trying to get a sense of the total cost for upgrading my smart thermostat with a line-voltage HVAC system.
Most of the integration kits covered in the article do not include voltage converters as a standard component. You’ll usually need to purchase a compatible voltage converter separately if your smart thermostat requires one for a line-voltage HVAC setup. Be sure to check the kit details or product specs before buying, so you can factor the extra cost into your upgrade budget.
When comparing different integration kits, are there any that are particularly user-friendly for beginners who might not have a lot of electrical experience? The article talks about a smooth, one-hour install, and I’m wondering which kits are most realistic for that timeline.
For beginners with limited electrical experience, kits that come with clear instructions, labeled wires, and minimal tools required are the most user-friendly. The article highlights that the Google Nest Power Connector and ecobee Power Extender Kit are known for simple installations, often achievable in about an hour. These kits typically include detailed guides and customer support options to walk you through each step, making them realistic choices for a smooth DIY upgrade.
You mentioned voltage converters for line-voltage systems. Are there any integration kits that are safer or easier for a DIY install, or is it better to call a professional for those setups?
Line-voltage systems can be tricky because of the higher voltages involved. While some integration kits offer built-in safety features and clearer instructions for DIY installation, working with line voltage can still pose real risks. If you have any doubt about handling electrical wiring or if local codes require, it’s usually safest to call a licensed professional. Even the most DIY-friendly kits can’t fully eliminate the safety concerns for beginners.
When comparing the integration kits, do any include both a C-wire adapter and a voltage converter, or do you usually have to buy those components separately depending on your HVAC situation?
Most smart thermostat integration kits include either a C-wire adapter or a voltage converter, but rarely both together in one package. Typically, you’ll need to check the kit contents carefully and may have to purchase one of these components separately, depending on your HVAC system’s requirements. Always review your system needs and the kit’s list of included parts before buying.
You mention troubleshooting common issues when using these kits. Could you go over what the most frequent problems are after installation, and whether there are any warning signs that the integration kit might not be compatible before I get too deep into the process?
Some of the most frequent problems after installing a smart thermostat integration kit are connection drops to Wi-Fi, unresponsive thermostats, or error codes due to wiring mismatches. Warning signs of incompatibility include your HVAC system lacking a C-wire, unusual wiring configurations, or the kit not supporting your thermostat brand. Before starting, double-check your system’s wiring and the kit’s compatibility list to avoid issues later.
When troubleshooting issues during installation, what are the most common mistakes DIYers make with these integration kits, and are there easy ways to avoid them before running into problems?
Some of the most common mistakes include not turning off power to the HVAC system before beginning, miswiring the thermostat connections, and skipping the compatibility check with your current system. To avoid problems, double-check your wiring diagrams, use the included labels, and verify your system’s compatibility before starting. Taking clear photos of your original wiring setup can also help if you need to troubleshoot later.
Do any of the leading smart thermostat integration kits you discuss work better with really old homes that have unusual wiring? I’m trying to avoid spending hours troubleshooting if I pick the wrong one.
If your home has unusual or older wiring, look for integration kits that specifically mention compatibility with two-wire or no-C-wire setups. In the article, the Ecobee Power Extender Kit and Nest Power Connector are highlighted for handling older wiring scenarios well. These options are designed to simplify installation and reduce troubleshooting, making them a good fit for older homes.
You mentioned voltage converters for line-voltage systems—are there any smart thermostat integration kits that are especially reliable for those setups? I’m worried about compatibility and safety with my baseboard heating.
For line-voltage baseboard heating, look for integration kits like the Mysa Smart Thermostat, which is specifically designed for high-voltage systems and has a strong reputation for safety and compatibility. Avoid adapting low-voltage thermostats with generic converters, as that can introduce safety risks. Always double-check that the kit is rated for your voltage (usually 120V or 240V) and follow manufacturer installation guidelines closely.
I noticed you mentioned voltage converters for line-voltage systems. Do any of the leading kits support both line-voltage and low-voltage scenarios in one package, or would I need to buy separate adapters if I plan on upgrading more than one zone in my home?
Most leading smart thermostat integration kits are designed specifically for either line-voltage or low-voltage systems, not both. If your home has a mix of both types or you plan to upgrade multiple zones with different voltages, you’ll usually need separate adapters or conversion kits for each type. Some brands offer bundles or multi-zone kits, but it’s important to check that the contents match your system’s voltage requirements before purchasing.
I noticed you mentioned some kits include relay modules for complex setups like heat pumps or dual-fuel systems. How would I know if my system actually needs those, and are those kits usually more difficult to install than the basic C-wire adapters?
To determine if you need a relay module, check if your HVAC system uses a heat pump, multi-stage heating/cooling, or combines gas and electric (dual-fuel). These setups often require special relays that basic C-wire adapters don’t handle. Kits with relays can be a bit more challenging to install since they may involve extra wiring at both your thermostat and furnace, but many come with clear instructions. If you’re uncertain, consulting your system manual or a professional is helpful.
When looking at these integration kits, are there any that work especially well for heat pumps with dual-fuel systems, or should I be looking for a specific kind of relay module? I want to avoid ordering something that doesn’t cover all the bases.
For heat pumps with dual-fuel systems, you’ll want an integration kit that specifically mentions support for dual-fuel or hybrid systems. Some kits include specialized relay modules or advanced control boards to handle the switch between electric and gas heat. Double-check that the kit supports configuring auxiliary heat and has clear wiring instructions for your type of system to ensure full compatibility.
When it comes to smart thermostat integration kits that solve a missing C-wire problem, do you notice any difference in reliability or performance compared to running a new C-wire entirely? I’m trying to decide if it’s worth the extra effort.
Using a smart thermostat integration kit to solve a missing C-wire issue is generally reliable and works well for most people, but running a new C-wire is usually considered the most robust and trouble-free solution in the long term. Kits can sometimes cause minor issues like intermittent power loss or compatibility quirks, especially with complex HVAC systems. If you want the most stable and future-proof setup, installing a real C-wire is worth the effort, but for simpler or temporary installs, a kit can be perfectly adequate.
Could you expand a bit on the troubleshooting scenarios for older wiring? I want to make sure I’m prepared before I start the installation, especially if I run into unique system architectures like you mentioned.
Absolutely, being prepared for older wiring is wise. Common issues include finding only two wires (no C-wire), incompatible voltage (like line-voltage systems), or unusual color coding. In these cases, you may need a C-wire adapter or to repurpose an unused wire. Always shut off power before starting. For unique systems like millivolt or multi-stage HVAC, check compatibility with your chosen kit. If unsure, take photos of your wiring and consult the thermostat manufacturer’s support.
For someone on a tight budget but dealing with an outdated HVAC system, are there particular integration kit brands or models that you found offer the best balance of compatibility and affordability, especially when it comes to supporting both smart thermostats and older home wiring?
If you’re on a budget and dealing with older HVAC wiring, the Venstar Add-a-Wire kit is often mentioned as a reliable and affordable option. It works well with most major smart thermostats and helps bridge the gap if your system lacks a common wire. Another budget-friendly choice is the Honeywell C-Wire Adapter, which is also known for broad compatibility and straightforward installation.
The guide talks about installation time ranging from a smooth one-hour process to a day-long ordeal. For a hands-on DIYer with only basic electrical skills, how realistic is that quick install timeframe, and what issues most commonly slow people down?
For someone with basic electrical skills who’s comfortable following instructions, the one-hour install time is realistic if your home’s wiring matches the thermostat kit’s requirements and you don’t run into surprises. Common slowdowns include unclear labeling on wires, outdated or incompatible wiring (like missing a C-wire), and tight or awkward spaces behind old thermostats. Double-checking wiring diagrams and having the right tools on hand can help keep things moving smoothly.
If I run into issues during installation, like getting the smart thermostat powered on but not communicating with the HVAC system, does your guide include troubleshooting steps for the most common integration problems? I’d like to know what support options are available before I start.
The guide does include troubleshooting steps for common integration issues, such as power connection problems and communication errors between the thermostat and your HVAC system. It covers basic diagnostic tips and solutions you can try on your own. Additionally, if you need further help, we point out where to find manufacturer support and suggest when it might be best to consult a professional installer.
You mentioned C-wire adapters as part of integration kits, but is using one of these adapters just as reliable as having a dedicated C-wire installed? I want to avoid any power interruptions or thermostat resets down the line.
Using a C-wire adapter is generally a reliable solution for smart thermostat installations when a dedicated C-wire isn’t available. However, a hardwired C-wire connection tends to be the most stable option over the long term. While most modern adapters work well, there’s a slightly higher risk of minor power interruptions with adapters compared to a direct C-wire. If absolute reliability is your priority, installing a dedicated C-wire is the better choice.
You mention voltage converters for homeowners with line-voltage systems. Are there certain integration kits that handle both voltage conversion and relay needs for more complex systems, or do I need to buy those solutions separately?
Some integration kits do combine voltage conversion and relay functions in one device, especially those designed for upgrading line-voltage systems to work with low-voltage smart thermostats. These all-in-one kits can simplify installation for more complex setups. However, not all kits offer both features, so it’s important to check each kit’s specifications. For highly customized systems, you might still need to purchase separate voltage converters and relays.
I’m on a tighter budget but really want a hassle-free install. Are there particular integration kits you’d recommend that are both reliable and affordable, especially for houses missing a C-wire?
If your budget is tight and you don’t have a C-wire, look for integration kits that include power extenders or C-wire adapters. The Nest Power Connector and ecobee Power Extender Kit are both affordable and designed for easy DIY installation, even in homes missing a C-wire. They’re reliable options that keep setup straightforward without needing professional help.
I noticed you mentioned voltage converters for homes with line-voltage systems. Is there an easy way for a beginner to figure out if they need one of these before buying a smart thermostat integration kit?
To check if you need a voltage converter, first look at your existing thermostat. If it’s connected to thick wires labeled with high numbers like 120V or 240V, or if it controls electric baseboard or wall heaters, you likely have a line-voltage system and will need a converter. Most smart thermostats are made for low-voltage (24V) systems, so identifying your wiring type before buying is important.
If a DIYer runs into issues after installing a smart thermostat with one of these kits, like the system not powering on or inconsistent heating and cooling, what are the first troubleshooting steps you suggest? Is it usually a wiring problem or something with the kit compatibility?
If the system won’t power on or heating and cooling are inconsistent, start by double-checking all wiring connections to ensure they’re secure and match your thermostat’s instructions. Many issues do trace back to wiring errors, like a loose common wire. If wiring checks out, confirm that your kit is compatible with your HVAC system. Reviewing the kit’s compatibility chart and the thermostat’s setup menu can help identify mismatches or missed steps during configuration.
If my current system is a multi-stage heat pump, do I need both a relay module and a C-wire adapter, or do most integration kits come with everything needed? How can I be sure I’m picking the right kit before I start the install?
For a multi-stage heat pump, you may need both a relay module and a C-wire adapter if your existing wiring doesn’t already support the smart thermostat’s requirements. Many integration kits include the needed adapters, but not all do. To be sure, check your system’s wiring and compare it with the kit’s contents and compatibility details before purchasing. Reading the product specs and user guides can help confirm you have everything for your setup.
You mention relay modules for setups like multi-stage HVAC and dual-fuel systems. Could you clarify how I’d know if my current system requires one of these, and are there specific symptoms or wiring differences I should look for before purchasing an integration kit?
To determine if your system needs a relay module, check your HVAC control board or thermostat wiring. If you see multiple wires labeled W1, W2, Y1, Y2 (for multi-stage) or if you have both a furnace and a heat pump (dual-fuel), a relay module is likely necessary. Symptoms include extra wires or your current thermostat supporting more than just basic heat/cool. Reviewing your equipment manual or consulting its wiring diagram can also clarify your setup.
My HVAC system is pretty old and I’m not sure if it has a C-wire. You mention C-wire adapters—are these universal across brands, or do they only work with certain smart thermostats and integration kits?
C-wire adapters are not completely universal. While many are designed to work with a range of HVAC systems, compatibility can depend on both your smart thermostat brand and your specific HVAC setup. Some smart thermostat brands offer their own adapters that work best with their products, so it’s a good idea to check the compatibility information for both your thermostat and the adapter before purchasing.
Out of all the integration kits you compare, are there any that are particularly beginner-friendly for homeowners with minimal electrical experience? I’m a bit apprehensive about dealing with complex wiring or relay modules.
Absolutely, the Nest Power Connector and the Ecobee Power Extender Kit stand out as the most beginner-friendly options in the article. Both are designed for straightforward installation and come with clear instructions, making them suitable for those with little to no electrical experience. These kits avoid complicated relay modules and minimize wiring, so they’re ideal for homeowners who want a hassle-free upgrade.
Could you elaborate on how to choose between a voltage converter and a relay module if my HVAC system has both a heat pump and some older high-voltage components? The article says some kits include both, but I’m not sure which would give me the cleanest installation.
When your HVAC system includes both a heat pump and older high-voltage components, a relay module is often best for isolating high-voltage circuits and keeping your smart thermostat safe. Voltage converters are usually needed when your thermostat requires a different power supply than your system provides. If space and simplicity matter, a kit that combines both functions in one compact module can give you a neat, integrated installation with less wiring hassle.
You mentioned voltage converters for line-voltage systems; do you have any insights on whether using these converters impacts the performance or lifespan of smart thermostats compared to setups in homes that are already low-voltage compatible?
Using voltage converters with smart thermostats on line-voltage systems can work well, but there are a few things to keep in mind. Converters add another layer of electronics, which could introduce minor inefficiencies or points of failure over time. However, most quality converters are designed to provide stable power, so performance differences are generally minimal if the converter is installed correctly. For maximum reliability, choosing a well-reviewed converter and following installation guidelines is key.
I’m not sure if my HVAC system is considered “line-voltage” or not. Is there an easy way for me to figure that out before I buy one of these integration kits? I want to avoid getting the wrong kind of adapter.
To check if your HVAC system is line-voltage, take a look at your current thermostat wiring. Line-voltage systems usually have thick wires (often black and red) connected with wire nuts, and may show 120V or 240V labels. Low-voltage systems use thinner, multi-colored wires and a lower voltage (often 24V). If you’re unsure, turning off power and removing the thermostat cover to inspect the wires can help. When in doubt, consult your system manual or contact a professional for confirmation.
When comparing these integration kits, how substantial is the price difference between basic C-wire adapters and more advanced kits with relay modules? I’m trying to balance straightforward installation with overall project costs.
The price difference between basic C-wire adapters and advanced kits with relay modules can be quite noticeable. Basic C-wire adapters typically cost between $15 to $30, offering a simple solution if your main concern is powering the thermostat. More advanced kits with relay modules usually range from $40 to $80, but they can handle more complex systems or multi-stage equipment. If your setup is straightforward, a basic adapter could keep costs down and installation easy. For more advanced HVAC setups, the higher price of a relay kit might be worth the added compatibility and convenience.
Can these integration kits help if my system uses a heat pump with dual fuel, or would I need a specific kind of relay module for that? Not sure what to look for in the product descriptions.
For a heat pump with dual fuel, not all smart thermostat integration kits will work out of the box. You typically need a kit or relay module that specifically lists support for dual fuel systems in its features. Look for product descriptions mentioning compatibility with heat pumps and dual fuel switching. If it’s not clearly stated, it’s safer to contact the manufacturer or choose a kit designed for advanced multi-stage and dual fuel setups.
Do most of these integration kits work for both line-voltage and low-voltage systems, or do I need to find something specific? I don’t want to spend too much, so are there budget options that still get the job done for basic compatibility issues?
Most integration kits are designed specifically for either line-voltage or low-voltage systems, not both. It’s important to check your current system type before buying a kit. For budget-friendly options, there are some reliable kits that handle basic compatibility needs, but always confirm they match your voltage system to avoid installation problems.
If my HVAC system is missing a C-wire and is pretty old, do most of these integration kits include everything I need, or would I have to buy something extra? Not sure if I should expect to open the kit and be ready to go right away.
Most smart thermostat integration kits designed for older HVAC systems without a C-wire will include either a C-wire adapter or a power extender kit. However, there are some kits that may require you to purchase the adapter separately. It’s important to check the kit’s contents before buying. If your system is especially old or unconventional, double-check compatibility to avoid extra trips to the hardware store.
When comparing the different integration kits, do you have any recommendations for someone on a tight budget who still wants decent reliability? Is there a big difference in installation time between the cheaper and more premium kit options?
If you’re on a tight budget but looking for reliability, the article highlights basic integration kits like the Honeywell C-Wire Adapter and Emerson Thermostat Common Wire Kit as solid choices. They generally offer dependable performance at a lower cost. As for installation time, the cheaper kits usually take about the same amount of time as premium versions—typically under an hour—since both require similar wiring steps. More expensive kits may include clearer instructions or extra accessories, but the overall time difference is minimal.
For a small business that wants to keep upfront costs down, are there integration kits that work reliably with both heat pump and standard HVAC systems, or do I have to buy separate kits for each setup? Compatibility and budget are my biggest concerns.
You don’t need to buy separate kits for heat pumps and standard HVAC systems in most cases. Many leading smart thermostat integration kits are designed to be compatible with both system types, which helps save on costs. Just double-check the kit’s specifications to confirm support for both heat pumps and conventional systems before purchasing. This way, you can keep your setup simple and budget-friendly.
Are there budget-friendly integration kits that still offer solid troubleshooting support or easy installation? Sometimes the cheaper options are missing clear setup guidance, which can make things way more stressful for small business owners who can’t spend all day on this.
Some budget-friendly smart thermostat integration kits do prioritize user experience, offering straightforward installation and decent troubleshooting support. Brands like Emerson Sensi and Honeywell Home often include clear printed guides, video tutorials, and responsive customer service, even for their more affordable kits. When shopping, look for kits with well-reviewed documentation and support features to minimize setup headaches, especially important for busy small business owners.
Could you clarify which integration kits are best suited for homes with older, non-standard wiring setups? The article mentions relay modules and voltage converters—are there particular brands or models that are more user-friendly for these trickier scenarios?
For homes with older or non-standard wiring, integration kits that include relay modules or voltage converters can make installation much smoother. Brands like Aube (by Honeywell) and Resideo offer relay modules that are often cited as user-friendly for adapting to older systems. The Aube RC840T-240 is a reliable choice for line voltage to low voltage conversion. For voltage converters, the Venstar Add-A-Wire is popular for adding a common wire in setups where one is missing. Both are designed with DIY users in mind and come with clear instructions.
You mention that the right integration kit can mean the difference between a quick install and a frustrating, day-long ordeal. Are there any brands or kits that are particularly beginner-friendly for people who don’t have much electrical experience?
For beginners with little electrical experience, kits from Ecobee and Nest are known for being especially user-friendly. Both brands include clear instructions, labeled wires, and online videos to guide you. Their integration kits often come with everything you need, including adapters for homes without a C-wire. These options can help make installation much less intimidating for first-timers.
If my older home has both a missing C-wire and a unique dual-fuel HVAC setup, is there a specific type of integration kit that covers both issues, or would I need to combine multiple adapters and relay modules?
For your situation with both a missing C-wire and a dual-fuel HVAC setup, you’ll likely need a combination approach. Most C-wire adapter kits address only power delivery, not dual-fuel control. You should use a C-wire adapter for power and a separate relay or integration kit designed for dual-fuel systems to manage the switch between heating sources. Always check compatibility with your thermostat model and HVAC system before purchasing.
You mention voltage converters for homes with line-voltage systems. How can I tell if my house requires this type of kit, and would using one limit which smart thermostats I can choose from?
To check if your home has a line-voltage system, look at your current thermostat: if it connects to thick wires labeled 120V or 240V, or directly controls baseboard or wall heaters, you likely have line-voltage. In that case, you’ll need a voltage converter kit. Using one does limit your options, as not all smart thermostats are designed for high-voltage systems—make sure the thermostat you choose is compatible with voltage converters and your specific heating setup.
I noticed the article mentions C-wire adapters being essential for homes without a dedicated common wire. If my HVAC setup is missing a C-wire, how difficult is it to install one of these adapters compared to running a new wire from the furnace? Any tips for making it easier?
Installing a C-wire adapter is generally much easier and less invasive than running a new wire from your furnace. Most adapters come with clear instructions and require only basic tools, usually involving connecting a few wires at your thermostat and control board. Be sure to turn off power to your HVAC before starting, take photos of your wiring for reference, and label wires to avoid confusion during installation.