Introduction: The Real Price of DIY Tool Ownership
For enthusiastic DIYers and homeowners, investing in tools and equipment feels empowering—unlocking the freedom to repair, maintain, and upgrade your living space on your terms. Yet, the process of selecting and purchasing tools involves more than simply comparing sticker prices or chasing the latest gadget deals. Hidden costs lurk beneath the surface, from ongoing maintenance and accessory replacement to storage solutions and even insurance. Many first-time buyers focus narrowly on upfront costs, only to be surprised by a wave of unanticipated expenses that can strain both budgets and enthusiasm. This comprehensive guide unpacks every aspect of the true cost of home tool ownership, reveals common budgeting pitfalls, and offers practical strategies to help you make smarter purchasing decisions. Whether you’re gearing up for your first major home project or simply looking to expand your toolkit, understanding the full financial picture will ensure your DIY journey stays rewarding—and cost-effective—in the long run.
Understanding Upfront vs. Lifetime Tool Costs
Breaking Down Initial Purchase Price
The shelf price of a tool is only the beginning. When comparing similar tools, it’s tempting to opt for the cheapest option, but this strategy often leads to frustration and higher costs over time. Upfront expenses include:
- Base purchase price: The amount paid for the tool itself.
- Starter kits or bundles: Packages that include batteries, chargers, or basic accessories, often at a slight discount.
- Sales tax and shipping: Frequently overlooked, these add-ons can increase costs by 5-15% or more.
Lifetime Costs DIYers Overlook
Over a tool’s lifespan, expenses accumulate in less obvious ways. Consider the following:
- Consumables: Blades, sandpaper, drill bits, and batteries wear out and require ongoing replacement.
- Maintenance: Lubricants, cleaning supplies, calibration fees, and repairs.
- Upgrades and add-ons: Attachments or accessories to expand functionality.
- Storage and protection: Toolboxes, organizers, or cabinets to prevent damage and loss.
- Energy costs: For power tools, electricity usage or battery charging expenses.
Case Example: The “Affordable” Cordless Drill
A budget cordless drill ($50) may seem like a steal. But factor in:
- Extra batteries ($30–$50 each)
- Charger (sometimes sold separately at $20–$40)
- Replacement bits and accessories ($15–$40/year)
- Storage case ($25)
- Occasional repairs or replacements (every 3–5 years)
Over five years, the real cost can easily double or triple the initial outlay.
Hidden Expenses: What Most Buyers Miss
Accessory and Consumable Burn Rate
Some tools, by design, require frequent replacement of consumables. For example, oscillating multi-tools and sanders chew through pads and blades rapidly, while saws need regular blade changes. Track how quickly you go through these items to budget accurately.
Tool Storage and Organization
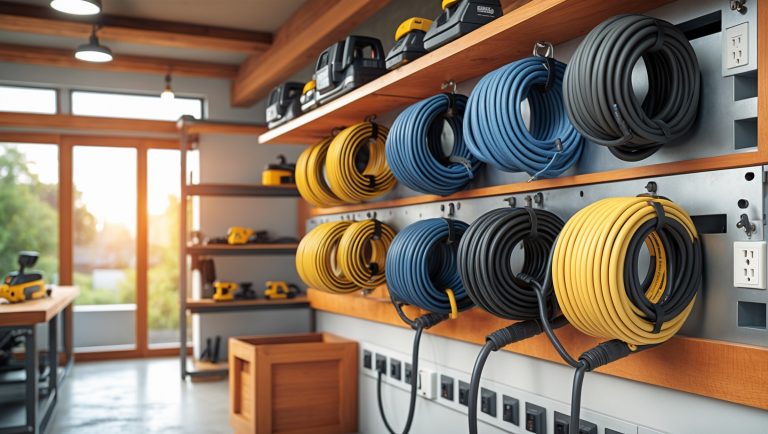
As your collection grows, so does the need for secure storage. Skimping on organization leads to lost or damaged tools—another hidden cost. Options include:
- Wall-mounted pegboards ($30–$80 with hardware)
- Modular drawer systems ($100+)
- Weatherproof outdoor storage for larger equipment ($150–$300)
Safety Equipment and Compliance
Every new tool may require its own set of safety gear (goggles, gloves, masks), especially for power equipment. Upgrading electrical tools can also raise compliance issues, requiring GFCI outlets or extension cords rated for higher loads. These upgrades protect you and your home but add to the bottom line.
Tool Insurance and Loss Protection
If you’ve invested in high-end tools, consider whether your homeowner’s or renter’s insurance covers their loss, theft, or damage. Some policies require additional riders or documentation, costing $20–$50 annually depending on value.
Time: The Often-Ignored Cost
Every tool comes with a learning curve. Factor in the time spent researching, setting up, maintaining, and mastering new equipment. While not a direct financial cost, time is a critical (and often underestimated) resource when calculating value.
Building a Smarter Tool Budget: Step-by-Step
Step 1: List Your Must-Have Tools
Start by identifying the essential tools needed for your specific projects. Avoid “nice-to-have” items until the basics are covered. Examples include:
- Hammer, screwdrivers, and tape measure for general repairs
- Power drill and bits for furniture assembly and wall mounting
- Stud finder, level, and utility knife for safety and precision
Step 2: Price Out the Complete Package
For each tool, calculate:
- Base price
- Essential accessories (batteries, chargers, blades, etc.)
- Protective gear required for safe operation
- Storage solution costs
Use a spreadsheet or budgeting app to tally subtotals and identify areas where prices add up quickly.
Step 3: Estimate Annual Consumable and Maintenance Costs
Research average replacement rates for consumables and schedule regular maintenance (like blade sharpening or lubrication). Allocate an annual budget for these recurring expenses to prevent surprises.
Step 4: Factor in Upgrade Paths
Consider whether the tools you buy now can be upgraded or expanded. Modular systems (like battery platforms shared across multiple brands) often yield savings over time, even if the initial cost is higher.
Step 5: Plan for Contingencies
Set aside a “miscellaneous” buffer (typically 10–15% of your total budget) to cover unexpected costs—emergency replacements, lost tools, or last-minute supply runs.
Cost-Saving Strategies Without Sacrificing Quality
Buy for Your Actual Needs, Not Aspirations
Assess the frequency and types of projects you realistically plan to tackle. For occasional use, mid-tier brands often offer the best balance of cost and reliability.
Leverage Battery and Accessory Ecosystems
Many brands offer tools that share batteries and chargers. Sticking to a single ecosystem reduces redundancy, cuts long-term costs, and simplifies storage.
Take Advantage of Bundles and Promotions
Watch for seasonal sales, manufacturer rebates, and bundle deals. These promotions can significantly lower the per-tool cost, especially during holidays or trade-in events.
Consider Refurbished or Certified Pre-Owned Tools
Reputable sellers often offer refurbished tools with warranties at a fraction of the new price. These can be a smart buy for non-critical or backup equipment.
Join Local Tool Libraries or Swap Groups
If you need a specialty tool for a single project, check for community tool libraries or borrowing apps instead of buying. You’ll save money and reduce clutter.
Invest in Preventative Maintenance
Proper cleaning, storage, and regular servicing dramatically extend tool life, reducing replacement frequency and associated costs.
Comparing Tool Types: When to Splurge vs. Save
Hand Tools: Spend More on Daily Drivers
For tools you’ll use every week (hammer, screwdriver, pliers), invest in high-quality options. Cheap hand tools often fail quickly and can be unsafe.
Power Tools: Match Features to Project Scale
If you’re tackling major renovations, higher-end power tools with robust warranties are worth the cost. For infrequent, light-duty jobs, reputable mid-range models suffice.
Multi-Purpose vs. Specialized Tools
Multi-tools offer good value for limited space or budgets, but may not perform as well as specialized equipment for demanding tasks. Analyze your project list to decide where versatility or performance matters most.
Real-World Budget Breakdown: Sample DIY Toolkit
Scenario: Setting Up for Routine Home Maintenance
- Hammer: $20 (mid-range, ergonomic grip)
- Screwdriver set: $25 (magnetic tips, multiple sizes)
- Cordless drill/driver (with battery & charger): $90
- Drill bit set: $18
- Pliers set: $30
- Tape measure & level: $22
- Stud finder: $15
- Toolbox: $35
- Safety glasses & gloves: $18
- Annual consumables (bits, batteries, replacements): $40
- Miscellaneous buffer (10%): $29
Total estimated first-year budget: $342
This breakdown highlights how non-tool costs quickly add up. Adjust your budget based on the scale and ambitions of your DIY projects.
Common Budgeting Mistakes to Avoid
- Underestimating accessory and consumable costs. Always tally these up before purchasing.
- Ignoring the price of quality storage and protection. Damaged tools are costly to replace.
- Overbuying for rare or one-off projects. Consider rental or borrowing instead.
- Neglecting to factor in safety gear and maintenance. These are not optional extras.
- Skipping research on warranty or service terms. Not all warranties are equal—read the fine print.
Conclusion: Maximizing Value, Minimizing Surprises
Owning the right tools is a cornerstone of self-sufficiency and home improvement satisfaction—but only when you understand and plan for the full financial picture. By looking beyond the sticker price and accounting for all associated costs, from consumables and maintenance to storage and insurance, you empower yourself to make smarter, more sustainable purchasing decisions. A thoughtful budget not only prevents expensive surprises but also helps prioritize quality, safety, and long-term value. Remember, the most expensive tool isn’t always the best investment—nor is the cheapest necessarily the wisest choice. Instead, focus on a balanced approach: buy what you’ll use most often, maintain your equipment diligently, and leverage community resources for specialty needs. With careful planning, the hidden costs of tool ownership become manageable—and your DIY journey transforms from a series of unexpected expenses into a rewarding, cost-effective adventure. Whether you’re a seasoned renovator or just starting out, let this guide serve as your roadmap to confident, budget-savvy tool ownership for every project ahead.




Could you elaborate more on how insurance factors into the long-term costs of tool ownership? Is there a particular type of home insurance that covers tool investment, or do DIYers typically need separate coverage?
Insurance is an important but often overlooked part of tool ownership costs. Standard home insurance sometimes covers tools up to a certain limit, but that limit may be too low for serious DIYers or professionals. If your tool collection is valuable, you might consider adding a rider or endorsement to your policy for extra coverage. In some cases, especially for high-value items or if you use tools for business, a separate policy might be necessary. It’s best to review your policy or consult your insurer to ensure your investment is adequately protected.
When it comes to budgeting for accessories and consumables like drill bits or sandpaper, is there a rule of thumb for estimating these ongoing costs as a percentage of the initial tool investment?
A practical rule of thumb is to budget about 10–20% of your initial tool investment each year for accessories and consumables like drill bits, saw blades, and sandpaper. If you use your tools heavily or tackle large projects, consider leaning toward the higher end of that range. Tracking your usage over time can also help you fine-tune your future budgets.
Is it generally more cost-effective to buy starter kits that include batteries and accessories, or should I purchase tools and add-ons separately over time? I’m trying to build a toolkit gradually but don’t want to fall into the common budgeting pitfalls discussed here.
When starting from scratch, buying starter kits that include batteries and accessories is usually more cost-effective. Kits often bundle items at a lower total price, and you avoid compatibility issues between brands. As you build your collection, buying bare tools individually can make sense, but starting with a kit helps you avoid hidden costs like buying batteries or chargers separately, which can add up quickly.
The article talks about starter kits and bundled deals with accessories. Is it usually more cost-effective in the long run to invest in these bundles upfront, or should I buy individual items as I need them for each project?
Starter kits and bundled deals can often save you money compared to buying each tool and accessory separately, especially if you’ll eventually use most items included. However, if your projects require only specific tools, buying individually might be smarter to avoid spending on unnecessary extras. Consider your typical DIY needs and future plans—if you’re committed to regular projects, a bundle is usually more cost-effective over time.
When it comes to storage solutions for tools, should I build something DIY or buy a pre-made organizer? I wasn’t expecting that storage would be such a big hidden cost, so I’m wondering what most first-timers do.
Many first-time DIYers are surprised by storage costs and often start with budget-friendly, pre-made organizers to get tools off the floor quickly. If you have some basic woodworking skills and want to save money, a DIY solution can be more customizable and cost-effective. It depends on your available time, tools, and whether you prefer convenience or personalization. Some people combine both: buying basic shelving and then building custom holders as their tool collection grows.
When deciding between buying the cheapest tool versus investing in a more expensive brand, how can I tell if the higher upfront price will actually save me money on lifetime costs like repairs or upgrades?
To judge if a pricier tool will save you money in the long run, consider how often you’ll use it and check reviews on durability and warranty. Expensive brands often last longer and offer better support, reducing the need for repairs or replacements. Factor in how much replacement parts cost and if upgrades are available. If you use the tool frequently or for demanding tasks, the upfront investment can pay off by avoiding repeated purchases of cheaper tools.
You mentioned storage solutions as one of the hidden costs of owning tools. Do you have any practical tips for affordable tool storage for someone with limited space, like an apartment or a small garage?
For small spaces like apartments or compact garages, consider wall-mounted pegboards or magnetic strips to keep tools organized vertically. Over-the-door organizers or stackable plastic bins can also help maximize storage without taking up much floor space. Collapsible toolboxes or rolling carts are great for storing tools out of sight when not in use and can be tucked into closets or corners easily.
The article mentions tool insurance as a hidden cost for DIYers, but I’m not really sure when it makes sense to get insurance for home tools. Are there situations where tool insurance is actually worth it for a homeowner, or is it mostly overkill?
Tool insurance can be worth considering if you own expensive power tools, have a large tool collection, or regularly lend your tools to others. It’s also useful if you store tools in a garage or shed that isn’t covered by your home insurance. For most casual DIYers with basic tools, though, it’s generally not necessary and your regular homeowner’s insurance may already provide enough protection.
In the section about lifetime costs, you mentioned ongoing expenses like consumables and maintenance. How do you recommend estimating these costs ahead of time, especially for someone just starting out who isn’t sure what will wear out fastest?
To estimate ongoing costs, start by checking the tool’s manual or manufacturer website for recommended maintenance and typical replacement parts. Look at common consumables like blades, sandpaper, or batteries and note their prices. You can also ask at hardware stores or online forums about how often items need replacing for your intended use. For beginners, it’s helpful to budget a small monthly amount for unexpected wear and tear until you get a feel for your actual usage.
If I’m trying to decide between investing in a starter kit with accessories and buying tools individually, which option tends to be more cost-effective over the long run when factoring in the hidden expenses described in the article?
Choosing a starter kit with accessories is often more cost-effective in the long run, especially when you consider hidden expenses like separate accessory purchases, mismatched tool compatibility, and extra storage needs. Starter kits typically include commonly used accessories and are designed to work together, helping you avoid additional unplanned spending that can come with buying tools individually.
When you mention storage solutions as a hidden cost, do you mean investing in full cabinets or are there affordable DIY ways to safely store tools that still protect your investment long term? I’m trying to budget realistically before I commit to buying more equipment.
Storage solutions can range from full cabinets to much more affordable DIY options. You don’t have to invest in expensive cabinets if that’s outside your budget. Wall-mounted pegboards, heavy-duty shelves, stackable bins, or even repurposed furniture can keep your tools organized and protected from damage and moisture. The key is to ensure good airflow, easy access, and safe storage to prolong your tools’ lifespan without overspending.
As a small business owner setting up a workshop, how do you suggest I estimate the annual maintenance and consumables budget for tools I use frequently, like drills or saws? Are there general guidelines or formulas you recommend for planning these recurring expenses?
To estimate your annual maintenance and consumables budget, review tool manuals for recommended service intervals and typical consumable lifespans. A common approach is to budget 10-20% of each tool’s initial cost per year for maintenance, plus the estimated cost of consumables like bits or blades based on usage frequency. Track your actual replacement intervals for more accurate future planning. Regularly reviewing these costs helps prevent budgeting surprises.
I know the article mentions storage and even insurance as hidden costs. Do you have advice on affordable storage solutions for someone with limited space, or tips for when insurance on tools is actually worthwhile?
For limited space, consider wall-mounted pegboards, stackable bins, or under-bed storage boxes to keep tools organized and accessible without taking up much room. As for insurance, it’s worth considering if you own high-value tools, rely on them professionally, or live in an area with higher theft risk. For hobbyists with just a few basic tools, extra insurance may not be necessary.
For someone just starting their toolkit, what are the best ways to avoid getting caught off guard by accessory and consumable expenses? Is there a rule of thumb for how much to set aside for replacements in the first year?
When building your first toolkit, it helps to factor in about 20–30% of your initial tool budget for accessories and consumables like drill bits, sandpaper, or saw blades. Track what you use most often, and restock in multipacks when possible for savings. Reviewing your tool manuals can also clue you in on which consumables you’ll need more frequently.
When deciding between buying a higher-end tool versus a basic starter kit, is there a general rule for how quickly the long-term savings from better quality make up for the higher initial cost?
There’s no one-size-fits-all rule, but generally, higher-quality tools pay off if you use them often or for demanding tasks. If you need a tool regularly, the savings from fewer replacements and better performance often recover the extra cost within a year or two. For tools you’ll use rarely, a starter kit might be more cost-effective. Estimate your expected usage and compare both purchase and possible repair or replacement costs to guide your choice.
I’m trying to budget for my first toolkit, but I’m not sure how much extra I should set aside for things like replacement blades, batteries, and maintenance over the first year. Is there a rule of thumb or percentage of the initial tool cost I should expect to spend on these hidden expenses?
A helpful rule of thumb is to budget an extra 15-25% of your initial tool costs for hidden expenses like replacement blades, batteries, and routine maintenance in the first year. This percentage can vary depending on how frequently you plan to use your tools and the types of projects you tackle, but it should give you a reasonable cushion for those often-overlooked expenses.
The article mentions storage solutions as a hidden cost. Do you have recommendations for budget-friendly ways to organize tools at home without spending a fortune on specialized cabinets or systems?
Absolutely, there are plenty of budget-friendly ways to organize your tools at home. Consider using pegboards with hooks for wall storage, repurposing old jars for storing screws and nails, or using inexpensive plastic bins and drawer organizers for smaller items. Wall-mounted shelves or even recycled wooden pallets can help keep larger tools off the floor. These options help you stay organized without needing to invest in costly, specialized storage cabinets.
The article talks about accessory and consumable replacements adding up over time. Is there a rule of thumb for how often items like batteries, blades, or drill bits typically need to be replaced for an average DIYer?
For the average DIYer, batteries for cordless tools usually last 2–3 years before performance drops noticeably. Blades for saws might need changing every 6–12 months, depending on usage and material, while drill bits can last several months to a year with moderate use. Actual replacement times vary based on project frequency and materials, but inspecting tools regularly for wear helps you plan ahead.
You mentioned consumables like blades and batteries adding up over time. Is there a guideline or rule of thumb for estimating how much to budget annually for these ongoing replacement costs when building a toolkit from scratch?
A useful rule of thumb is to budget about 10-20% of your initial tool investment each year for consumables like blades, bits, sandpaper, and batteries. For example, if you spend $500 on tools, set aside $50–$100 annually. Actual costs will vary depending on how often you use your tools and the types of projects you take on, but this percentage provides a reasonable starting point.
The article talks about storage solutions being a hidden cost. For someone with limited space, do you recommend prioritizing money for wall-mounted organizers or portable storage cases at the beginning, or is it better to wait until my collection grows?
If you’re just starting out and have limited space, portable storage cases are a practical first investment. They keep your tools organized and easy to move or store wherever you have room. As your tool collection expands, you can consider adding wall-mounted organizers to maximize your space and keep frequently used tools accessible.
When it comes to budgeting for consumables like blades and batteries over a tool’s lifespan, what’s a realistic annual estimate for a moderate DIYer? I’m trying to plan ahead and avoid surprises after my initial tool investment.
For a moderate DIYer, a practical annual estimate for consumables like blades, batteries, bits, and sandpaper is typically between $50 and $150, depending on your project types and tool brands. Battery replacements are less frequent and may only be needed every few years, but blades and similar items may need replacing more often. Keeping a small buffer in your budget helps manage any unexpected needs.
Could you elaborate on insurance for home tools? Is it typically covered under homeowners policies, or would I need additional coverage if I’m investing in higher-end equipment?
Most homeowners insurance policies offer some coverage for personal property, which usually includes your home tools. However, there are often limits on high-value items, and some policies may exclude business or hobby equipment if it’s particularly expensive. If you’re investing in higher-end or specialized tools, it’s wise to check your policy’s limits and exclusions. You may want to schedule an endorsement or rider for additional coverage to protect these items more fully.
I noticed you brought up the impact of sales tax and shipping on the overall price. In your experience, does buying tools in-store versus online usually end up being more cost-effective once all these fees are considered?
Buying tools in-store can sometimes be more cost-effective, especially since you avoid shipping fees and can take advantage of any in-person discounts or clearance deals. However, online retailers sometimes offer lower base prices or exclusive promotions. Sales tax usually applies to both options, but the total cost depends on current sales, shipping policies, and any available coupons. It’s a good idea to compare the final checkout totals—including all fees—before deciding.
The article mentions storage and even insurance as hidden costs. Could you explain what kinds of storage solutions or insurance policies I should consider for a growing tool collection, especially if I’m just getting started with DIY projects?
For storage, consider sturdy shelving, lockable tool chests, or wall-mounted pegboards to keep tools organized, safe, and easily accessible. If you’re short on space, stackable bins or portable toolboxes work well. As for insurance, review your homeowner’s or renter’s policy to see if tool theft or damage is covered. You might need to add a rider or endorsement for valuable or specialized tools. Taking inventory with photos and receipts can help streamline any future claims.
You mentioned that starter kits sometimes include batteries or accessories at a slight discount. How do I figure out whether it’s smarter financially to buy a starter kit versus buying the tool and accessories separately in the long run?
To decide between a starter kit and buying items separately, make a list of all the components you need—such as the tool, batteries, charger, and accessories. Check the total price of each item individually and compare it to the price of the starter kit. Also, consider the quality and compatibility of included accessories. Sometimes, kits offer basic versions, so if you need higher-end accessories, buying separately could be smarter long-term.
If I’m torn between buying a cheaper tool upfront versus investing more in a higher-quality version, is there a rule of thumb for when it’s actually worth the extra investment based on lifetime costs?
A helpful rule of thumb is to invest more in high-quality versions of tools you’ll use regularly or for demanding tasks, since these tend to last longer and perform better, reducing replacement and repair costs over time. For tools you’ll only use occasionally, a more affordable option might be sufficient. Weigh expected frequency of use and potential costs of poor performance when deciding.
You mention hidden costs like maintenance and accessory replacement—do you have any advice on estimating how much I should budget annually for these extras as a beginner? I’m worried about unexpected expenses piling up after buying basic tools.
For beginners, a good rule of thumb is to set aside about 10–20% of your initial tool purchase cost each year for maintenance and accessory replacements. So if you spend $300 on tools, budgeting $30–60 yearly should cover basics like new blades, oils, or protective gear. As you gain experience and expand your toolkit, you can adjust this amount based on actual wear and tear.
When comparing starter kits to buying bare tools, is it generally smarter for a beginner to pay extra for bundles that include batteries and chargers, or is it better to start small and only buy what you need for immediate projects?
For beginners, starter kits that include batteries and chargers are usually a better value in the long run. These bundles often cost less than buying everything separately, and having extra batteries is handy as your tool collection grows. If you’re sure you’ll only need one or two tools, starting small can work, but most DIYers quickly find new uses, so kits offer more flexibility and convenience.
The article mentions insurance as a hidden cost—can you share more about what types of tool-related insurance homeowners might actually need, and how much it typically adds to the overall budget?
Homeowners may want to consider two main types of tool-related insurance: coverage under their homeowners policy for theft or damage, and specific tool insurance if they own expensive or specialized tools. Standard homeowners insurance may cover tools up to a certain limit, but high-value items might need extra riders or scheduled coverage. Costs can range from a few dollars per month for a small increase, up to $100 or more annually for comprehensive tool insurance, depending on the value and type of tools you want to protect.
If I’m mostly doing smaller home projects, does it still make sense to buy tools outright given these lifetime costs, or would renting be a smarter budget choice?
If your projects are occasional and involve tools you won’t use often, renting can be more cost-effective since you avoid maintenance, storage, and upfront costs. However, for frequently used basic tools, owning them may save money in the long run. Try to assess how often you’ll use each tool and compare rental costs to purchase price before deciding.
Your mention of storage solutions as a hidden cost got me thinking—do you have any tips for affordable ways to store tools, especially for someone with limited space who’s just starting out?
For small spaces and tight budgets, wall-mounted pegboards or magnetic strips are great for keeping tools organized and easy to reach. Repurposing items like old jars for screws or small parts, and using stackable plastic bins or shoe organizers, can also help store tools efficiently without spending much. Start with what you have and expand as your collection grows.
I have been budgeting for some new tools and was surprised to see sales tax and shipping can add 5-15% to costs. Do you find it’s usually better to wait for in-store promotions or bundle deals to offset these extra expenses?
Waiting for in-store promotions or bundle deals can often help offset the extra costs from sales tax and shipping. Many retailers offer discounts, free shipping, or tax-free events, especially during holidays or special sales. Bundling tools can also provide better value. If your purchases aren’t urgent, keeping an eye out for these deals can definitely help you stay within your budget.
When it comes to choosing between starter kits and buying tools and accessories separately, do DIYers usually save money in the long run with the bundles, or do the ongoing consumable and upgrade costs cancel out those initial savings?
Starter kits often give you a good deal upfront, especially if you need several tools at once. However, over time, the need to buy specific accessories, replacement parts, or higher-quality upgrades can add up. Many DIYers find that while bundles save money at first, ongoing costs for consumables and better tools may reduce or even outweigh those initial savings, depending on your projects and how often you use your tools.