

Introduction: Why Every Home Needs a Water Leak Detection System
Water leaks are among the most common—and costly—home maintenance issues. Whether it’s a slow drip beneath the sink or an unexpected burst pipe in the basement, unchecked water leaks can cause extensive property damage, promote mold growth, and inflate your utility bills. In fact, the Environmental Protection Agency estimates that household leaks can waste nearly 10,000 gallons of water each year. But there’s good news: modern water leak detection systems are more accessible, affordable, and DIY-friendly than ever before. From smart sensors to full-home shutoff valves, today’s technology empowers homeowners to spot trouble early and act fast. This comprehensive guide will walk you through the essential steps of choosing, installing, and maintaining a water leak detection system tailored for DIYers. You’ll discover practical advice, tool and equipment recommendations, real-world setup tips, and troubleshooting strategies—so you can protect your home from water damage without breaking the bank or calling in the pros.
Understanding Water Leak Detection Systems: Types and Components
What Is a Water Leak Detection System?
A water leak detection system is a network of sensors and devices designed to alert you to the presence of unwanted water in specific locations around your home. Some advanced systems can even shut off your water supply automatically in the event of a major leak, helping prevent catastrophic damage.
Main Types of Leak Detection Systems
- Standalone Spot Sensors: Small, battery-powered devices placed in high-risk areas (under sinks, behind appliances, near water heaters) that sound an alarm and/or send alerts if water is detected.
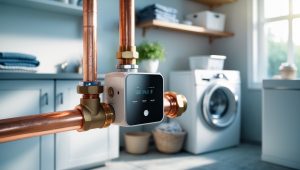
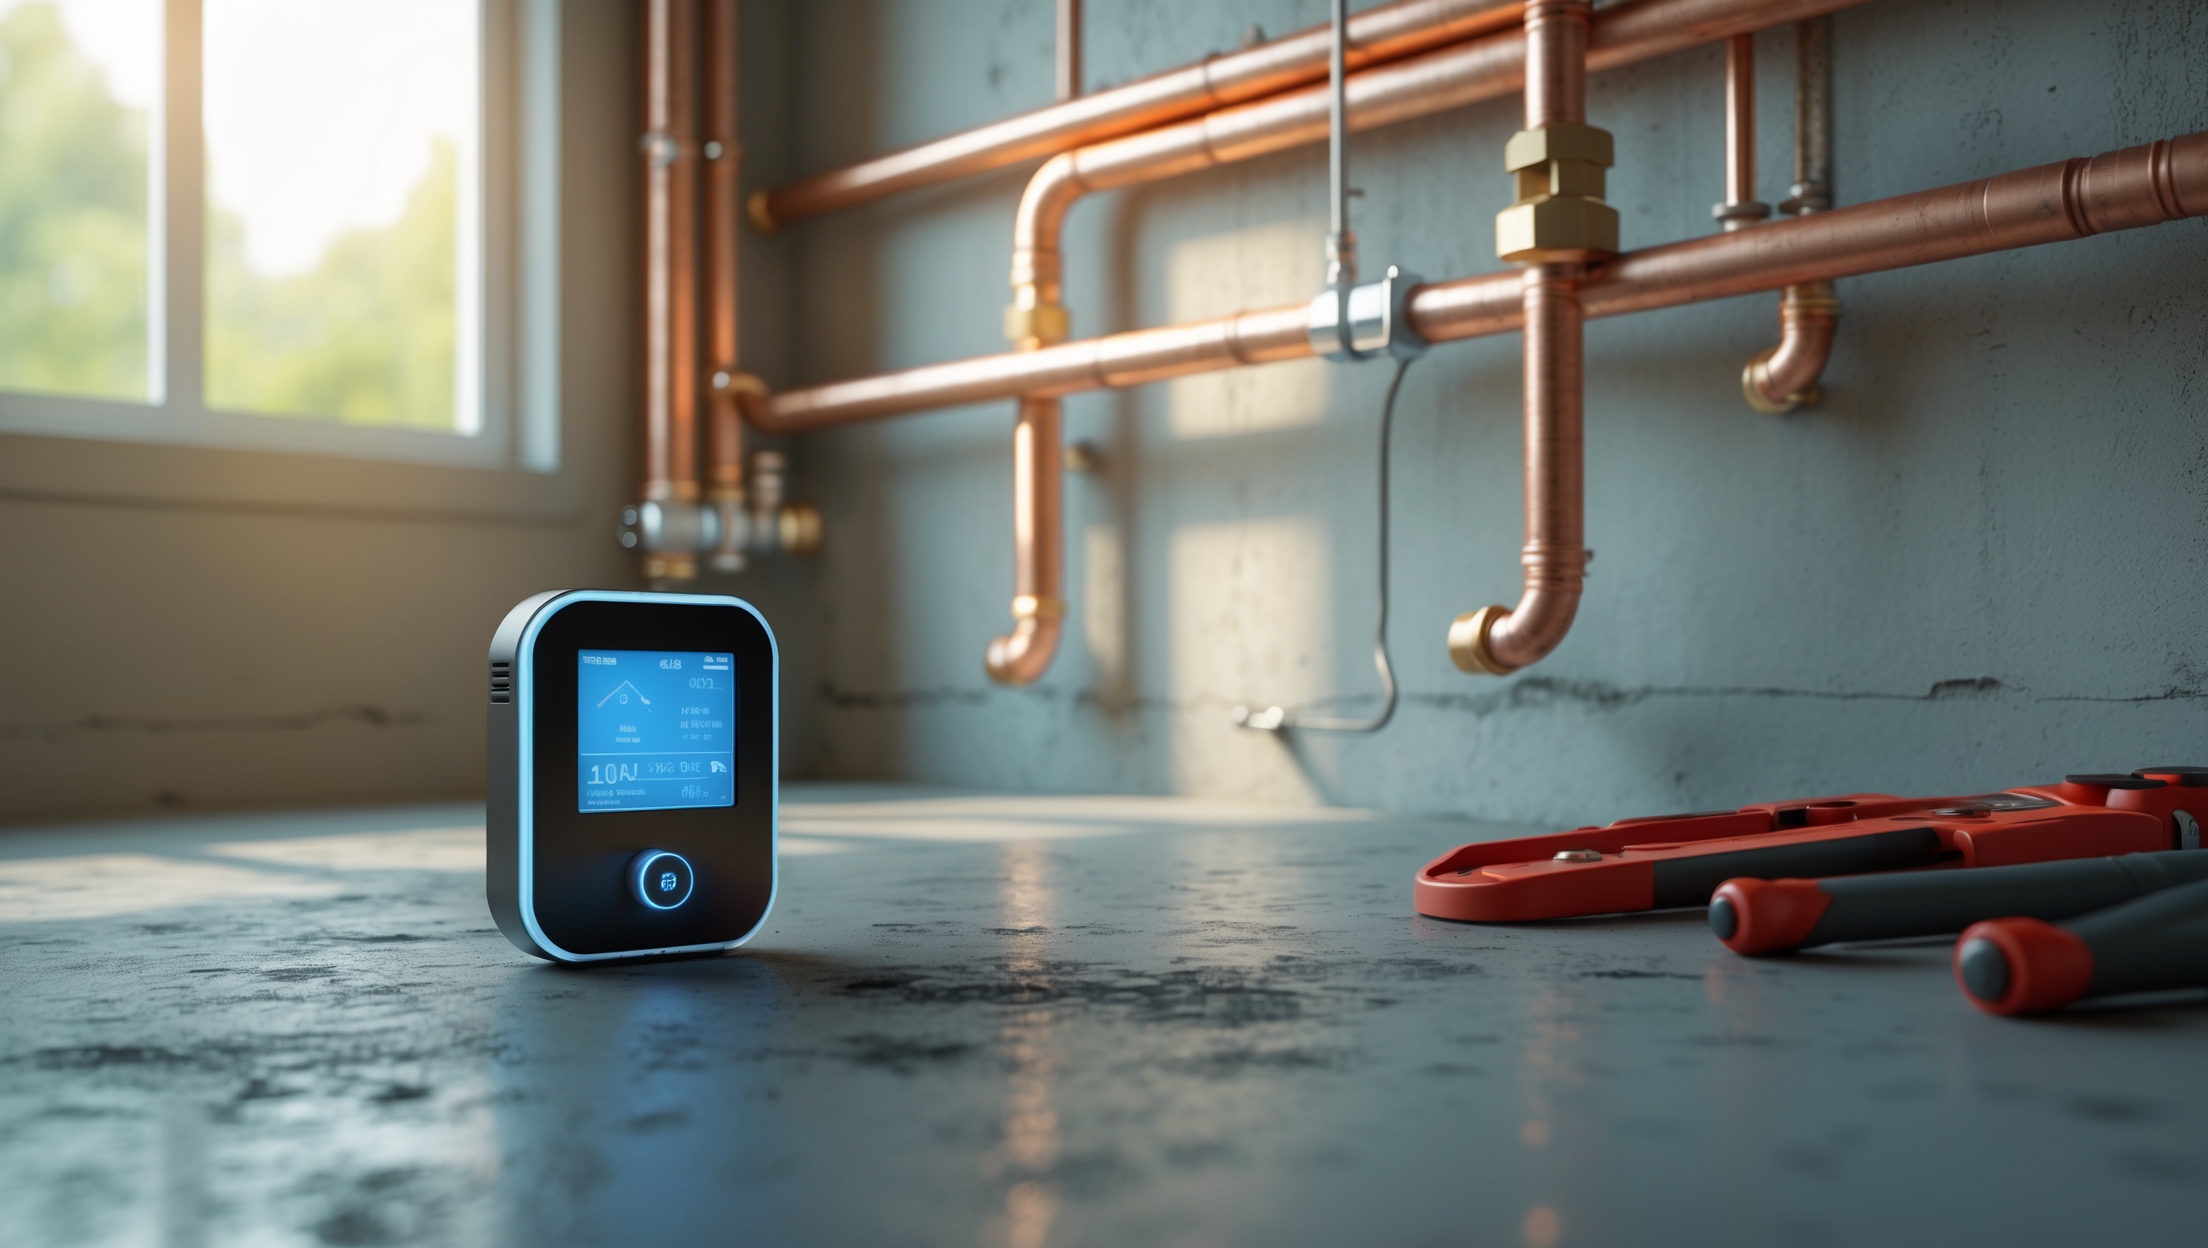
- Whole-Home Monitors: Devices that attach to your main water line to track water flow and detect anomalies indicative of leaks. Many connect to smart home platforms for real-time notifications.
- Automatic Shutoff Systems: Advanced setups that combine leak sensors with a motorized valve on your main water supply. When a leak is detected, the valve closes automatically.
Key Components
- Sensors: Detect the presence of water via moisture, conductivity, or pressure changes.
- Control Hub: Central unit (optional for standalone sensors) that communicates with sensors and relays alerts.
- Mobile App/Notification System: Sends push notifications, emails, or texts when leaks are detected.
- Shutoff Valve: (If included) Mechanically turns off the water supply upon leak detection.
- Power Source: Batteries, AC adapters, or hardwired connections.
Choosing the Right Leak Detection System for Your Home
Assessing Your Needs
Start by identifying your home’s risk zones. Common leak-prone areas include:
- Basement and crawl spaces
- Under sinks and behind toilets
- Water heater closets
- Laundry rooms (behind washers)
- Near dishwashers and refrigerators with water lines
Consider the following:
- Home size and number of risk areas: Larger homes and more appliances may require multiple sensors or a whole-home system.
- Smart home integration: Do you want alerts on your phone, or even voice assistant compatibility?
- Budget: Spot sensors can cost as little as $20 each, while whole-home systems range from $200 to $800+.
- DIY installation complexity: Some systems are plug-and-play, others require basic plumbing skills.
Comparing Popular DIY Leak Detection Systems
- Spot Sensors (e.g., Govee, Honeywell Lyric): Affordable, easy to install, app alerts, battery-powered. Ideal for renters or targeted protection.
- Flow-Based Monitors (e.g., Flo by Moen, Phyn): Attach to main supply, monitor usage patterns, can detect invisible leaks (like in walls). May require professional installation if you’re not comfortable with plumbing.
- Automatic Shutoff Valves (e.g., LeakSmart, Dome): Combine sensors and valve for maximum protection. DIY-friendly versions clamp onto existing valves; some require cutting pipes.
What to Look For
- Reliable mobile notifications and/or audible alarms
- Long battery life or backup power options
- Water resistance and durability
- Easy sensor reset and maintenance
- Integration with existing smart home systems (optional)
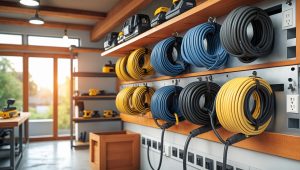
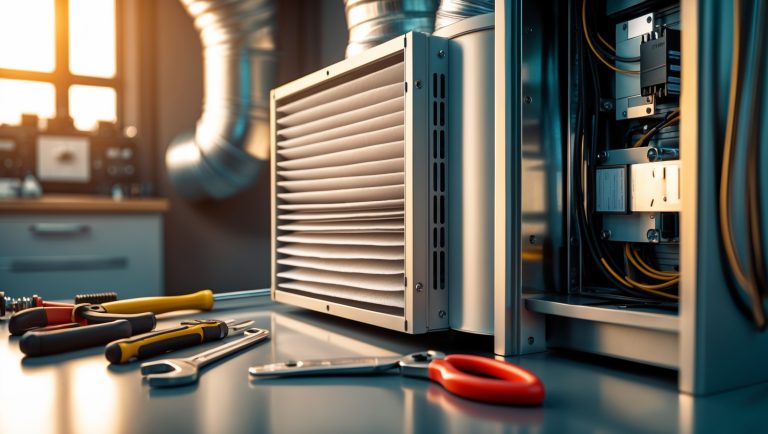
Tools and Equipment Needed for DIY Installation
- Leak detection system (sensors, hub, shutoff valve as required)
- Basic hand tools: screwdriver set, adjustable wrench, pliers
- Drill and drill bits (for mounting hubs or sensors)
- Measuring tape and pencil for positioning
- Pipe cutter (if installing an in-line shutoff valve)
- Channel-lock pliers (for tight spaces or stubborn fittings)
- Plumber’s tape (Teflon tape) for sealing threaded connections
- Smartphone or tablet for app setup and testing
- Extra batteries (for battery-powered sensors)
- Zip ties or adhesive pads (for tidy sensor placement)
Step-by-Step Setup Tutorial: Installing Your Leak Detection System
1. Plan Sensor Placement
Identify the highest-risk areas first. Check for proximity to water sources, electrical outlets, and Wi-Fi coverage for smart sensors. Mark locations with a pencil.
2. Unbox and Inspect Components
Lay out all parts and verify you have the necessary mounting hardware and manuals. Register your devices if required by the manufacturer.
3. Prepare the Installation Area
- Clean floors and remove clutter near installation points.
- Ensure sensors will be in contact with the floor or at the lowest point where water would accumulate.
- For shutoff valves, shut off your main water supply before starting.
4. Install Sensors
- Place spot sensors flat beneath appliances or pipes.
- Use adhesive pads, screws, or zip ties as recommended to secure sensors.
- For smart models, follow pairing instructions with your hub or app. Test connectivity before final placement.
5. Mount the Control Hub (if applicable)
- Choose a central location with strong Wi-Fi and nearby power outlet.
- Mount using included screws or adhesive.
- Connect to home Wi-Fi and pair with sensors per manufacturer’s instructions.
6. Install a Shutoff Valve (Optional)
- Locate your main water supply line (usually in the basement, garage, or utility closet).
- If your system uses a clamp-on actuator, align it with the existing valve and secure it firmly.
- For in-line valve replacements, use a pipe cutter to remove the required section, apply plumber’s tape, and install the new valve per instructions. Tighten fittings securely.
- Reconnect water supply and check for leaks.
7. Connect and Test the System
- Install or check batteries in each sensor.
- Use the app to run a detection test. Place a damp cloth under each sensor to simulate a leak—verify that you receive notifications and/or alarms.
- If using a shutoff valve, trigger a test to ensure it closes and reopens properly.
- Adjust sensor placement as needed for optimal coverage and reliability.
8. Finalize Installation
- Label each sensor’s location in your app if possible (e.g., “Basement Water Heater”).
- Record installation dates and battery change reminders.
- Store manuals and spare batteries in a known location.
Maintenance Best Practices: Keeping Your Leak Detection System Reliable
Regular Testing
- Test each sensor quarterly by placing a damp cloth or small cup of water nearby.
- Check for app or hub firmware updates and install promptly.
Battery Replacement
- Replace batteries at least once a year, or as soon as you receive a low-battery alert.
- Keep a log of battery changes for each sensor.
Cleanliness & Inspection
- Wipe sensors with a dry cloth to remove dust or debris every few months.
- Check for signs of corrosion on sensor contacts.
Seasonal Checks
- Inspect for sensor displacement after heavy cleaning, appliance moves, or renovations.
- In winter, pay special attention to areas at risk of freezing pipes.
Troubleshooting Common DIY Installation Issues
False Alarms
- Ensure sensors are not touching condensation-prone pipes or air conditioner outlets.
- Move sensors away from sources of humidity or cleaning products.
Connectivity Problems
- Improve Wi-Fi signal with a mesh system or extender near the control hub.
- Check for firmware updates or re-pair devices if needed.
Shutoff Valve Won’t Close
- Ensure no obstructions in the valve’s path.
- Recalibrate following manufacturer’s instructions.
- Check battery or power supply to the actuator.
Cost Breakdown and Budgeting Tips
Typical Costs
- Spot sensors: $20–$50 each (may need several)
- Smart hub (if required): $50–$150
- Whole-home flow monitors: $200–$400
- Automatic shutoff valve: $150–$400
- Miscellaneous (batteries, mounting hardware): $20–$40
For a typical three-bedroom home, expect to spend $100–$600 depending on system complexity and coverage.
Ways to Save
- Start with spot sensors in highest-risk areas; expand coverage over time.
- Look for bundle deals or open-box discounts from reputable retailers.
- Choose DIY-friendly systems to avoid professional installation fees.
- Some insurance companies offer discounts for having water leak detection—check with your provider.
Real-World Case Study: DIY Leak Detection Saves Thousands
When Sarah, a homeowner in Oregon, installed four basic spot sensors under her kitchen sink, water heater, and laundry room, she didn’t expect them to spring into action so soon. Just six months later, a slow leak developed behind her washing machine. The sensor detected the first few drops, triggering an app alert on her phone. Sarah was able to shut off the water and fix a loose hose clamp for under $10—avoiding what could have been thousands in water damage and an insurance claim. Her experience underscores the value of even the simplest leak detection setups and the peace of mind they provide.
Conclusion: Long-Term Benefits of DIY Leak Detection
Investing in a home water leak detection system is one of the smartest, most cost-effective steps you can take to safeguard your property. With today’s DIY-friendly technology, you don’t need advanced plumbing skills or a big budget to set up robust protection. The right combination of sensors and (optionally) a shutoff valve can alert you to leaks before they become disasters, saving you money on repairs, insurance premiums, and utility bills. Regular testing and maintenance are minimal—especially compared to the hassle and expense of cleaning up water damage or dealing with mold remediation. Plus, the peace of mind is priceless: whether you’re at home or away, you’ll know your sensors are on duty, ready to catch the first sign of trouble. Start small if you need to, focusing on your home’s most vulnerable spots, and expand your system as your budget allows. With careful planning and the right tools, any DIYer can take control of water leak risks and enjoy a safer, smarter home for years to come.


Can you clarify if the whole-home water leak monitors require professional plumbing knowledge for installation, especially when it comes to attaching them to the main water line? I’d like to try it myself but don’t want to get in over my head.
Whole-home water leak monitors that attach directly to your main water line typically require turning off your home’s water supply and cutting into the pipe, which can be challenging without plumbing experience. While some systems are designed for easier DIY installation, most recommend or require a professional plumber to ensure proper and safe setup. If you’re not comfortable working with your main water line, hiring a professional is the safest route.
Could you explain how the automatic shutoff systems work if the power goes out or if Wi-Fi is lost? I’m curious about their reliability in emergencies compared to the basic battery-powered sensors.
Automatic shutoff systems often rely on electricity and Wi-Fi to operate fully. If the power goes out, many models with built-in battery backups can still function to some extent—usually to detect leaks and sometimes to close the valve, but this varies by brand. If Wi-Fi is lost, most shutoff valves can continue to detect leaks and close the valve locally, but you might not get remote alerts. Basic battery-powered sensors are simpler and tend to be more reliable in outages, but they won’t automatically shut off your water—they just sound an alarm.
You talk about sensors being placed near appliances and water heaters. Are there budget-friendly options that still provide real-time alerts to a smartphone, or do those features only come with more expensive systems?
Yes, there are budget-friendly water leak sensors that offer real-time smartphone alerts. Many entry-level systems connect via Wi-Fi or Bluetooth and send notifications to your phone through a dedicated app. While they might lack advanced features like integration with smart home hubs or automatic shutoff valves, they still provide reliable leak alerts without a high price tag. Just double-check compatibility with your phone before purchasing.
I’m on a budget and wondering, are the standalone spot sensors sufficient for most situations, or do you really need to invest in a whole-home monitor to be fully protected?
Standalone spot sensors are usually enough if you only need to monitor specific high-risk areas like under sinks or near your water heater. They can alert you quickly to leaks in those spots without much expense. However, a whole-home monitor offers broader protection and can detect leaks anywhere in your plumbing, which is ideal for maximum coverage but does cost more. For most people on a budget, starting with spot sensors in key areas is a practical first step.
The article mentions troubleshooting strategies for these systems. What are some common issues DIYers might encounter during installation or regular use, and are there easy fixes available for problems like false alarms or sensor battery failures?
DIYers often encounter issues like false alarms, weak sensor signals, or sensor battery failures. False alarms can happen if sensors are placed near sources of harmless moisture, such as sinks or humid areas—try relocating the sensors. For battery failures, check and replace batteries regularly, and consider using high-quality, long-lasting batteries. If the system loses connection, ensure your hub or sensors are within range of your Wi-Fi network and reposition them if needed. Most problems can be resolved with these quick checks and adjustments.
When installing spot sensors in areas like behind appliances or under sinks, do you have any tips for keeping them secure and making sure they do not get knocked loose during routine cleaning or maintenance?
To keep spot sensors secure behind appliances or under sinks, consider using double-sided adhesive strips or Velcro to attach them firmly to flat surfaces. For extra stability, you can use small cable clips or brackets if your sensors have mounting holes. Try to position them in corners or along walls, out of the main path of cleaning tools, and check their placement periodically during routine maintenance.
I’m curious about the whole-home monitor systems mentioned. Do these typically work with homes that have older plumbing, or are there compatibility issues I should watch out for when installing on older copper or galvanized pipes?
Whole-home water leak monitor systems generally work with older plumbing, including copper and galvanized pipes. However, you may encounter challenges with pipe diameter or threading, as some older pipes don’t match the standard fittings provided with new systems. Before purchasing, check the manufacturer’s compatibility guidelines and measure your pipe size. If needed, adapters are often available at hardware stores to bridge the gap between old and new connections.
You mention that automatic shutoff systems are more advanced—are those realistic for DIY installation, and do they require plumbing modifications that could increase the overall budget significantly?
Automatic shutoff systems can be installed by skilled DIYers, but they usually require cutting into your main water line to add a shutoff valve, which does count as a plumbing modification. This can add to both the complexity and the cost, especially if you need special tools or choose to hire a plumber for that part. Be sure to review the product instructions and your own comfort level with plumbing tasks before deciding.
Could you provide more information on the typical upkeep for battery-powered spot sensors? I’m concerned about maintenance schedules and whether there are any best practices to make sure the system doesn’t fail when it’s needed most.
Battery-powered spot sensors usually require battery checks every 6 to 12 months, depending on the model and battery type. It’s important to test the sensors regularly—many have a test button for this purpose. Replace batteries as soon as you receive a low-battery alert, and keep spare batteries on hand. Also, periodically inspect for dust or debris around the sensors, which could affect performance. Setting calendar reminders for checks helps ensure the system is always ready to detect leaks.
Can you explain how difficult it is to install an automatic shutoff system as a DIY project? Are there any parts of the setup that typically require a professional plumber, especially when working with the main water line?
Installing an automatic shutoff system can be manageable for experienced DIYers, but it does involve working directly with your main water line, which can be tricky. Most systems require cutting into the main pipe to fit the shutoff valve, which usually means turning off the water supply and using plumbing tools. If you’re not comfortable with pipe cutting or soldering, it’s a good idea to have a professional plumber handle that part to ensure a safe, leak-free installation.
You talk about automatic shutoff systems that can actually turn off the main water line if a major leak is detected. How complicated is it to install one of those as a DIY project, especially if I’ve never worked with plumbing before?
Installing an automatic shutoff system is more advanced than placing basic leak sensors, but it’s doable if you’re comfortable with tools and can follow instructions closely. You’ll need to cut into your main water line to install the shutoff valve and connect it to the detection system, which can involve working with pipe wrenches and possibly shutting off your home’s water supply. If you’ve never done any plumbing before, you might find it challenging, but many kits offer clear step-by-step guides. For peace of mind, consider having a plumber handle just the valve installation, then finish the sensor setup yourself.
You mention that some leak detection systems can automatically shut off the water supply in case of a major leak. Is installing an automatic shutoff system something a beginner DIYer can handle, or does it usually require a plumber?
Installing an automatic shutoff valve can be more involved than setting up basic leak sensors. It usually requires cutting into your main water line and connecting the device, which may involve plumbing skills and using specific tools. Some systems are designed for easier installation, but if you’re not confident working with water lines, it’s safest to consult a plumber to ensure a leak-free, reliable setup.
What kind of ongoing maintenance do these DIY-friendly leak detection systems usually require? I’m concerned about battery life for spot sensors and whether software updates are needed for smart monitors.
DIY water leak detection systems generally require you to check and replace batteries in spot sensors every 1 to 2 years, depending on the brand and frequency of alerts. For smart monitors, you may need to occasionally update the device software or app to ensure you get new features and security patches. It’s a good idea to test sensors periodically to confirm they’re working properly.
I’m interested in the automatic shutoff systems you mentioned. Do most of those require cutting into the main water line, or are there non-invasive options a DIY-er could install on their own without hiring a plumber?
Most automatic shutoff systems do require cutting into the main water line, which usually involves plumbing knowledge and tools. However, there are some non-invasive options available, such as clamp-on ultrasonic sensors that don’t require pipe cutting. These are less common and may be pricier, but they can be installed without major plumbing work. Always check the system’s installation instructions to see if it’s truly DIY-friendly before purchasing.
If I start out with just a few spot sensors in high-risk areas, how easy is it to upgrade later to an automatic shutoff system without having to redo the whole setup?
Upgrading from spot sensors to an automatic shutoff system is usually straightforward, especially if you choose components from the same brand or ecosystem. Most modern systems are designed to be modular, so you can easily add a shutoff valve and connect it to your existing sensors without redoing the wiring or setup. Just make sure your initial system is compatible with future expansion.
When it comes to maintaining these water leak detectors, how often do the spot sensors need their batteries changed, and are there any common issues homeowners should check for during regular upkeep?
Spot sensors typically need their batteries replaced every 1 to 2 years, but it’s best to check the manufacturer’s recommendations as some models may vary. During regular upkeep, make sure to inspect sensors for corrosion or debris, ensure they’re dry and securely placed, and test them periodically to confirm they’re working. Also, check for any low battery alerts if your system supports notifications.
You mention that these systems are more affordable now, but what kind of budget range should a DIYer expect for a decent setup, and are there any hidden costs involved in maintenance or installation for a small storefront?
For a small storefront, you can expect to spend between $100 and $400 for a quality DIY water leak detection system. This range usually covers sensors, a hub, and basic installation tools. Hidden costs might include batteries for wireless sensors, optional subscription fees for advanced app features, and potential upgrades if you expand coverage. Professional installation isn’t necessary for most DIY systems, but plan for a few hours to set everything up yourself.
When installing an automatic shutoff system as a DIYer, are there any specific tools or skills I need, or is this something that can be handled without much plumbing experience? I want to avoid costly mistakes if possible.
Installing an automatic shutoff system does require some basic plumbing skills, like shutting off your main water supply and cutting and reconnecting pipes. You’ll need tools such as an adjustable wrench, pipe cutter, and possibly a screwdriver or drill. If you’re comfortable following instructions and working with plumbing connections, you can usually handle this as a DIY project. If you’re unsure about cutting pipes or dealing with water lines, it’s wise to consult a plumber to avoid potential leaks or mistakes.
You mention some systems can automatically shut off the water supply if a major leak is detected. Are those compatible with older homes that might have dated plumbing, or do they require specific pipe materials to work?
Automatic water shut-off systems are generally compatible with most homes, including older ones. However, installation can depend on the type and size of your main water supply pipe. Many shut-off valves are designed to fit common pipe materials like copper, PVC, or PEX. If your plumbing is unusually old or uses non-standard materials, you might need adapters or a plumber’s help to ensure a secure fit.
When it comes to installing an automatic shutoff system, are there any specific tools or plumbing skills I should have before attempting this as a DIYer, or is it realistic for someone who’s never worked on pipes before?
Installing an automatic shutoff system usually requires some basic plumbing skills, like cutting and fitting pipes and possibly using pipe wrenches or compression fittings. If you’ve never worked with plumbing before, you might find certain steps challenging, especially when connecting the shutoff valve to your main water line. If you’re comfortable following instructions and using basic hand tools, it’s doable, but consider having a friend with plumbing experience help, or be prepared to call a professional if you run into trouble.
I’m wondering if the automatic shutoff systems mentioned here are easy to install for someone without a lot of plumbing experience. Are there models you’d recommend for beginners, or is it better to stick with standalone spot sensors if I want a DIY setup?
Automatic shutoff systems can be installed by DIYers, but they often require cutting into your home’s main water line, which can be tricky if you don’t have plumbing experience. For beginners, standalone spot sensors are much easier to set up—most just require placing them near potential leak areas. If you do want an automatic shutoff, look for models labeled as DIY-friendly or tool-free installation, but be prepared to spend more time on setup.
When deciding between standalone spot sensors and a whole-home monitor, how do you determine which one is right for your situation? Are there specific scenarios where one type is a better fit than the other?
Choosing between spot sensors and a whole-home monitor depends on your home’s layout and your needs. Spot sensors are ideal for monitoring specific risk areas like under sinks or near hot water heaters. They’re cost-effective if you only worry about a few locations. Whole-home monitors are better if you want to track leaks anywhere in your plumbing system, including behind walls or in hidden pipes—great for larger homes or if you want comprehensive coverage. Consider where past leaks have happened and how much coverage gives you peace of mind.
You mentioned that household leaks can waste nearly 10,000 gallons per year. For someone on a tight budget, is it more effective to focus on placing multiple standalone spot sensors in key areas, or is it worth saving up for a single whole-home monitor?
If you’re on a tight budget, placing several standalone spot sensors in high-risk areas like under sinks, behind toilets, and near your water heater gives you targeted protection at a lower upfront cost. Whole-home monitors are more comprehensive but have a higher initial price. Start with spot sensors in the most vulnerable spots, and you can always upgrade later if needed.
You mention that whole-home monitors attach to the main water line and some can connect to smart home platforms. Does installation of these require shutting off my water supply for a long period, and are there compatibility issues with older plumbing systems?
For most whole-home leak detectors, you will need to briefly shut off your water supply during installation—usually for 30 minutes to an hour, depending on your plumbing layout and your comfort with DIY tasks. Some older plumbing systems may have compatibility issues, especially if pipe diameters or materials differ from current standards. It’s a good idea to check the manufacturer’s specifications or consult with a plumber before purchasing to ensure the device will fit your setup.
You mentioned that modern leak detection systems are more DIY-friendly nowadays. Can you give a ballpark idea of how long the average installation might take for a beginner, and what the most challenging step typically is?
For a beginner, installing a modern water leak detection system usually takes about 1 to 2 hours. The most challenging step is often connecting the sensors to your home’s Wi-Fi network and making sure the app is properly set up to receive alerts. The physical installation of sensors is generally straightforward, especially with wireless models.
I run a small retail shop out of my home, and I’m wondering if these smart spot sensors would be sensitive enough to catch slow leaks, like a drip from behind a commercial fridge, or if I’d need a more advanced system?
Smart spot sensors are generally quite sensitive and can usually detect even slow leaks or drips, including those behind appliances like a commercial fridge. For the scenario you described, placing the sensor as close as possible to where a drip might occur should work well. However, if you need constant monitoring over a larger area or need data logging, you might consider a more advanced system with multiple sensors or continuous moisture monitoring.
I noticed you mention both standalone spot sensors and whole-home monitors. Are there any specific situations where you would recommend one type over the other, especially for someone living in an older house with a history of leaks?
For an older home with a history of leaks, a whole-home monitor is usually the better choice as it tracks water flow throughout the entire plumbing system and can detect hidden leaks anywhere, not just in one spot. However, if you know there are specific trouble areas—like under old sinks or near the water heater—adding standalone spot sensors as an extra layer of protection is also a smart idea.
Do you have any tips on balancing affordability with effectiveness when selecting a water leak detection setup? I’m on a budget but still want reliable protection against leaks.
To keep costs down without sacrificing reliability, consider starting with basic battery-powered leak sensors in the most vulnerable areas like under sinks or near appliances. Choose models with loud alarms or smartphone alerts for quick notification. You can expand the system gradually as your budget allows. Also, look for kits that offer multiple sensors at a lower package price. Avoid unnecessary smart home features if they’re not essential for you.
I noticed the article mentions both standalone spot sensors and whole-home monitors. For someone living in an older house with a mix of new and old plumbing, would it be better to start with individual sensors in key spots or just go all-in with a whole-home system right away?
For an older house with mixed plumbing, starting with individual spot sensors in high-risk areas like under sinks, near the water heater, or by washing machines is often a practical first step. This lets you address the most vulnerable spots without a big upfront investment. Later, if you want broader coverage or added peace of mind, you can consider adding a whole-home monitor.