Introduction: Why the True Cost of DIY Home Gadget Upgrades Matters
The appeal of upgrading your home with the latest gadgets—think smart thermostats, wireless security cameras, video doorbells, or smart lighting—has never been stronger. With promises of improved convenience, energy savings, and even increased property value, it’s no wonder DIY enthusiasts are eager to take these projects on themselves. However, many homeowners focus solely on the sticker price for devices, overlooking the complex web of hidden costs that can quickly turn a simple upgrade into a budget-busting surprise. From specialty tools and unexpected accessories to installation hurdles and ongoing maintenance, the real price tag of a DIY smart home project often extends far beyond the initial purchase.
This comprehensive guide breaks down the true costs of DIY home gadget upgrades, helping you budget smartly, avoid common financial pitfalls, and select the right tools for the job. Whether you’re a tech-savvy beginner or a seasoned DIYer, we’ll provide actionable advice to ensure your next home upgrade is a financial success—and not a wallet-draining headache.
Understanding the Layers of DIY Gadget Upgrade Costs
1. The Upfront Device Price: Only the Beginning
Most homeowners begin their upgrade by comparing the retail prices of devices. While this is a crucial step, it’s far from the full picture. Many popular home gadgets—especially smart devices—require additional components, subscriptions, or professional-grade tools for proper installation. Consider the following common scenarios:
- Smart Doorbells: May require existing wiring or a compatible transformer.
- Smart Locks: Often need specific door thickness or compatible deadbolt setups.
- Wi-Fi Security Cameras: Could demand enhanced network equipment for reliable streaming.
2. Hidden Costs: What Shoppers Often Overlook
- Accessory Purchases: Mounting brackets, extension kits, or adapter plates.
- Tool Acquisition: Specialty drill bits, hole saws, voltage testers, wire strippers, or network cable crimpers.
- Consumable Supplies: Anchors, screws, batteries, electrical tape, or sealants.
- Connectivity Upgrades: Mesh Wi-Fi systems, Ethernet cables, switches, or PoE adapters.
- Software & Service Fees: Cloud storage, monitoring subscriptions, or advanced automation platforms.
- Permit or Inspection Fees: Occasionally required for exterior cameras or hardwired devices (varies by city).
All these extras can add up, sometimes rivaling the cost of the main device itself.
Budgeting for a DIY Home Gadget Upgrade: A Step-by-Step Approach
1. Research Beyond the Box
Before hitting “buy,” spend time reading the full installation manual—not just the marketing highlights. Look for:
- Required tools and materials (some may not be common in a basic toolkit)
- Dependencies (does the gadget need a hub, bridge, or specific wiring?)
- Optional but recommended add-ons (weatherproofing, surge protection, extended warranties)
2. Make a Complete Project List
Break down all line items into these categories:
- Device(s): The main product(s) you want to install.
- Accessory hardware: Mounts, plates, adapters.
- Tools: New purchases or rentals needed for installation.
- Supplies: Screws, anchors, batteries, wire, fasteners.
- Connectivity: Routers, range extenders, cables.
- Services: Subscriptions, cloud storage, professional help if needed.
- Permits/Inspections: Only if required by local regulations.
3. Price Everything Realistically
Gather current prices from multiple sources. Don’t forget to:
- Check if you can borrow, rent, or reuse tools.
- Look for bundled deals or open-box discounts.
- Factor in shipping, taxes, and potential return fees.
4. Add a Contingency Buffer
Always add at least 10–20% to your total project estimate for unforeseen expenses—like extra trips to the hardware store or replacing a tool that breaks mid-project.
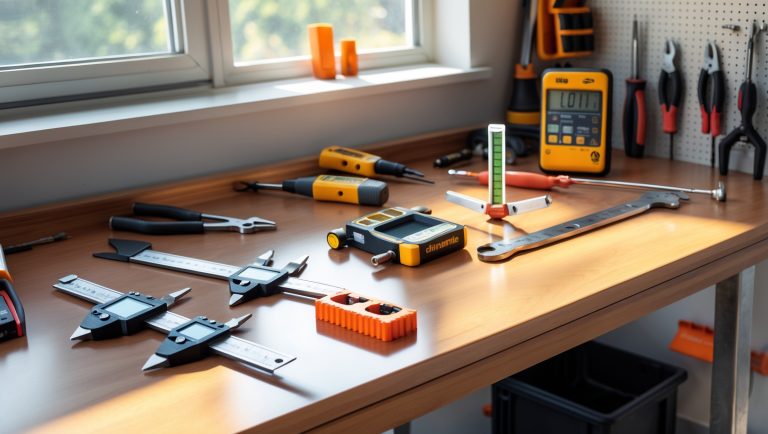
Essential Tool Investments for DIY Gadget Upgrades
1. Tools Most DIYers Already Own
- Screwdrivers (Phillips and flathead)
- Hammer
- Measuring tape
- Level
- Utility knife
2. Tools Commonly Overlooked (and Their Cost)
- Wire Strippers: $10–$30. Needed for any wiring or sensor installation.
- Voltage Tester or Multimeter: $15–$50. Critical for safety when working with electrical connections.
- Drill and Specialty Bits: $60–$150 (more for hammer drills or hole saws for masonry).
- Network Cable Tester: $15–$40. Key for troubleshooting wired cameras or smart hubs.
- Fish Tape: $10–$25. Needed for running cables through walls.
- Ladder: $60–$200. Essential for outdoor cameras or sensors.
- Caulking Gun and Sealant: $10–$20. To weatherproof exterior device installations.
3. Rent vs. Buy: Smart Strategies
For tools you’ll rarely use again (like a masonry drill or high-end cable crimper), consider renting from your local hardware store or borrowing from a neighbor. This keeps your budget in check and saves storage space.
Accessory and Consumable Costs: The Silent Budget Busters
1. Mounting and Installation Hardware
- Specialty anchors for drywall, brick, or stucco: $5–$15
- Weatherproof boxes for outdoor gadgets: $10–$30
- Replacement gaskets or seals: $5–$20
2. Batteries and Power Supplies
- Backup batteries (for smart locks, sensors): $10–$50/year
- Power adapters (if not included): $15–$40
- Surge protectors or UPS units for sensitive devices: $25–$120
3. Cables and Networking
- Ethernet cable (Cat6): $10–$50, depending on length
- PoE injectors/adapters for cameras: $20–$60
- Network switches (for adding multiple devices): $25–$100
Connectivity Upgrades: The Hidden Price of Going Smart
1. Wi-Fi Coverage: More Devices, More Demand
Modern smart gadgets require robust, reliable Wi-Fi. If your router is outdated or your signal is weak in certain parts of the house, you may need to budget for upgrades:
- Mesh Wi-Fi Systems: $120–$400. Ideal for eliminating dead zones.
- Wi-Fi Range Extenders: $30–$100. A more affordable (but sometimes less effective) alternative.
- Upgraded Router: $80–$300 for models with advanced security and device management.
2. Network Security: Protecting Your Investment
- Firewall appliances or advanced router features: $50–$200
- VPN subscriptions for remote device access: $40–$100/year
Don’t neglect the cost of keeping your new gadgets—and your personal data—safe.
Subscription and Service Fees: Ongoing Expenses to Consider
1. Cloud Storage and Monitoring
- Video doorbells and cameras often require a monthly fee ($3–$15/month) for recording and playback features.
- Some smart alarms or sensors have optional monitoring plans ($10–$30/month).
2. Smart Home Automation Platforms
- Advanced automation services (like IFTTT Pro or SmartThings) may charge $5–$10/month for premium features.
These recurring costs can add up, especially if you install multiple devices from different brands.
Permits, Inspections, and Compliance: When They Matter
1. When Permits Are Needed
While many DIY gadget upgrades fly under the regulatory radar, some projects—especially those involving exterior cameras, electrical wiring, or devices visible to the street—may require a permit or inspection. Check your local codes before drilling into siding or running new power lines.
- Permit fees: $25–$150, depending on your municipality.
- Inspection fees: $40–$100, if required.
2. HOA and Landlord Rules
If you live in an HOA community or rent, you may need written approval before installing exterior gadgets. Failing to comply can result in fines or forced removal—an expensive mistake.
Case Study: Real-World Budget for a DIY Smart Doorbell and Camera Setup
Let’s break down a realistic budget for a homeowner who wants to install a smart doorbell and a wireless outdoor security camera:
- Smart doorbell (mid-range): $150
- Outdoor camera (mid-range): $120
- Specialty drill bits (masonry): $18
- Wire strippers: $15
- Voltage tester: $25
- Weatherproof box: $20
- Wall anchors & screws: $8
- Mesh Wi-Fi add-on: $140
- Cloud storage (annual): $60
- Contingency (15%): $83
Total project cost: $639
This is more than double the combined sticker price of the two devices—illustrating how quickly costs can escalate when all factors are considered.
Money-Saving Strategies for DIY Gadget Upgrades
1. Bundle and Save
Many brands offer starter kits or bundles that include devices, mounts, and sometimes even tools at a lower price than buying each piece separately. Look for these deals, especially during holiday sales.
2. Borrow or Rent Tools
Check local tool libraries, hardware stores, or even neighbors before purchasing a specialty tool you’ll only use once. Some online communities facilitate tool sharing among DIYers.
3. Reuse and Repurpose Accessories
Old power adapters, Ethernet cables, and even mounting hardware from previous devices can often be reused—saving both money and time.
4. Plan Multiple Upgrades Together
If you’re considering several upgrades, plan to do them at once. You’ll save on shipping, reduce the number of trips to the hardware store, and maximize the value from rented or purchased tools.
5. Shop Open-Box or Refurbished
Reputable retailers often sell returned or refurbished gadgets at a significant discount. These devices are tested and usually backed by a warranty.
Red Flags: When DIY Becomes False Economy
- Mandatory Professional Installation: Some high-voltage or integrated systems (like hardwired alarms) may void warranties if self-installed.
- Complex Permits or Inspections: If your project requires extensive paperwork or compliance, the DIY savings may evaporate.
- Time Sink: If you value your weekends, factor in the time cost of learning, troubleshooting, and installing—sometimes hiring a pro is worth it.
Conclusion: Upgrade Smarter, Not Harder—And Keep Your Budget Intact
DIY home gadget upgrades can be incredibly rewarding—boosting your home’s security, efficiency, and convenience—while often saving you money over full-service installation. However, the path to a smarter home is rarely as simple or cheap as it first appears. Hidden costs lurk at every stage: in the tools you didn’t know you needed, the accessories not included in the box, the Wi-Fi upgrades for reliable device operation, and the ongoing fees for cloud storage and automation platforms. Add possible permits, replacement batteries, or even contingency spending for the inevitable hiccup, and it’s clear that a true DIY budget must look far beyond retail prices.
The key to a successful and affordable upgrade lies in meticulous planning. Read installation manuals in advance, create a comprehensive project list, price out every component, and pad your budget for surprises. Don’t hesitate to borrow or rent tools, repurpose accessories, or shop for refurbished devices to cut costs. Most importantly, be honest about your skill level and time commitment—sometimes the DIY route isn’t the cheapest or safest option. By approaching your home gadget upgrades with eyes wide open and a realistic budget, you’ll avoid nasty surprises and get the most value from every dollar spent. Here’s to smarter homes—and smarter spending!