


Introduction: Why Proper Smoke and Carbon Monoxide Detector Placement Matters
Home safety is about more than just locks and alarms—it’s about having the right tools in the right places. Smoke and carbon monoxide (CO) detectors are among the most critical gadgets you can install to protect your family and property. Yet too many homeowners overlook not just the importance of having these detectors, but also the nuances of placement, installation, and ongoing maintenance. Poorly positioned detectors or neglected maintenance can mean the difference between a timely warning and a silent, invisible threat.
This comprehensive DIY guide will walk you through every step of selecting, installing, and maintaining smoke and CO detectors. We’ll cover the essential tools needed for a safe setup, debunk common placement myths, break down costs, and share maintenance best practices that prolong device life and reliability. Whether you’re outfitting a new home or upgrading your current detectors, this resource ensures you’re equipped with actionable, expert-level guidance.
Let’s demystify the process and empower you to take control of your home’s safety—starting with the right knowledge, tools, and a plan you can execute in a single afternoon.
Choosing the Right Smoke and Carbon Monoxide Detectors
Types of Smoke Detectors
- Ionization Smoke Detectors: Best for flaming fires. Quicker to detect fast-moving fires but can be prone to false alarms from cooking smoke.
- Photoelectric Smoke Detectors: Better at detecting smoldering fires. Less likely to give false alarms from cooking or steam.
- Dual-Sensor Smoke Detectors: Combine both ionization and photoelectric sensors for comprehensive coverage.
Types of Carbon Monoxide Detectors
- Plug-In Detectors: Easy to install but may be limited by outlet locations.
- Battery-Operated Detectors: Flexible placement and continue to work during power outages.
- Hardwired Detectors: Integrated into your home’s electrical system, often with battery backup for reliability.
Combination Units
Many manufacturers offer combination smoke/CO detectors. While these save space and simplify installation, ensure each sensor meets current safety standards and that the device is certified by recognized testing laboratories (like UL or CSA).
Essential Tools and Materials Checklist
Gather these tools before starting your installation for a smoother, more efficient process:
- Drill with assorted drill bits (masonry bits if mounting on brick or concrete)
- Phillips and flat-head screwdrivers
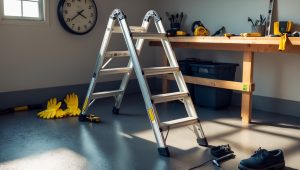
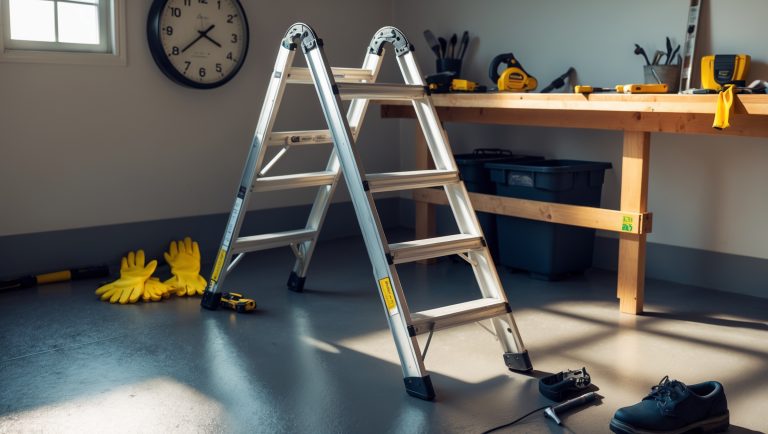
- Step ladder or sturdy stool
- Stud finder (for ceiling installations)
- Level (for precise detector alignment)
- Pencil or marker (for marking screw locations)
- Wire stripper/cutter (for hardwired detectors)
- Voltage tester (if working with hardwired units)
- Mounting screws and anchors (usually included, but check your wall/ceiling type)
- New batteries (for battery-powered models)
- Protective eyewear and dust mask (if drilling into older ceilings)
Optimal Placement: Where to Install Smoke and CO Detectors
General Placement Guidelines
- One smoke detector per floor, minimum. This includes finished attics and basements.
- Inside every bedroom and outside each sleeping area.
- At least 10 feet from cooking appliances to minimize false alarms.
- On ceilings or high on walls. Smoke rises, so high placement is crucial. Wall-mounted detectors should be 4–12 inches from the ceiling.
- Never install near windows, doors, or air ducts where drafts might interfere.
- CO detectors should be installed outside sleeping areas and on every level.
- CO detectors can be placed at knee height (typical breathing level when sleeping) or on the ceiling—follow manufacturer instructions.
Special Considerations
- Don’t mount smoke detectors in unheated attics or garages: Extreme temperatures and dust can cause device failure.
- Bathrooms: Avoid placement near showers to prevent steam-triggered false alarms.
- For split-level homes: Install detectors on the ceiling at the top of every stairway.
- Combination smoke/CO detectors: Follow the stricter placement requirements.
Common Placement Mistakes to Avoid
- Ignoring manufacturer’s instructions: Always defer to specific guidance for your model.
- Installing too close to ceiling fans or vents: Air movement can prevent smoke or CO from reaching the sensor.
- Mounting on sloped ceilings: Place detectors 3 feet from the highest point.
- Using old or expired detectors: Replace smoke detectors every 10 years, CO detectors every 7 years.
Step-by-Step DIY Installation Guide
1. Prep the Area
- Use a stud finder to locate joists for ceiling installations. Avoid mounting directly on a joist if possible, as this can transmit vibrations.
- Mark the installation spot with a pencil for accuracy.
2. Drill and Mount the Base Plate
- Drill pilot holes using the correct bit for your ceiling or wall material.
- If mounting on drywall, insert wall anchors for a secure hold.
- Align the detector’s mounting base and secure it with screws.
3. Wiring (For Hardwired Detectors Only)
- Turn off power at the breaker panel before working with wires.
- Use a voltage tester to confirm power is off.
- Connect the detector’s wiring harness to the corresponding house wires—black (hot), white (neutral), red/yellow (interconnect, if applicable).
- Secure connections with wire nuts and carefully tuck wires into the box.
4. Attach Detector and Install Battery
- Twist or snap the detector body onto the mounting base.
- Install the recommended battery (if not preinstalled).
- For smart detectors, follow app instructions for Wi-Fi setup and notifications.
5. Test the Detector
- Restore power if hardwired.
- Press the test button until the alarm sounds. If it doesn’t, check battery orientation, wiring, and installation steps.
- For smart detectors, verify app connectivity and alert functionality.
Cost Breakdown and Budgeting Tips
Detector Costs
- Basic smoke detectors: $10–$25 each
- CO detectors: $20–$40 each
- Combination smoke/CO detectors: $35–$60 each
- Smart detectors: $70–$120 each
Installation Tools and Supplies
- If you already own basic hand tools (drill, screwdrivers, ladder), additional out-of-pocket costs are minimal.
- Extra mounting hardware or specialized anchors: $5–$10 per pack
- Batteries (if not included): $5–$15 per 4-pack
Sample Budget for a 3-Bedroom Home
- 5 smoke detectors: $75
- 2 CO detectors: $50
- Miscellaneous supplies: $15
- Total: ~$140
Upgrading to smart detectors or integrated systems will increase costs, but factor in potential insurance discounts for enhanced home safety.
Maintenance Best Practices for Longevity and Reliability
Monthly Testing
- Press the test button on each detector and listen for the alarm. For interconnected systems, all alarms should sound simultaneously.
- For smart detectors, confirm app notifications and remote testing features.
Battery Replacement
- Replace batteries every 6–12 months, or immediately if you hear a low-battery chirp.
- Use manufacturer-recommended battery types for best performance.
- Mark a recurring calendar reminder for hassle-free battery changes.
Cleaning and Inspection
- Gently vacuum detector vents using a soft brush attachment every 3–6 months.
- Avoid using sprays or solvents near detectors.
- Inspect for dust, cobwebs, or signs of wear, and clean as needed.
Replacement Schedule
- Replace smoke detectors every 10 years from the manufacture date.
- Replace CO detectors every 7 years, or as recommended by the manufacturer.
- Write the installation date on each unit for easy tracking.
Smart Detectors: Are They Worth It?
Smart smoke and CO detectors offer features like self-testing, app alerts, and integration with home automation systems. They can alert you to emergencies even when you’re away and provide advanced diagnostics on device health. However, they are more expensive and may require Wi-Fi setup. If you travel frequently or want extra peace of mind, smart detectors are worth considering.
Frequently Asked Questions
- Is it better to use separate smoke and CO detectors, or combination units? Both are effective if certified. Combination units simplify installation, but separate detectors allow for more flexible placement.
- Do I need a detector in every room? Install in every sleeping area, outside each sleeping area, and on every level. Kitchens and bathrooms require careful placement to avoid false alarms.
- What about interconnected detectors? Hardwired or wireless interconnected detectors ensure all alarms sound together, which is especially valuable in larger homes.
Conclusion: Secure Your Home with Confidence
Installing and maintaining smoke and carbon monoxide detectors is one of the most effective DIY projects for safeguarding your home and family. With the proper tools, placement strategies, and regular maintenance, these small devices provide an essential, life-saving layer of protection.
Remember: correct placement is just as important as having detectors at all. Avoid corners, vents, and dead air spaces to maximize effectiveness. Regular testing and timely battery replacements keep your system reliable, while cleaning and periodic replacement ensure long-term performance.
Don’t let cost or uncertainty hold you back—basic detectors are affordable, and the DIY installation process is well within reach for most homeowners. If you choose to invest in smart detectors, you’ll gain additional peace of mind and convenience. Above all, treat this as a vital maintenance task: set reminders, involve the whole household in safety drills, and make detector upkeep a non-negotiable part of your home care routine.
With a few hours of effort and the right approach, you’ll enjoy greater confidence that your home is protected—day or night, season after season.


Could you elaborate a bit more on the costs you mentioned for installing different kinds of detectors? I’m trying to budget for updating both smoke and CO detectors in my house, and I’d like to know what the main pricing differences are between battery-operated, plug-in, and hardwired models.
Battery-operated smoke and CO detectors are usually the most affordable, typically ranging from $15 to $40 each. Plug-in models, which often include a battery backup, tend to cost between $20 and $50. Hardwired detectors are pricier at $30 to $70 per unit, and they might require professional installation, which can add $100 or more per detector if you don’t do it yourself. The main differences are upfront price and potential installation costs.
You mentioned breaking down costs for installing these detectors. Can you give an idea of the average total cost for outfitting a standard three-bedroom house with both smoke and carbon monoxide detectors, including basic tools I might need for installation?
For a typical three-bedroom house, you’ll likely need about 5–6 smoke detectors and 2–3 carbon monoxide detectors. Basic models cost $15–$40 each, so expect to spend around $120–$250 on detectors alone. For tools, a drill, screwdriver, pencil, and step ladder are usually sufficient, which might add $30–$60 if you don’t already have them. Altogether, the average total cost ranges from $150 to $310 depending on your choices.
I see the article touches on both plug-in and battery-operated carbon monoxide detectors. If I live in an older apartment with limited outlets, would battery-powered detectors be more reliable, especially during power outages?
Battery-powered carbon monoxide detectors can be a better choice in older apartments with limited outlets, as they don’t rely on your electrical system to function. This means they’ll continue working during power outages, providing uninterrupted protection. Just make sure to check and replace the batteries regularly to ensure the detector stays reliable.
The guide mentions that hardwired CO detectors are often integrated into a home’s electrical system. If I want to upgrade from battery-operated to hardwired detectors, are there specific electrical safety precautions I should take, or should this be handled by a professional electrician?
Upgrading from battery-operated to hardwired CO detectors does involve working with your home’s electrical wiring, which can pose safety risks if not handled properly. It’s strongly recommended to have a licensed electrician perform the installation. They have the expertise to ensure correct wiring, proper placement, and compliance with local electrical codes, minimizing risks of electrical shock or improper installation.
I noticed you mentioned both ionization and photoelectric smoke detectors. Is it better to install one type in certain rooms over the other, or are dual-sensor models always the safer choice for all areas of a typical college apartment?
Both ionization and photoelectric smoke detectors have strengths: ionization models respond faster to flaming fires, while photoelectric detectors are better for smoldering fires. For a college apartment, dual-sensor models offer broad protection and are a convenient all-in-one choice. However, if you use single-sensor alarms, photoelectric types are generally recommended for areas like bedrooms and living rooms, while ionization detectors can be placed near kitchens (but not too close to avoid false alarms from cooking smoke).
The article says you can tackle detector installation in a single afternoon. For someone with basic DIY skills, does this estimate include time for mounting, testing, and reviewing the user manuals, or should I plan for some extra time to handle unexpected issues?
The article’s estimate of finishing in a single afternoon generally includes mounting the detectors, testing them, and reviewing the user manuals. However, if your home has hard-to-reach spots, old wiring (for wired units), or unique layouts, you might need some extra time for troubleshooting or adjustments. Setting aside a bit of extra time is a good idea just in case anything unexpected comes up.
You mention dual-sensor smoke detectors as offering more comprehensive coverage, but are there situations where it’s better to stick with either ionization or photoelectric types instead? I’m curious about whether certain homes or layouts would benefit from one over the other.
Dual-sensor detectors do provide broad protection, but there can be cases where a single type is preferable. Ionization detectors respond faster to fast-flaming fires, so they might be better in kitchens or near garages where such fires can start. Photoelectric detectors excel at sensing smoldering fires, making them ideal for bedrooms or living rooms. In homes prone to a specific risk, using the detector best suited for that risk in those areas can make sense.
You mention costs in relation to detector selection and setup. Could you give a ballpark estimate of what a full DIY installation might run for an average-sized house, including tools and recommended detector types?
For an average-sized house, a full DIY installation typically costs between $100 and $300. This covers purchasing 4–6 combination smoke and carbon monoxide detectors ($25–$50 each), a basic drill and screwdriver set if needed ($20–$40), and mounting hardware. The total cost depends on the detector models you choose and whether you already have the necessary tools.
The article talks about installing detectors in just an afternoon. For someone who hasn’t done much DIY before, what safety precautions or beginner mistakes should I look out for while placing or mounting smoke and CO detectors?
When installing smoke and CO detectors, always turn off power at the circuit breaker if you’re working with wired units. Use a sturdy step stool or ladder rather than furniture, and double-check that you’re not placing detectors too close to vents, windows, or kitchens, as this can cause false alarms. Take your time measuring and marking the right spots—don’t rush, and keep the manufacturer’s instructions handy for safe, accurate mounting.
For someone planning to install both hardwired and battery-operated carbon monoxide detectors, is there an ideal combination or placement strategy to maximize protection during power outages and regular times?
To maximize protection, it’s smart to use both hardwired and battery-operated CO detectors. Place hardwired detectors in main living areas and near sleeping spaces since they’re reliable during regular power. Add battery-operated units in similar key spots, and in areas where wiring is difficult, like basements or garages. This ensures coverage even if the power goes out, and you’re protected 24/7.
You mention that all the steps can be done in a single afternoon, but I have limited DIY experience. How much time should I realistically set aside if I’m installing detectors in a two-story home, including the tools and testing process?
If you’re new to DIY projects, I recommend setting aside about 3 to 4 hours for installing smoke and carbon monoxide detectors in a two-story home. This covers gathering tools, reading instructions, mounting the detectors, and testing each one. Taking your time ensures proper placement and safety.
You touched on different installation methods, including hardwired and battery-operated detectors. For someone on a tight budget, which combination of detector types and power sources would provide reliable protection without overspending?
For reliable protection on a tight budget, consider using battery-operated smoke and carbon monoxide detectors. They’re generally less expensive than hardwired models, easier to install yourself, and still meet safety standards. Placing battery-operated smoke detectors in each bedroom, outside sleeping areas, and on every level of your home, plus at least one battery carbon monoxide detector near sleeping areas, gives good coverage without requiring costly electrical work.
For someone trying to stick to a budget, can you break down the approximate costs for the essential tools and detectors mentioned in the guide? I want to make sure I’m not missing any hidden expenses before getting started.
Absolutely, here’s a rough cost breakdown: Basic smoke or carbon monoxide detectors typically range from $15 to $40 each, or around $50–$60 for combination units. Essential tools like a drill, screwdriver, and batteries (if not included) may add $10–$30 if you don’t already have them. Wall anchors and mounting hardware usually come with detectors, so no extra cost is needed there. Altogether, you’re looking at approximately $30–$100 for a standard installation, depending on your home’s size and whether you need new tools.
The article touches on breaker-down costs for installing different types of detectors. For someone on a tight budget, which combination would you say balances affordability and reliable protection without sacrificing important features?
If you’re watching your budget, a combination of dual-sensor detectors—those that detect both smoke and carbon monoxide—can offer solid protection while saving money compared to buying separate units. These detectors generally include core features like battery backup and test buttons, ensuring safety without unnecessary extras. Place one in the hallway near bedrooms and another on each floor for balanced, affordable coverage.
As a small business owner updating a rental property, I’m wondering if there’s a recommended way to balance both smoke and CO detector placement in spaces with open floor plans or high ceilings. The article mentions placement myths—are there mistakes people often make in these types of layouts?
In open floor plans or rooms with high ceilings, it’s common to mistakenly place detectors too high or too far from potential sources. For best results, mount smoke detectors on or near the ceiling, but not right at the peak of vaulted ceilings—keep them 12 to 36 inches below. For CO detectors, avoid places near air vents or overly high locations, as CO mixes evenly with air. Ideally, put detectors near sleeping areas and at least one per floor to ensure coverage.
I saw you mention both battery-operated and hardwired CO detectors. If I rent my business space, do you recommend one type over the other, especially for ongoing maintenance and reliability?
For rented business spaces, battery-operated CO detectors are often a practical choice since they don’t require electrical work or landlord approval to install. They’re easy to maintain—just test and replace batteries regularly. However, if your space already has hardwired detectors, those are generally more reliable over time and need less frequent battery changes (usually only the backup battery). Check your lease and local codes, but in most rental situations, battery-operated units are simpler and effective.
The article mentions that hardwired carbon monoxide detectors are often integrated into the electrical system, but if my building is older and doesn’t have wiring in place, would battery-operated detectors be just as reliable for ongoing safety?
Battery-operated carbon monoxide detectors are a reliable option for older buildings without existing electrical wiring. They provide dependable protection as long as you regularly test the device and replace the batteries as needed. Just make sure to follow the manufacturer’s placement guidelines and perform routine maintenance to ensure ongoing safety.
How do I figure out the best rooms to put a plug-in carbon monoxide detector versus a battery one, especially if my electrical outlets are in some awkward spots? Are there areas where you’d never put a plug-in model even if there is an outlet?
Plug-in carbon monoxide detectors work best in rooms where there’s both an outlet at the right height (usually about 5 feet above the floor) and a potential CO source, like near attached garages or gas appliances. Avoid placing plug-in models in bathrooms, near windows, or behind furniture, even if there’s an outlet—humidity and airflow can affect readings. For areas without convenient outlets, like bedrooms or hallways, opt for a battery-powered unit to ensure coverage.
Between ionization, photoelectric, and dual-sensor smoke detectors, how do I decide which type to use in each room? I want to avoid false alarms near the kitchen but also make sure bedrooms are safe.
To minimize false alarms near the kitchen, use a photoelectric smoke detector—these are less sensitive to cooking smoke and steam. For bedrooms and sleeping areas, a dual-sensor detector is ideal since it combines both ionization and photoelectric technologies, offering the broadest protection. Reserve ionization-only detectors for areas away from kitchens or bathrooms where fast-flaming fires are a concern.
Can you clarify how far away from the kitchen you should install a smoke detector to avoid false alarms, especially with the differences between ionization and photoelectric types mentioned in the article?
To minimize false alarms from cooking, it’s best to install smoke detectors at least 10 feet away from kitchen appliances. The article notes that ionization detectors are more sensitive to small cooking particles and steam, so they should be placed even further from the kitchen if possible. Photoelectric detectors are less likely to trigger from cooking, making them a better choice for areas near the kitchen, but still keep some distance to prevent nuisance alarms.
I’m a little confused about the difference between ionization and photoelectric smoke detectors, especially since both types are mentioned. If I mostly do a lot of cooking and worry about false alarms, which one would be better for my kitchen and nearby rooms?
Ionization smoke detectors respond quickly to fast-flaming fires but are more likely to trigger false alarms from cooking smoke. Photoelectric detectors are better at catching slow, smoldering fires and are less sensitive to small amounts of smoke, making them a better choice near kitchens or rooms close to cooking areas. For your situation, photoelectric detectors are recommended to help reduce unnecessary alarms while still keeping you safe.
The article says you can execute the installation in a single afternoon, but are there any common mistakes that first-time DIYers make when placing their detectors, especially with outlet-limited plug-in models?
One common mistake is plugging detectors into outlets that are too low or behind furniture, which can block airflow and reduce their effectiveness. It’s also important not to place them near windows, vents, or bathrooms, as drafts and humidity can trigger false alarms or affect sensor accuracy. Make sure to follow the manufacturer’s height and location guidelines, and test the device after installation to ensure it’s getting proper power and coverage.
Could you suggest any cost-effective strategies for homeowners on a tight budget looking to upgrade to both smoke and CO detectors without compromising on safety or reliability?
One smart approach is to choose combination smoke and carbon monoxide detectors, which cover both needs in a single device and save money compared to buying separate units. Look for models that are third-party certified for safety. Consider starting by installing detectors in the most crucial areas first, like hallways near bedrooms and the kitchen, then gradually add more as your budget allows.